
Finding the right panel board led light for a low-ceiling condominium in the Philippines requires balancing physical dimensions, heat management, and light distribution. In compact urban living spaces where ceiling heights often hover around 2.4 to 2.6 meters, traditional hanging fixtures or bulky dome lights can make rooms feel cramped and visually cluttered. Selecting an ultra-slim LED panel light helps preserve precious headroom while delivering bright, even illumination across your entire living area. By focusing on edge-lit designs, appropriate mounting systems, and proper thermal management, you can transform a dark, confined condo unit into an airy, welcoming home.
When dealing with limited vertical clearance, every centimeter counts. Bulky fixtures not only present physical hazards when moving furniture or stretching, but they also create visual obstacles that disrupt the continuous plane of the ceiling. A streamlined ceiling plane reflects light more effectively, tricking the eye into perceiving a larger, more open volume. By understanding the technical specifications and installation requirements of modern LED panels, you can make an informed purchase that enhances both the functionality and aesthetic appeal of your high-rise home.
Why Ceiling Height Dictates Your Panel Light Choice
Low ceilings impose strict physical and visual constraints that directly influence how light behaves in a room. When a light fixture protrudes significantly from the ceiling, it creates a harsh visual break in your line of sight. This visual compression makes the ceiling feel lower than it actually is, casting deep shadows in the corners of the room and making the entire living space feel restrictive. An ultra-slim panel board led light sits nearly flush with the ceiling surface, maintaining an uninterrupted plane that allows the eye to travel across the room without obstruction.
Products mentioned in this guide
Prices are valid at publication and may change. Please refer to the product page for the latest price.
Thermal management is another critical factor influenced by ceiling height and structure. In the tropical climate of the Philippines, high ambient temperatures and humidity levels can accelerate heat buildup in enclosed spaces. Many modern condominiums are constructed with solid concrete ceiling slabs that retain heat. Bulky, traditional fixtures with enclosed bulbs often trap heat inside the housing, which can drastically shorten the lifespan of the LED chips. Ultra-slim panel lights are engineered with integrated aluminum frames that act as heat sinks, drawing warmth away from the sensitive electronics and dissipating it into the surrounding air.
Clearance requirements also dictate the safety and comfort of your daily movements. Standard residential guidelines suggest maintaining a clear distance between the floor and any ceiling-mounted fixture to prevent accidental contact. In a low-ceiling condo, a hanging chandelier or a deep flush-mount dome can easily become an obstacle when carrying tall items, changing bedsheets, or simply walking through high-traffic zones. Transitioning to a low-profile panel light ensures that your living spaces remain safe, functional, and free from physical obstructions.
Key Specifications to Look for in Ultra-Slim Panels
When browsing online marketplaces or local hardware retailers, understanding the technical specifications on the product label is essential for finding a high-performing fixture. The first specification to verify is the profile thickness of the panel. Edge-lit LED panels are highly recommended for low-ceiling environments because they place the LED chips along the inner frame of the fixture, directing the light sideways through a light guide plate before diffusing it downward. This design allows the panel housing to remain incredibly thin, often measuring less than 15 millimeters in thickness, compared to back-lit panels which require a deeper housing to prevent visible hot spots.

Luminous efficacy is another vital metric to evaluate before making a purchase. This value, represented as lumens per watt (lm/W), measures how efficiently the fixture converts electrical energy into visible light. In a compact condo, you want to maximize brightness while minimizing energy consumption and heat generation. Selecting a panel board led light with high luminous efficacy ensures that you achieve the desired brightness level without needing a high-wattage fixture that could overload your wiring or generate excess heat in a tight ceiling cavity.
Beam angle and light distribution play a decisive role in how spacious your condo feels. A narrow beam angle creates concentrated cones of light, leaving the upper portions of the walls in shadow and creating a gloomy “cave effect” in small rooms. For low ceilings, look for panels that offer a wide beam angle of 110 to 120 degrees. This wide distribution ensures that light spreads horizontally across the ceiling and upper walls, softening shadows, reducing harsh contrasts, and making the entire room feel brighter and more expansive.
Choosing the Right Mounting Method for Your Ceiling
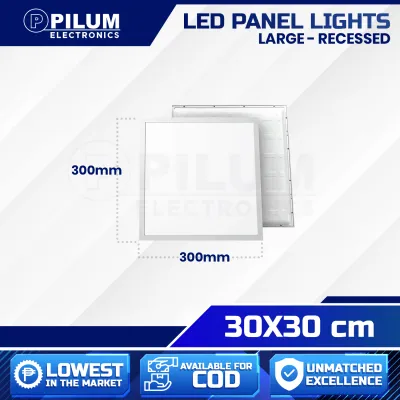
Matching the mounting method of your LED panel to your condo’s actual ceiling structure is crucial for a successful and safe installation. If your condo features an existing gypsum board or acoustic drop ceiling, recessed mounting is often the cleanest option. Recessed panels sit completely flat against the ceiling surface, with the housing and wiring hidden inside the ceiling plenum. Before purchasing, you must measure the available depth behind the drywall to ensure there is sufficient clearance for both the panel housing and the external LED driver, taking care never to cut through structural metal studs or support wires.
For condos with bare concrete slab ceilings—a very common construction method in Philippine high-rises—recessed mounting is generally not an option because chipping into structural concrete is strictly prohibited by building administrations. In this scenario, surface-mounted frames are the ideal alternative. These slim metal or plastic frames screw directly into the concrete slab, allowing the ultra-slim panel to slide into place. This method adds only a few centimeters of depth while completely concealing the wiring and driver, providing a clean, modern look without compromising the structural integrity of your ceiling.
Suspension kits, which use adjustable cables to hang panels from the ceiling, are generally unsuitable for low-ceiling condos because they reduce valuable headroom. However, there are rare exceptions where suspended panels can be used effectively. For instance, hanging a slim panel directly over a dining table or a kitchen island can create a focused, intimate zone of light. Because the table or island naturally prevents people from walking directly underneath the fixture, the reduced clearance does not present a physical hazard, allowing you to enjoy the aesthetic benefits of a suspended light without sacrificing safety.
Optimizing Light Quality for Compact Living Spaces
Selecting the right light quality is essential for creating a comfortable and versatile atmosphere in a compact condo layout. Color temperature, measured in Kelvin (K), should be matched to the specific function of each room. For relaxation areas like bedrooms and living rooms, warm white light (around 3000K) creates a cozy, inviting ambiance. For task-oriented spaces like kitchens, home offices, and bathrooms, cool white (around 6000K) or daylight (6500K) is preferred for clarity and focus. Many modern LED panels now feature selectable color temperature switches on the driver, allowing you to adjust the warmth of the light during installation.
Glare control is another critical factor when light fixtures are positioned closer to eye level. Harsh, direct glare from exposed LEDs can cause eye strain, headaches, and visual discomfort over time. To prevent this, look for panel board led lights equipped with high-quality frosted diffusers made of PMMA (polymethyl methacrylate) or polycarbonate. These materials scatter the light evenly across the surface of the panel, reducing glare and ensuring a soft, comfortable glow that is gentle on the eyes even in low-clearance rooms.
Integrating dimmability and smart controls can greatly enhance the functionality of interior condo units that suffer from a lack of natural light. Dimmable LED panels allow you to adjust the brightness levels throughout the day, transitioning from bright, energizing light in the morning to soft, dim illumination in the evening. When planning a dimmable setup, always verify that the LED driver is compatible with your specific dimmer switch type, whether it is a traditional triac wall dimmer or a modern smart wireless controller, to prevent flickering and buzzing.
Pre-Purchase and Installation Checklist
Before purchasing your new LED panel lights, it is important to run through a final checklist to ensure electrical compatibility, safety, and compliance with your building’s regulations.
- Verify Voltage and Certification: Ensure the fixture is rated for the standard Philippine voltage of 220V to 240V at 60Hz. Look for local electrical safety certification marks on the packaging to guarantee the product has undergone rigorous quality testing.
- Isolate the Power: Always turn off the main power switch at the circuit breaker before handling any electrical wiring. If you are not experienced with fixed wiring installations, hire a licensed electrician to complete the hookup safely.
- Review Condo Administration Rules: Consult your property management office to obtain the necessary work permits and review guidelines regarding drilling into concrete slabs, approved electrical materials, and working hours.
- Plan Driver Placement: Ensure there is a well-ventilated space to house the external LED driver. For surface-mount setups, verify that the mounting frame has sufficient internal depth to accommodate the driver without pinching the wires.
- Check IP Ratings for Wet Areas: If you plan to install panel lights in bathrooms or laundry areas, verify that the fixtures have an appropriate Ingress Protection (IP) rating, such as IP44 or higher, to protect against moisture and splashes.
Frequently Asked Questions (FAQ)
Can I install a recessed LED panel in a concrete condo ceiling?
No, you cannot install a recessed LED panel directly into a solid concrete ceiling slab. Chipping or carving into structural concrete to create a recess is strictly prohibited by condominium building administrations because it compromises the structural integrity of the building and can damage embedded post-tension cables or electrical conduits. Instead, you should use a surface-mounted frame. These slim frames screw directly into the concrete surface and allow the ultra-slim panel to slide in, providing a clean, flush look while safely housing the wiring and driver within a profile of only a few centimeters.
Do ultra-slim LED panel lights overheat faster?
Ultra-slim LED panel lights do not necessarily overheat faster, provided they are engineered with high-quality materials. Because slim panels have less internal air space, they rely heavily on conductive cooling. Reputable manufacturers design these panels with robust aluminum frames and backplates that act as efficient heat sinks, drawing heat away from the LED chips and dissipating it into the room. When shopping, check the product specifications for aluminum housing materials rather than cheap plastics, and ensure the fixture is installed with adequate ventilation space as recommended by the manufacturer.
How do I hide the LED driver in a low-ceiling setup?
Hiding the external LED driver depends on your chosen mounting method. In a recessed setup with a gypsum drop ceiling, the driver simply sits in the ceiling plenum space next to the fixture. For solid concrete ceilings using a surface-mounted frame, the frame itself is designed with a small internal cavity that provides just enough space to tuck the driver neatly behind the panel. Alternatively, if you have adjacent cove lighting or a nearby utility closet, you can route the low-voltage wiring to place the driver in an accessible, well-ventilated remote location, or look for ultra-slim panels that feature integrated internal drivers.

Community discussion
Share your experience or ask a question. Comments are reviewed before publication.