
Living in a modern condominium in the Philippines often means working with a standard ceiling height of 2.4 meters or lower. In these compact, tropical spaces, choosing the wrong light fixture can quickly make a room feel cramped, hot, and visually cluttered. Selecting ultra-slim flush mount lights is an effective way to preserve precious headroom while ensuring your living areas remain bright and airy. By focusing on low-profile designs that sit tight against the ceiling, you can maintain a clean overhead plane and create the illusion of a more expansive living space.
Key Dimensions for Low-Ceiling Flush Mount Lights
When every centimeter of vertical clearance matters, the physical dimensions of your ceiling fixture dictate both safety and comfort. For a ceiling height of 2.4 meters or lower, look for ultra-slim flush mount lights with a total profile thickness of 2.5 centimeters to 5 centimeters. Keeping the fixture profile under this range ensures that tall family members and guests can walk freely without the risk of bumping into the light source. A slim profile also minimizes the downward shadow cast by the fixture housing itself, which helps keep the ceiling looking bright.
The diameter of the fixture must also scale with the room’s floor area to maintain balanced visual proportions. A light that is too small will look lost on the ceiling, while an oversized unit can overwhelm a small condo bedroom or dining area. To find a balanced size, measure the length and width of your room in meters, add those two numbers together, and multiply the sum by ten to get a rough guideline for the fixture diameter in centimeters. For example, a small 3m x 3m study would benefit from a fixture with a diameter of approximately 60 centimeters, though you should always verify how the physical footprint fits among other ceiling features like smoke detectors or sprinkler heads.
Products mentioned in this guide

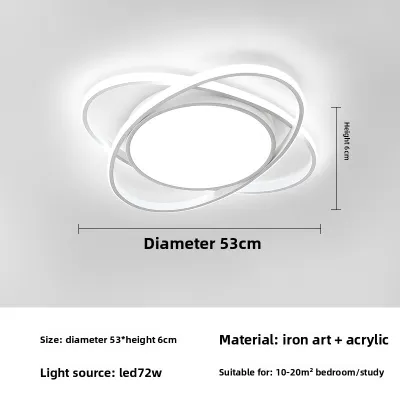
Prices are valid at publication and may change. Please refer to the product page for the latest price.
Pay close attention to the edge design and bezel width of the flush mount light. Fixtures with ultra-thin bezels or frameless, edge-to-edge diffusers blend seamlessly into the ceiling surface, reducing the visual weight of the unit. Conversely, thick, dark-colored frames draw the eye upward and emphasize the low ceiling height. Choosing a bezel that matches your ceiling paint—typically a matte white or light off-white—helps the fixture recede into the background when turned off, preserving a clean and uninterrupted overhead plane.
Light Distribution and Visual Space
The way a fixture distributes light plays a major role in how spacious your condo feels. Edge-lit LED panels are highly effective for low ceilings because they guide light sideways through a light guide plate before diffusing it downward. This design produces a soft, even glow that minimizes harsh shadows and eliminates the intense glare often associated with direct downlights. Direct downlights, which place LEDs pointing straight down, can sometimes create a “cave effect” where the ceiling remains dark while the floor is brightly lit, making the room feel shorter than it actually is.

Diffuser materials and textures also influence light quality and spatial perception. Opt for high-quality acrylic or polycarbonate diffusers with a matte or frosted finish, as these materials scatter light evenly across a wider angle. Avoid clear glass or highly textured diffusers that can project distracting patterns or create hot spots on the ceiling. A smooth, wide-angle distribution ensures that light bounces off the upper walls, which visually expands the boundaries of the room.
When reviewing packaging labels, check the color temperature options to match the room’s function and enhance the sense of space. Warm white light (around 2700K to 3000K) creates a cozy, inviting atmosphere suitable for bedrooms and living areas, but it can sometimes make a small space feel more enclosed if the light output is too low. Cool white or daylight options (4000K to 6500K) offer a crisp, clean look that works well in kitchens and bathrooms, making these task-heavy zones feel brighter and more open. Many modern flush mount lights feature adjustable color temperature switches on the back of the fixture, allowing you to test and select the most comfortable setting during installation.
Installation and Clearance Checks
Before purchasing any ultra-slim flush mount light, you must verify the physical and electrical conditions of your condo’s ceiling. Start by inspecting the existing ceiling junction box to ensure it is securely anchored and compatible with the mounting bracket of your new fixture. Some ultra-slim lights require specific shallow junction boxes, while others utilize an integrated driver that must fit inside the box. If you encounter old, brittle wiring or a loose junction box, consult a qualified professional to make the necessary repairs before proceeding.
Always verify that the fixture’s voltage, base interface, wattage limits, and electrical certifications match your condo’s electrical system before completing your purchase. Heat dissipation is another critical factor, especially in tropical climates where ambient temperatures and humidity are naturally high. Even though LED fixtures generate significantly less heat than traditional incandescent bulbs, they still require adequate ventilation to prevent premature driver failure. Check the manufacturer’s instructions for clearance requirements, particularly if you are installing the light on a concrete slab ceiling or within a false ceiling with limited airflow.
Finally, measure the drop distance from the ceiling to the top of your tallest furniture pieces, such as wardrobes, bookshelves, or pantry cabinets. In a low-ceiling condo, tall furniture can come surprisingly close to ceiling-mounted fixtures. Maintaining a safe clearance prevents the light from overheating nearby surfaces and ensures that cabinet doors can open fully without striking the fixture. For any tasks involving fixed wiring, working at heights, or installing fixtures in damp areas like bathrooms, always prioritize power-isolation at the breaker, follow the manufacturer’s installation instructions, and hire a qualified professional to ensure a safe setup.
Common Mistakes When Lighting Low Ceilings
One of the most common mistakes is choosing fixtures with dangling elements, thick decorative housings, or semi-flush drops that encroach on valuable headroom. While a small chandelier or a semi-flush light might look appealing in a showroom, it can quickly become a physical hazard in a room with a 2.4-meter ceiling. Every centimeter the fixture hangs down reduces the usable space and draws negative attention to the low clearance. Stick strictly to true flush mount designs that sit flat against the ceiling surface.
Another frequent error is relying solely on wattage to estimate light output, which often leads to under-lighting or over-lighting the space. Instead, look at the lumen rating on the product packaging to understand the actual brightness of the fixture. For low ceilings, a high-wattage light that is too bright can create uncomfortable glare, while an under-powered light will leave corners in shadow, making the room feel smaller. Aim for a balanced lumen-to-area ratio, and consider installing dimmable fixtures so you can adjust the light levels to suit different times of day and activities.
Lastly, do not overlook the impact of your ceiling’s paint finish and texture. A high-gloss or semi-gloss paint will reflect the light source directly, creating distracting glare and highlighting every minor imperfection in the plaster. A flat or matte white ceiling paint is highly recommended for low-ceiling condos, as it diffuses the light softly across the entire surface, enhancing the overall brightness of the room without creating harsh reflections.
Frequently Asked Questions (FAQ)
Can I use a semi-flush mount light on a 2.4m ceiling?
Generally, semi-flush mount lights are not recommended for main walkways in rooms with a 2.4-meter ceiling, as they typically drop 10 to 20 centimeters below the ceiling, leaving less than 2.2 meters of clearance. However, they can still be viable in specific zones where foot traffic is non-existent. For example, you might safely install a semi-flush mount directly over a dining table or a kitchen island, where the furniture naturally prevents people from walking underneath. Always measure the exact drop length of the fixture and ensure it does not obstruct sightlines or cabinet doors.
How do I clean ultra-slim flush mount lights safely?
To clean your low-profile fixture safely, always turn off the power at the wall switch and allow the light to cool completely before touching it. Use a dry, soft microfiber cloth to gently wipe away dust and cobwebs from the diffuser and the outer bezel. Avoid using harsh chemical cleaners, abrasive pads, or excessive moisture, which can damage the plastic diffuser or seep into the internal electronics. If you notice any signs of moisture ingress, loose wiring, or damage to the housing during cleaning, stop immediately and contact a qualified electrician to inspect the fixture.

Community discussion
Share your experience or ask a question. Comments are reviewed before publication.