
Condominium living in the Philippines offers unparalleled convenience, especially in bustling urban hubs like Metro Manila, Cebu, and Davao. However, one of the most common architectural constraints in modern condo developments is restricted vertical space. With typical ceiling heights hovering between 2.4 and 2.7 meters, every centimeter of headroom is highly valuable. Installing bulky, hanging light fixtures can quickly make a room feel cramped, visually cluttered, and physically hazardous for taller residents or guests.
To maintain an open, airy atmosphere while ensuring your living space is beautifully illuminated, selecting the right “room lights ceiling” fixtures is essential. Flush mount ceiling lights serve as the ideal solution for these low-ceiling environments. By sitting directly against the ceiling surface, these fixtures minimize vertical intrusion, maximize clearance, and distribute light evenly across your living, dining, and sleeping areas. Making an informed choice requires understanding physical dimensions, lighting specifications, and local electrical requirements.
Key Dimensions and Lighting Specs for Restricted Headroom
When dealing with restricted headroom, the physical dimensions of your ceiling fixtures are the first critical factor to evaluate. As a general rule of thumb, a safe walking clearance of at least 2.1 meters should be maintained from the floor to the lowest point of any ceiling fixture. In a condo with a 2.4-meter ceiling, this leaves you with a maximum allowable fixture height of 30 centimeters. However, to prevent the space from feeling visually oppressive, aiming for an even lower profile—between 5 and 15 centimeters—is highly recommended. This low-profile range keeps the light source well above the average eye level and preserves the clean, uninterrupted lines of your ceiling.
Products mentioned in this guide
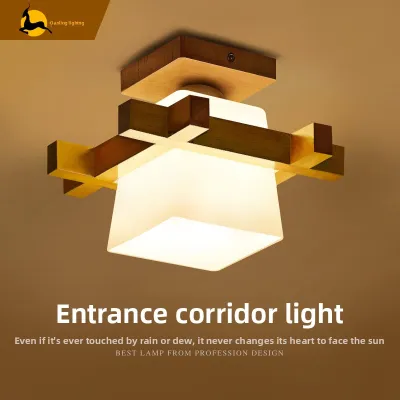
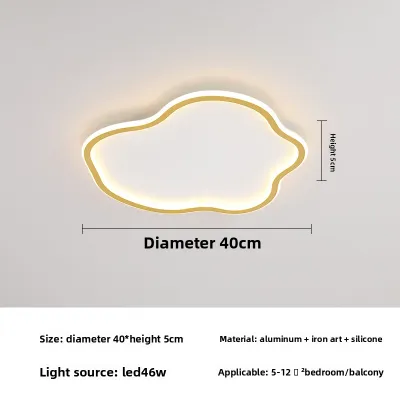
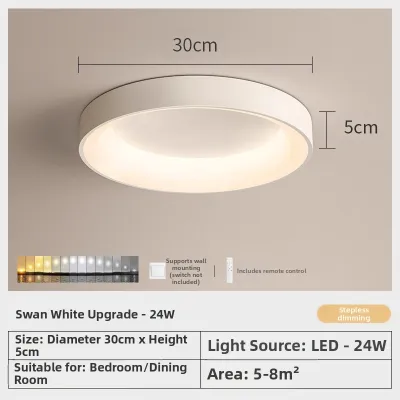
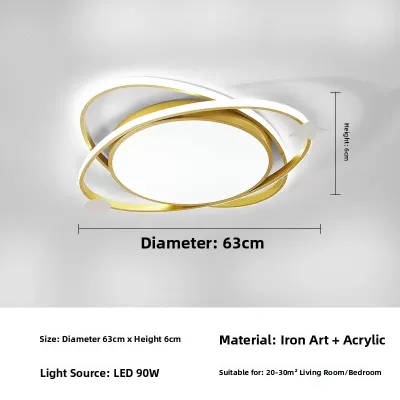
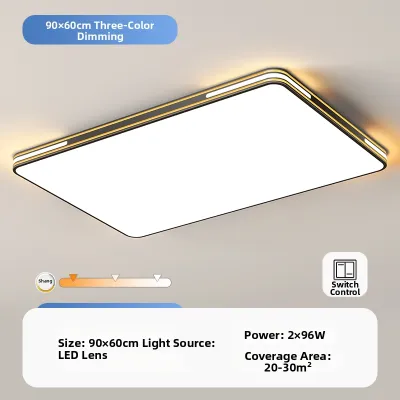
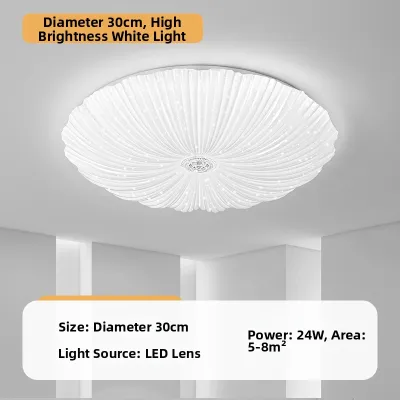

Prices are valid at publication and may change. Please refer to the product page for the latest price.
Beyond physical dimensions, calculating the appropriate light output, measured in lumens, is vital to avoid under-lighting or over-lighting your condo. Because condo layouts are often compact and multi-functional, a single room might serve as a home office, a dining area, and a relaxation zone. Instead of relying on generic wattage recommendations, focus on the lumen output relative to the square footage of each area. For general ambient lighting in living rooms and bedrooms, a baseline of 20 to 30 lumens per square foot is typically sufficient. For task-oriented zones like kitchens or study corners, aim for 50 lumens per square foot. Over-lighting a low-ceiling room can create harsh glare, while under-lighting can make the compact space feel gloomy and even smaller than it actually is.
Color temperature also plays a significant role in how the height and openness of a room are perceived. In the tropical climate of the Philippines, where outdoor temperatures and humidity are consistently high, lighting choices can influence the perceived thermal comfort of an indoor space. Cool white (3500K to 4000K) or daylight (5000K to 6500K) color temperatures are popular for functional areas like kitchens and bathrooms because they provide a clean, crisp, and energizing atmosphere. Conversely, warm white (2700K to 3000K) is preferred for bedrooms and living areas to create a cozy, relaxing ambiance. While color temperature is ultimately a matter of personal preference, using a consistent color temperature across open-concept spaces helps unify the layout and visually expand the room.
Finally, pay close attention to the diffuser materials and glare control of the fixture. Because low ceilings bring the light source closer to your line of sight, exposed bulbs or poorly diffused fixtures can cause significant eye strain. Look for flush mounts equipped with high-quality acrylic, polycarbonate, or frosted glass diffusers. In humid tropical environments, acrylic and polycarbonate are particularly advantageous because they are lightweight, highly resistant to shattering, and less prone to trapping moisture or yellowing over time compared to low-grade plastics. A well-designed diffuser scatters the light evenly, eliminating harsh hotspots and casting a soft, pleasant glow across the entire ceiling plane.
Flush Mount Profiles That Suit Compact Condo Layouts
Selecting the right aesthetic profile for your flush mount room lights ceiling fixtures can dramatically alter the visual height of your condominium. The most unobtrusive option available is the ultra-flat integrated LED panel. These fixtures feature built-in light-emitting diodes and extremely slim housings, often protruding less than 2.5 centimeters from the ceiling surface. Because they sit almost flush with the plasterboard or concrete, ultra-flat panels virtually disappear into the ceiling when turned off. When illuminated, they provide a broad, even wash of light that mimics the effect of a natural skylight, making them an exceptional choice for narrow hallways, compact kitchens, and minimalist living areas.

For those who prefer a more decorative touch, drum and dome shades remain highly popular options that work well within low-ceiling constraints. Drum shades feature vertical fabric, metal, or plastic sides that direct light both downward and softly outward. To suit a low ceiling, look for shallow drum profiles that prioritize horizontal width over vertical depth. Dome shades, characterized by their curved, semi-spherical glass or acrylic covers, offer a softer visual transition. When selecting dome or drum fixtures, opt for semi-translucent materials that allow light to filter through the sides, as solid metal shades can create a harsh downward spotlight effect that leaves the upper corners of the room in shadow, visually lowering the ceiling.
If you need to illuminate a larger or irregularly shaped condo layout, geometric and multi-light flush mounts offer an excellent balance of style and coverage. Square, rectangular, or hexagonal flush mounts can house multiple light sources or larger LED arrays, spreading illumination over a wider surface area without requiring a deep vertical drop. Some modern geometric designs feature adjustable, low-profile heads that allow you to direct light toward specific task areas or accent walls. This directional capability is highly beneficial in studio apartments, allowing you to define distinct functional zones—such as a dining nook or a reading corner—using a single ceiling fixture.
Regardless of the profile shape, the visual weight and finish of the fixture must be carefully considered. Visual weight refers to how heavy or dominant an object appears in a space. In a compact condo, heavy, dark-colored fixtures—such as those with thick matte black iron frames or dark bronze detailing—can draw the eye downward and make the ceiling feel lower. To maintain an open feel, prioritize light-colored finishes such as matte white, brushed aluminum, satin nickel, or light natural wood accents. A matte white fixture that closely matches the paint color of your ceiling will blend seamlessly into the background, allowing the light itself to take center stage and creating the illusion of a higher, more spacious room.
Electrical Compatibility and Safe Installation Boundaries
Before purchasing any new room lights ceiling fixtures, it is crucial to verify that your condo’s existing electrical infrastructure can safely support the installation. The first step is to inspect the ceiling junction box. In many Philippine condominiums, ceilings are constructed from solid concrete slabs with embedded utility boxes, while others utilize suspended gypsum board ceilings with metal framing. If you are replacing a lightweight plastic fixture with a heavier glass or metal flush mount, you must ensure the junction box is securely anchored to the structural concrete or ceiling joists. A standard junction box can typically support fixtures weighing up to 22 kilograms, but any heavy or complex fixture requires verifying the manufacturer’s weight specifications and ensuring the mounting hardware is rated for the specific ceiling material.
Electrical compatibility is another vital consideration, particularly regarding voltage and frequency standards. The standard electrical supply in the Philippines is 220V to 230V at a frequency of 60Hz. When sourcing fixtures online or from international retailers, always verify that the product’s driver or ballast is rated for 220V-230V and 60Hz operation. Installing a fixture rated solely for 110V or 50Hz can lead to immediate electrical failure, severe overheating, or a significantly shortened lifespan for the LED components. Additionally, older condominium buildings may feature legacy wiring systems that lack a dedicated grounding wire. If your chosen fixture features a metal chassis, installing it without a proper ground poses a safety hazard, making it essential to verify your unit’s wiring conditions beforehand.
Safety must always be the top priority during any electrical project. Before removing an old fixture or installing a new one, isolate the power at the main circuit breaker panel of your condominium unit. Do not rely solely on the wall switch to turn off the power, as some wiring configurations may leave live current at the ceiling box even when the switch is in the “off” position. Use a reliable non-contact voltage tester to confirm that the wires are completely dead before touching them. If your installation involves working at heights on a tall stepladder, drilling into solid concrete ceilings, modifying fixed wiring, or addressing complex dimming compatibility issues, stop and consult a licensed electrician. Professional installation ensures compliance with the Philippine Electrical Code and guarantees a safe, long-lasting setup.
Finally, always review the manufacturer’s installation instructions and product labels before beginning the process. Pay close attention to the maximum wattage limits specified for the fixture’s sockets, especially if you plan to use retrofitted LED bulbs in a traditional medium-base (E27) socket. Exceeding the recommended wattage can trap excessive heat inside the enclosed flush mount housing, leading to premature bulb failure or damage to the fixture’s wiring. For integrated LED fixtures, verify the dimming specifications; using a standard wall dimmer switch with a non-dimmable LED driver can cause annoying flickering, buzzing, or permanent damage to the light source. Taking the time to verify these technical details ensures your new ceiling lights operate safely and efficiently for years to come.
Frequently Asked Questions (FAQ)
Is a semi-flush mount safe for a 2.4-meter ceiling?
A semi-flush mount fixture, which features a small stem or gap between the ceiling and the light canopy, typically has a total drop length of 15 to 30 centimeters. On a 2.4-meter ceiling, a 30-centimeter drop leaves only 2.1 meters of clearance from the floor. While this technically meets the minimum safety standard for clearance, it can still pose a physical hazard in high-traffic areas, especially for taller individuals or when carrying tall items through the room. Additionally, the visible gap above a semi-flush fixture can draw the eye upward and emphasize the low height of the ceiling, making the room feel smaller. For a 2.4-meter ceiling, it is generally safer and visually more appealing to stick to true flush mount fixtures that sit tight against the ceiling surface. If you do choose a semi-flush mount, reserve it for areas where foot traffic is minimal, such as directly over a dining table or a kitchen island.
How do I clean a flush mount fixture without taking it down?
Cleaning your flush mount ceiling lights regularly prevents the accumulation of dust, cobwebs, and small insects, which can significantly reduce light output over time. To clean the fixture safely without dismantling the electrical components, start by turning off the light switch and allowing the bulbs or integrated LEDs to cool down completely. Set up a stable stepladder on a flat, even surface. Using a dry microfiber cloth or an extendable static duster, gently wipe the exterior surfaces of the shade and the ceiling canopy to remove loose dust. For stubborn grime, insect spots, or grease film—common in open-concept condo units where the kitchen is close to the living area—slightly dampen a microfiber cloth with a mixture of warm water and a drop of mild dish soap. Gently wipe the diffuser, taking care not to let any moisture seep into the electrical housing, sockets, or junction box. Never spray cleaning solutions directly onto the fixture, and ensure all surfaces are completely dry before restoring power.

Community discussion
Share your experience or ask a question. Comments are reviewed before publication.