
Determining the ideal number and spacing of industrial wall lamps in your corridor is essential for creating a safe, well-lit, and visually appealing pathway. Hallways are often treated as afterthoughts in home design, yet they serve as crucial transition zones that connect the private and public areas of your living space. In the Philippines, where tropical architecture often features long corridors to promote airflow, these spaces can easily become dark and gloomy. Installing an industrial wall lamp setup is an excellent way to introduce character, warmth, and functional illumination to these high-traffic areas.
To achieve even illumination without harsh shadows or blinding glare, you must balance the physical dimensions of your corridor with the specific light output of your chosen fixtures. Generally, spacing wall sconces approximately 1.8 to 2.4 meters apart provides a continuous path of light that guides the eye naturally down the hallway. For a standard residential corridor measuring 6 meters in length, this spacing typically requires two to three fixtures. However, finding the perfect configuration for your specific home involves analyzing your corridor’s layout, calculating the light spread, and understanding the physical characteristics of industrial-style lighting.
Assessing Your Corridor Dimensions and Lighting Goals
Before purchasing any lighting fixtures, you must conduct a thorough assessment of your corridor’s physical dimensions. Use a reliable tape measure to record the exact length, width, and ceiling height of the space. These measurements are critical because they define the overall spatial volume that your lights must fill. A narrow hallway with high ceilings will distribute and reflect light very differently than a wide corridor with low ceilings. Understanding these proportions helps you select fixtures that are scaled appropriately for the space, ensuring they do not look awkwardly small or overwhelmingly large.
Products mentioned in this guide
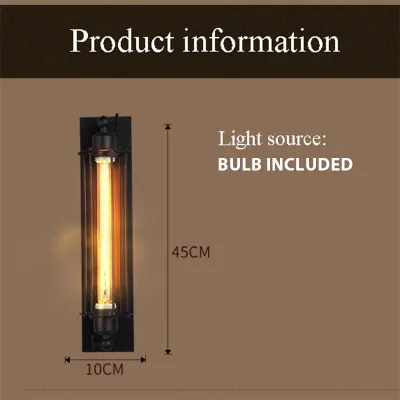
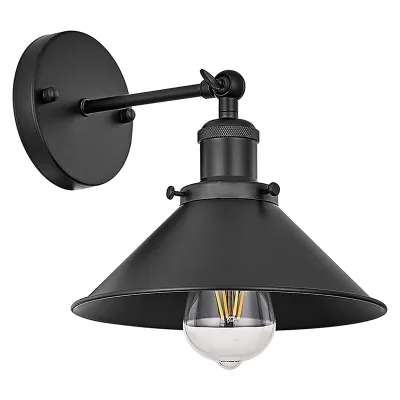
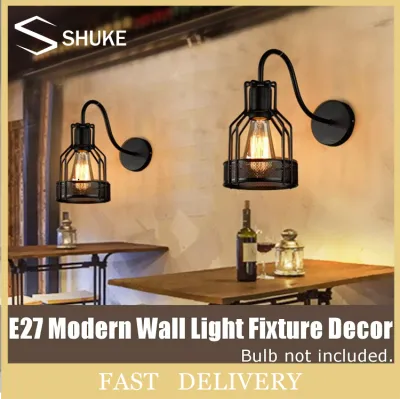
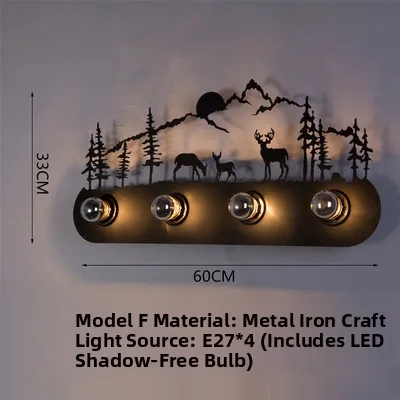
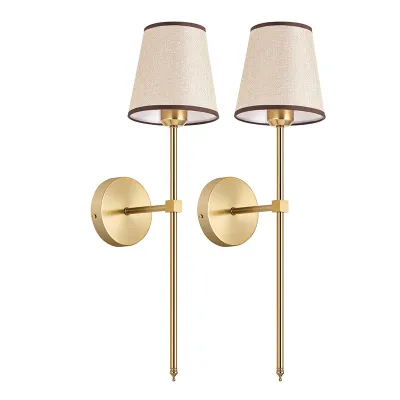
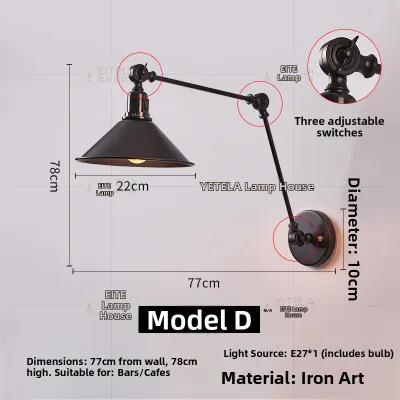
Prices are valid at publication and may change. Please refer to the product page for the latest price.
Next, identify the primary function of your corridor to establish your lighting goals. If the hallway is purely a transit zone used to walk from the living room to the bedrooms, your primary goal is safety and basic visibility. In this scenario, you need soft, ambient lighting that illuminates the floor clearly to prevent trips and slips. However, if your corridor serves as a gallery space to display family photographs, paintings, or decorative shelving, your lighting goals will shift toward accentuation. You will need fixtures that can cast focused beams of light onto the walls, which may require closer spacing or adjustable industrial fixtures that allow you to direct the light.
You should also take note of any existing light sources in the corridor. Observe how much natural light enters the space during different times of the day through nearby windows, glass doors, or skylights. Additionally, identify any existing ceiling fixtures, such as recessed downlights or central flush mounts. If your corridor already receives a significant amount of natural light or has functional ceiling lights, your industrial wall lamps may serve primarily as decorative accents or evening mood lighting. This allows you to opt for lower-wattage bulbs or space the fixtures slightly further apart, as they will not be solely responsible for illuminating the entire pathway.
Calculating the Number of Industrial Wall Lamps Needed
To calculate the exact number of industrial wall lamps required, start by identifying the total usable wall length. Usable wall length refers to the continuous flat surfaces where you can realistically mount a fixture. You must subtract any space occupied by doorways, built-in closets, structural pillars, or large wall hangings that cannot be moved. Once you have this usable length, you can use it as a baseline variable. The goal is to position the fixtures so that the light cast from one lamp gently overlaps with the light from the next, creating a seamless transition of illumination down the entire length of the hallway.

Rather than relying on rigid, one-size-fits-all spacing rules, you must account for the specific lumen output and beam angle of your chosen industrial wall lamp model. Industrial fixtures vary widely in design; some feature open metal cages that allow light to disperse in all directions, while others have heavy metal shades that direct light strictly downward or upward. Check the manufacturer’s specifications for the recommended bulb types and their lumen output. A fixture equipped with a high-lumen bulb and a wide beam angle will cover more ground, allowing you to install fewer fixtures. Conversely, a fixture with a restrictive metal shade that creates a narrow spotlight effect will require closer spacing to avoid leaving large, dark gaps between the lamps.
Finally, adjust your calculated fixture count to accommodate the unique architectural features of your corridor. If your corridor features an L-junction, a sharp turn, or a doorway leading to a bedroom, plan to place a fixture near these critical transition points. Placing a lamp near a doorway or intersection enhances safety by clearly illuminating areas where foot traffic changes direction. If these architectural features disrupt your even spacing, prioritize safety and visual balance by adding an extra fixture rather than leaving a crucial corner in complete darkness.
Determining Spacing and Mounting Height for Even Illumination
Once you have determined the total number of fixtures needed, calculate the precise horizontal spacing. To achieve visual symmetry, divide the total usable wall length by the number of fixtures plus one. This calculation gives you the distance that should separate each lamp from the next, as well as the distance from the end walls to the first and last fixtures. For example, if you have a 6-meter wall and plan to install two lamps, placing them 2 meters from the ends and 2 meters apart from each other creates a balanced, symmetrical look. This arrangement ensures the light is distributed evenly and looks architecturally intentional.
Mounting height is another critical factor in achieving comfortable, glare-free illumination. The standard recommendation for mounting wall sconces is between 1.5 and 1.7 meters from the finished floor to the center of the fixture’s junction box. This height keeps the light source near average eye level, providing effective illumination for walking. However, because industrial wall lamps often feature exposed Edison-style filament bulbs, direct glare can be an issue. If your chosen fixtures do not have frosted glass or solid metal shades to block direct line of sight to the bulb, consider mounting them slightly higher—around 1.8 meters—to keep the bright filaments out of your direct line of vision as you walk down the hall.
You must also consider the physical protrusion of your industrial wall lamps, especially in narrow corridors. Industrial design elements, such as extended gooseneck arms, protective wire cages, and wide metal shades, can stick out significantly from the wall surface. Measure the depth of the fixture from the wall to ensure it does not obstruct the walkway. In standard Philippine hallways, which are often narrow to maximize bedroom space, a protruding fixture can easily be bumped by passing residents, carrying laundry baskets, or moving furniture. If your corridor is narrow, look for low-profile industrial sconces or flush-mount designs that provide the desired aesthetic without encroaching on valuable walking space.
Electrical Safety and Installation Boundaries
Before beginning any installation work, verify that your home’s electrical infrastructure can safely support your new industrial wall lamps. Industrial fixtures are often constructed from heavy materials like cast iron, steel, or thick brass, making them significantly heavier than standard plastic or aluminum sconces. Inspect your existing wall junction boxes to ensure they are securely anchored to the wall studs and rated to handle the weight of heavy metal fixtures. Additionally, verify that the fixture’s electrical specifications match the standard 220V electrical system used in the Philippines, and check the socket’s maximum wattage limit to prevent overloading the circuit.
Electrical safety must be your top priority during any lighting project. Before you inspect, test, or modify any existing wiring, turn off the main power supply at your home’s circuit breaker panel. Do not rely solely on the wall switch to cut the power, as some wiring configurations may still carry live current to the junction box even when the switch is in the off position. Use a reliable, non-contact voltage tester inside the wall box to confirm that the wires are completely dead before touching them or attempting to connect your new fixture.
It is crucial to understand the boundary between a simple DIY project and a task that requires a qualified professional. If you are simply replacing an existing, functional wall sconce with a new industrial fixture on a pre-wired junction box, this is generally a safe task to perform yourself by carefully following the manufacturer’s installation instructions. However, if your corridor does not have existing wall wiring, or if you need to cut into concrete walls, run new electrical conduits, or install new junction boxes, you must hire a licensed electrician. A professional will ensure that all work complies with the Philippine Electrical Code, preventing fire hazards and ensuring long-term safety.
Frequently Asked Questions (FAQ)
Can I mix industrial wall lamps with other lighting styles in a corridor?
Yes, mixing industrial wall lamps with other design styles is an excellent way to create a unique, layered look in your home. To maintain visual cohesion, focus on matching the metal finishes of your industrial fixtures—such as matte black, antique brass, or oil-rubbed bronze—with other hardware in the corridor, such as doorknobs, picture frames, or cabinet pulls. You can soften the raw, rugged aesthetic of industrial metal and exposed bulbs by pairing them with warmer architectural elements, such as natural wood paneling, soft paint colors, or minimalist ceiling downlights. This contrast prevents the space from feeling too cold or clinical while still highlighting the distinct character of your industrial sconces.
What type of bulb color temperature works best for industrial corridor lighting?
For residential corridors, warm white light (ranging from 2700K to 3000K) is highly recommended because it creates a cozy, inviting atmosphere and beautifully complements the amber glass and warm metal tones typical of industrial design. If your corridor doubles as an art gallery or display space, a neutral white light (around 4000K) can offer a cleaner, more modern look that renders colors more accurately. Cool white light (5000K and above) is generally too harsh and clinical for narrow transit spaces and should be avoided. Before purchasing your bulbs, always verify the industrial fixture’s socket type (most commonly E27 in the Philippines) and its maximum wattage limit to ensure safe and compatible operation.
How do I clean and maintain metal industrial wall sconces?
Regular maintenance is key to keeping your industrial wall lamps looking their best and ensuring they continue to provide optimal light output. Use a soft, dry microfiber cloth to gently dust the metal cages, gooseneck arms, and glass shades on a weekly basis. Avoid using harsh chemical cleaners, liquid sprays, or abrasive scrubbing pads on unfinished or plated metals, as these can strip away protective clear coats and accelerate rust, particularly in the humid tropical climate of the Philippines. If a glass shade becomes heavily soiled, carefully remove it from the fixture, wash it separately with mild dish soap and warm water, dry it completely with a lint-free cloth, and then securely reinstall it.

Community discussion
Share your experience or ask a question. Comments are reviewed before publication.