
A well-lit staircase is essential for preventing missteps and enhancing your home’s architectural beauty. To achieve safe, even illumination on a standard straight staircase of about 3 to 4 meters, you will typically need two to three wall sconces. These fixtures should be spaced approximately 1.5 to 2 meters apart and mounted at a vertical height of 1.5 to 1.7 meters measured from the tread nose directly below them. Determining the ideal setup for your specific layout involves balancing physical dimensions, wall materials, and fixture specifications to ensure every step is clearly visible. Selecting the right stair light setup ensures your transition zones remain safe and stylish.
Assessing Your Staircase Layout and Stair Light Requirements
Before purchasing any fixtures, you must evaluate the physical dimensions and structural layout of your staircase. Start by measuring the total run, which is the horizontal distance the staircase covers, and the total rise, which is the vertical height from the lower floor to the upper floor. These measurements provide the baseline for calculating how much wall space you have available and how many light sources will be required to cover the entire path.
Different staircase configurations distribute light in distinct ways. A straightforward, single-flight staircase allows for a highly predictable, linear light spread. L-shaped staircases, which feature a 90-degree turn, and U-shaped staircases with mid-flight landings, introduce blind spots and shadow zones that require dedicated fixtures. Spiral or curved staircases present the greatest challenge, as the changing angles of the walls can easily cast deep shadows across the narrower inner edges of the steps.
Products mentioned in this guide
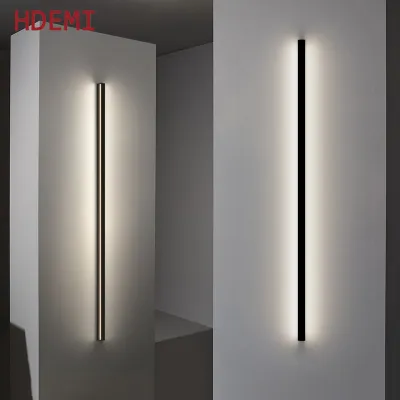
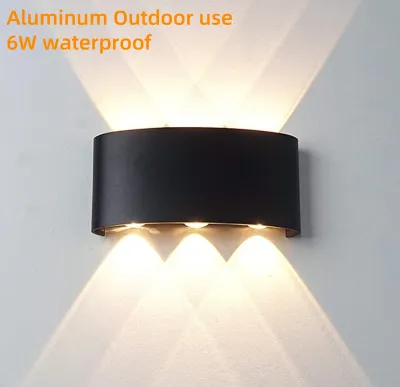
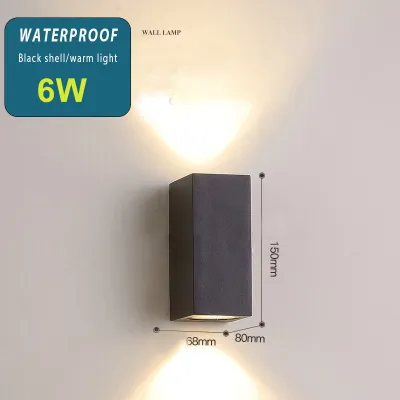
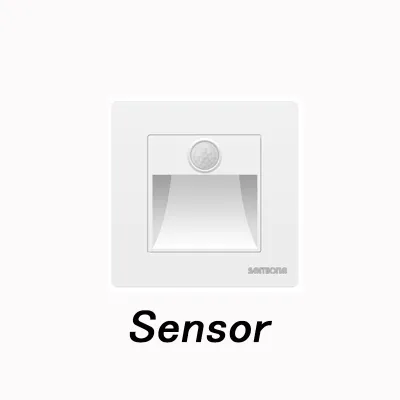
Prices are valid at publication and may change. Please refer to the product page for the latest price.
When mapping out your lighting, focus on critical safety zones where accidents are most likely to occur. The top and bottom steps are crucial transition points where your feet adjust to a change in elevation, making clear visibility vital. Mid-flight landings and sharp turns also require dedicated illumination to prevent missteps.
Achieving the perfect balance between ambient and task lighting is key to a successful installation. Ambient lighting provides overall comfort and fills the stairwell with soft, welcoming illumination. Task lighting, on the other hand, must be directed downward to highlight the tread edges, allowing you to clearly distinguish where one step ends and the next begins.
Calculating the Right Number of Wall Sconces
Determining the exact number of fixtures requires a logical approach that goes beyond simple guessing. The primary objective is to maintain a continuous path of light along the entire run without creating dark gaps or overwhelming glare. For most residential staircases, spacing sconces between 1.5 and 2 meters apart provides a balanced overlap of light.

Always consult the manufacturer’s technical specifications for the beam angle and light spread of your chosen fixtures. Sconces with a wide beam angle disperse light broadly across the wall and steps, meaning you will need fewer units to cover the same distance. Conversely, narrow-spot fixtures project concentrated beams that create dramatic pools of light; while visually striking, they require tighter spacing to prevent dark intervals between steps.
Your wall color and surface texture also play a significant role in how light behaves in the stairwell. In many Philippine homes, smooth, light-colored painted walls reflect light efficiently, amplifying the overall brightness and allowing you to use lower-wattage bulbs or fewer fixtures. If your walls feature dark paint, rough concrete, or heavy wooden paneling, these surfaces will absorb light, necessitating either more fixtures or higher-lumen outputs to achieve the same level of safety.
Be careful not to over-light the space. Flooding a narrow stairwell with excessive brightness causes intense visual fatigue and can wash out the beautiful architectural lines of your home. The goal is gentle, uniform illumination that guides the eye naturally from one step to the next.
Determining the Ideal Placement and Mounting Height
Vertical Height and Glare Prevention
When determining the vertical mounting height, always measure upward from the stair tread directly beneath the fixture, rather than from the lower floor level. Because you are climbing a slope, your physical relationship to the wall changes with every step. Mounting the fixtures at a height of 1.5 to 1.7 meters above the tread nose ensures they remain high enough to clear your head and prevent accidental bumps when carrying laundry or furniture.
This height also keeps the physical light source out of your direct line of sight as you navigate the stairs. Direct exposure to an unshielded bulb can cause temporary blindness or glare, which is incredibly dangerous on a staircase. To prevent this, prioritize sconces designed with solid shields, frosted glass diffusers, or downward-directed louvers that channel the light precisely toward your feet.
Horizontal Spacing and Navigating Landings
You can choose between two primary horizontal alignment strategies: following the diagonal slope of the stairs or mounting the fixtures at a consistent horizontal level. Following the diagonal slope creates a dynamic, contemporary look that mirrors the natural movement of the staircase. Mounting fixtures horizontally is more common in traditional homes or when the staircase is flanked by a flat, continuous wall that transitions into an open hallway.
Navigating mid-flight landings and sharp turns requires careful planning to avoid clustering too many fixtures in a single corner. Place a sconce directly above or adjacent to the landing to ensure this transition zone is fully illuminated. This placement helps you transition smoothly between the different pitches of the staircase.
Maintaining a consistent visual rhythm is essential for a cohesive architectural aesthetic. Whether you choose a diagonal or horizontal layout, keep the spacing between each fixture uniform. This consistent spacing ensures that the light levels remain balanced, preventing your eyes from constantly adjusting to varying levels of brightness as you walk.
Pre-Installation Checks and Electrical Safety
Before you begin cutting holes or mounting hardware, several critical structural and electrical verifications must be performed. First, verify that your selected wall sconces are fully compatible with the local standard voltage of 220V used in the Philippines. Connecting a fixture rated only for 110V directly to a 220V circuit will damage the driver or bulb and pose a serious fire hazard.
The material of your stairwell wall dictates the specific tools and hardware you will need. Many homes in the Philippines feature walls made of solid poured concrete or concrete hollow blocks (CHB). Installing fixtures on these surfaces requires a rotary hammer drill, masonry drill bits, and high-quality wall plugs (commonly referred to as tox). If you are working with drywall or wood paneling, you must use appropriate hollow-wall anchors or locate the structural studs to ensure a secure mount.
Planning the routing of your electrical cables is another vital step. If you are adding lights to a previously unlit wall, you must determine how to run the wires from your home’s distribution panel or an existing junction box. In concrete walls, this may involve chasing channels into the masonry and replastering, or utilizing neat, surface-mounted PVC conduit molding to protect the wires.
Never compromise on electrical safety protocols. Before touching any wiring or opening an electrical box, turn off the power at the main circuit breaker. Use a reliable, non-contact voltage tester to confirm that the wires are completely dead before proceeding with any installation work.
Deciding Between DIY and Hiring a Professional
Understanding your technical limits is crucial for ensuring a safe and code-compliant installation. Safe DIY scenarios are generally limited to straight, like-for-like replacements of existing wall sconces where the junction box, wiring, and mounting bracket are already in place. You can also safely install low-voltage, plug-in, or battery-operated LED accent lights that do not require modifications to your home’s permanent wiring.
Any task that involves running new electrical lines, cutting into concrete walls, installing new junction boxes, or modifying your circuit breaker panel must be handled by a professional. Working at height on tall stairwell ceilings also poses significant physical risks that require specialized scaffolding and safety gear.
In the Philippines, performing unpermitted or unlicensed structural electrical work can void your home insurance policy and violate local building codes. Hiring a licensed professional or a registered master electrician ensures that all wiring complies with the Philippine Electrical Code (PEC), protecting your family and your investment.
Basic Installation Steps and Post-Install Verification
The physical installation of a wall sconce follows a precise, high-level sequence. After ensuring the power is completely shut off at the breaker, secure the mounting backplate to the wall using the appropriate anchors and screws. Next, connect the electrical wires—matching the live, neutral, and ground wires from your house to the corresponding leads on the fixture—using secure wire connectors or terminal blocks. Once the wiring is neatly tucked away, attach the fixture body to the backplate and install the appropriate bulb.
After completing the physical installation, restore the power and begin the post-installation verification process. Test the wall switches—ideally configured as a three-way switch system so you can turn the lights on or off from both the top and bottom of the stairs. Check the fixtures carefully for any signs of flickering, buzzing, or loose connections, and gently wiggle the sconces to ensure they are firmly anchored to the wall.
The final step is to conduct a night walk once the sun goes down. Walk up and down the stairs several times to evaluate the actual light spread in complete darkness. Look for any harsh shadow zones on the tread edges or blinding glare when looking up or down, and make any necessary adjustments to the fixture angles or bulb wattages.
Frequently Asked Questions (FAQ)
Can I use dimmable or smart wall sconces on stairs?
Yes, you can use dimmable or smart wall sconces on your stairs, provided that the LED bulbs and your wall dimmer switch are explicitly rated for compatibility. However, you must never dim stair lights to a level that compromises safe navigation or hides the edges of the steps. Instead of manual dimming, consider integrating smart motion sensors or automated schedules that keep the lights at full brightness during high-traffic hours and lower them slightly only when the stairs are completely vacant.
What color temperature is best for stairway safety?
For optimal safety, neutral white (3500K to 4000K) or cool white (5000K) light is highly recommended because it maximizes contrast, making the edges of each step highly visible. Warm white light (2700K to 3000K) creates a cozy, inviting atmosphere but can sometimes soften contrast and make it harder to judge depth in low-light conditions. If you prefer the aesthetic of warm light, ensure your staircase has ample ambient light from other sources and that the sconces project sufficient downward task lighting to keep the treads clearly defined.

Community discussion
Share your experience or ask a question. Comments are reviewed before publication.