
Adhesive mirror wall stickers offer a lightweight, budget-friendly, and highly customizable way to transform cramped interiors. By strategically bouncing light and creating the illusion of extended sightlines, these reflective panels can make a compact studio apartment or a small bedroom feel significantly more open. Unlike heavy glass mirrors, these acrylic or thin plastic alternatives can be arranged in endless configurations without the need for heavy-duty wall anchors or drilling.
However, achieving a high-end look that truly expands your space requires more than simply sticking panels onto the nearest empty wall. The final visual impact depends heavily on strategic placement, meticulous wall preparation, and precise installation techniques. Without careful planning, you risk creating a distorted reflection, dealing with peeling corners due to tropical humidity, or accidentally highlighting cluttered areas of your room.
Assess Your Room and Choose the Right Layout
Before peeling off any adhesive backing, take a close look at how light moves through your room during the day. In tropical climates, natural sunlight can be intense, meaning a mirror placed directly opposite a bright window might bounce blinding glare into your living space. Instead, aim to position your adhesive mirror wall stickers on a wall adjacent to your windows, allowing them to catch and disperse natural light softly across the room. This placement mimics the effect of an additional window, instantly doubling the perceived depth of the room.
Products mentioned in this guide
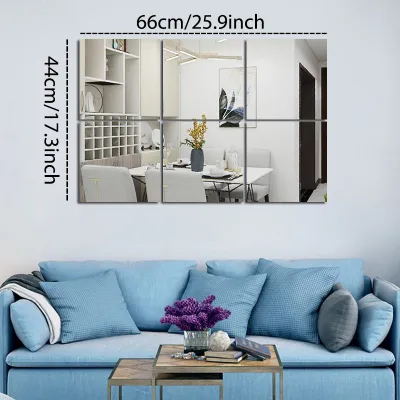
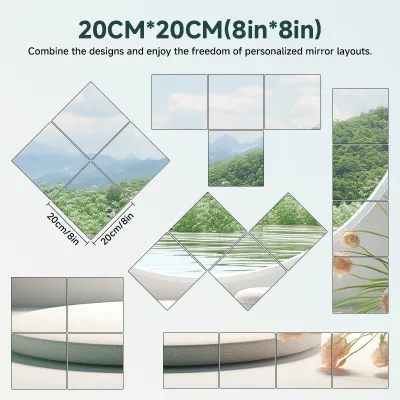
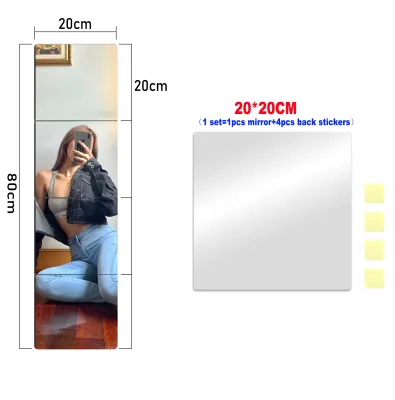
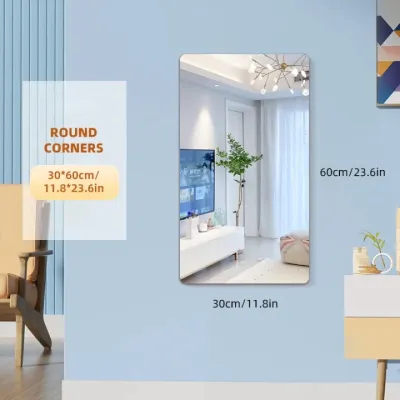

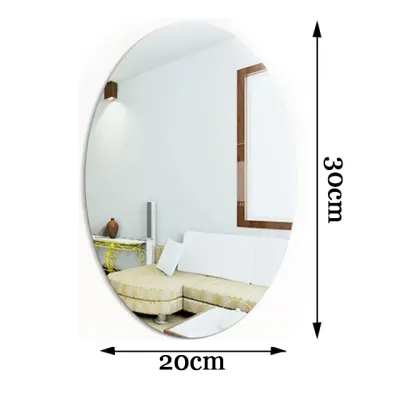
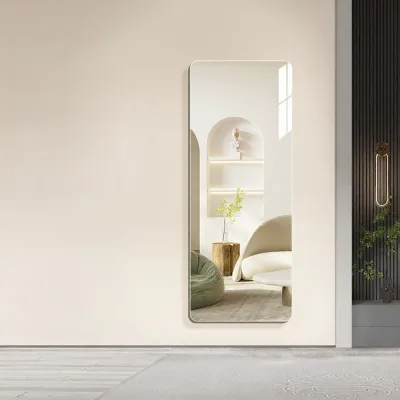
Prices are valid at publication and may change. Please refer to the product page for the latest price.
The arrangement pattern you choose will dictate the spatial illusion you create. A structured grid pattern of square mirror tiles mimics the look of a large paneled window, which visually pushes the wall backward and adds architectural interest. If you want to draw the eye upward and make low ceilings feel higher, a vertical staggered or columnar layout works exceptionally well. For a more artistic, modern vibe, a clustered geometric pattern can serve as a focal point while still reflecting light throughout the space.
Always consider what your mirrors will reflect from their designated position. Placing a large array of reflective stickers directly opposite an open closet, a cluttered utility shelf, or a busy workspace will only double the visual noise, making the room feel more chaotic rather than spacious. Instead, aim to reflect clean, open areas, a beautiful indoor plant, or a well-lit corner to maximize the feeling of depth.
Prepare the Wall and Gather Your Tools
The longevity and visual clarity of your adhesive mirror wall stickers depend almost entirely on the condition of the wall surface beneath them. Because these stickers are typically thin and flexible, any texture, bump, or imperfection on the wall will telegraph through the material, resulting in a warped, funhouse-mirror effect. Ensure your target wall is completely flat, smooth, and free of textured plaster or peeling paint.

In humid environments, moisture can easily compromise adhesive backing, causing the stickers to slide or peel over time. Clean the wall thoroughly with a damp cloth to remove dust, grease, and cobwebs, then allow it to dry completely for several hours before beginning the installation. Avoid using heavy chemical cleaners that leave a soapy residue, as this film will prevent the adhesive from bonding securely. Avoid applying these stickers to damp concrete walls or in areas with active moisture issues, as the trapped humidity will inevitably degrade the bond.
Gathering the right tools beforehand will streamline the installation process and prevent alignment errors. You will need a reliable measuring tape, a spirit level to ensure your lines are perfectly straight, and low-tack painter’s tape to map out your design. A clean, lint-free microfiber cloth and a soft rubber squeegee are also essential for smoothing out the stickers and securing them to the wall without scratching the reflective surface.
Step-by-Step Installation Guide
Begin by mapping out your entire layout on the wall using painter’s tape. This step allows you to visualize the final scale and positioning of your adhesive mirror wall stickers before making any permanent commitments. Use your measuring tape and spirit level to draw light pencil guidelines or align strips of painter’s tape to serve as a perfectly straight baseline for your first row of stickers.
When you are ready to apply the first piece, avoid peeling off the entire adhesive backing at once, as this makes the sticker difficult to handle and increases the risk of trapping large air bubbles. Instead, peel back just a small portion of the protective backing from the top edge. Align this exposed adhesive edge carefully with your level painter’s tape guideline, ensuring it sits perfectly straight before letting the rest of the sticker touch the wall.
Gradually peel away the remaining backing with one hand while using your other hand, wrapped in a soft microfiber cloth, to smooth the sticker onto the wall. Work in a continuous, controlled motion to prevent wrinkles or misalignment. For multi-piece layouts, it is generally best to work from the center outward or from the bottom up, checking each new piece with your spirit level to ensure the entire array remains perfectly aligned.
Once a sticker is in place, use a soft rubber squeegee or a folded microfiber cloth to firmly press the material onto the wall. Apply gentle, even pressure starting from the center of the sticker and sweeping outward toward the edges. This technique pushes out any trapped air pockets and ensures a strong, uniform bond between the adhesive and the wall surface, which is crucial for preventing edge lifting in warm, humid climates.
After all the pieces are securely mounted, carefully peel away the protective film from the front of the mirror stickers. Do this slowly to avoid pulling the edges of the stickers away from the wall. Give the entire arrangement a final, gentle wipe with a clean microfiber cloth to remove any fingerprints or smudges left behind during the installation process.
Avoid Common Placement and Installation Mistakes
One of the most common mistakes when installing adhesive mirror wall stickers is ignoring minor wall textures. Even slightly textured drywall or orange-peel paint can cause the flexible mirror material to bend minutely, resulting in a highly distorted, dizzying reflection. If your walls are not perfectly smooth, consider mounting the stickers onto a thin, flat backing board first, and then hanging that board securely on the wall.
Placement within your daily living zones also requires careful thought to avoid visual fatigue. Avoid installing large, highly reflective mirror arrays directly opposite your bed or right in front of your primary desk setup. Constant movement caught in your peripheral vision can be highly distracting during work hours and can disrupt the relaxing atmosphere needed for a good night’s sleep.
Establish clear stop conditions during your installation process to protect your walls and your decor investment. If you notice that the edges of the stickers refuse to adhere during the initial application, or if adjusting a misplaced sticker begins to lift the wall paint, stop immediately. This indicates that either the wall surface is too damp, dusty, or poorly primed, or the paint itself is too delicate, requiring you to reassess your surface preparation before proceeding.
Maintain and Clean Your Mirror Stickers
Because adhesive mirror wall stickers are typically made from acrylic or lightweight polymers rather than heavy glass, they require a gentle touch when it comes to cleaning. Standard glass cleaners containing harsh chemicals like ammonia or alcohol can seep behind the edges and degrade both the reflective backing and the adhesive. Instead, opt for a mild solution of warm water mixed with a few drops of dishwashing liquid, or use a specialized acrylic-safe cleaner.
Always use a clean, ultra-soft microfiber cloth to wipe down the reflective surfaces. Avoid paper towels, abrasive sponges, or rough scrubbing pads, as these can easily leave fine scratches on the soft plastic surface, permanently dulling the mirror’s clarity over time. Wipe in gentle, circular motions, and use a dry section of the microfiber cloth to buff away any remaining moisture streaks.
In tropical regions where indoor humidity levels fluctuate, make it a habit to periodically inspect the edges and corners of your mirror stickers. If you notice any minor lifting, gently press the edges back down with a warm, dry cloth to reactivate the adhesive. Catching these minor lifts early prevents dust and moisture from settling behind the sticker, ensuring your reflective wall display remains secure and beautiful for years to come.
Frequently Asked Questions (FAQ)
Can I remove adhesive mirror stickers without damaging the paint?
Removing adhesive mirror wall stickers safely requires patience and a bit of gentle heat. Use a handheld hairdryer on a low, warm setting to gently heat the surface of a sticker for a few seconds, which softens the adhesive backing underneath. Once the adhesive is warm and pliable, slowly peel the sticker away from the wall starting from one corner, keeping the peeling angle as flat against the wall as possible to minimize tension on the paint.
Any remaining sticky residue can be wiped away using a mild, surface-safe adhesive remover or a small amount of cooking oil on a microfiber cloth, followed by a quick wipe with soapy water. Keep in mind that if your wall was freshly painted, poorly primed, or covered in delicate wallpaper, there is still a high risk of surface damage regardless of the removal technique used.
Do mirror stickers work in rooms with no natural light?
Yes, adhesive mirror wall stickers can still be highly effective in windowless rooms, but their success depends entirely on how you integrate them with artificial lighting. Because mirrors do not generate light on their own, they can only reflect and amplify the light sources already present in the space. In a dark room with no active light sources, the stickers will simply look like dark, glossy panels rather than space-expanding elements.
To make a windowless room feel larger, position your mirror stickers where they can catch and bounce light from artificial fixtures, such as wall sconces, floor lamps, or warm LED strip lights. Placing a mirror array behind a lamp or opposite a well-lit accent wall will scatter the artificial glow throughout the room, softening harsh shadows and creating a bright, airy ambiance that mimics the feel of natural daylight.

Community discussion
Share your experience or ask a question. Comments are reviewed before publication.