
Condo living in the Philippines offers unparalleled convenience, but the typical modern high-rise unit often comes with a structural challenge: low ceilings. Standard concrete slab heights in many local developments range from 2.4 to 2.7 meters, leaving little vertical clearance for dramatic, hanging chandeliers or bulky pendant lights. Fortunately, selecting an elegant flush mount light allows you to illuminate your living space beautifully while preserving precious headroom. By focusing on slim profiles, high-quality materials, and smart design choices, you can create an open, sophisticated atmosphere that makes your home feel spacious and bright.
Assessing Vertical Space and Lighting Constraints
Before browsing online marketplaces or visiting local showrooms, you must establish the exact physical boundaries of your space. Begin by measuring your ceiling height with a reliable steel tape measure, measuring directly from the finished floor to the lowest point of the ceiling. If your condo has a dropped ceiling or decorative gypsum board soffit to hide air conditioning ducts, measure from the floor to that lower surface. This measurement establishes your baseline clearance and dictates the maximum allowable depth of your new light fixture.
To maintain a safe and comfortable living environment, aim for a minimum clearance of 2.1 meters between the bottom of the light fixture and the floor. This clearance ensures that tall family members and guests can walk freely beneath the light without any risk of accidental contact. For a standard 2.4-meter ceiling, this leaves you with a maximum fixture depth of 30 centimeters, though a slimmer profile of 10 to 20 centimeters is often much more visually appealing and less intrusive.
Products mentioned in this guide
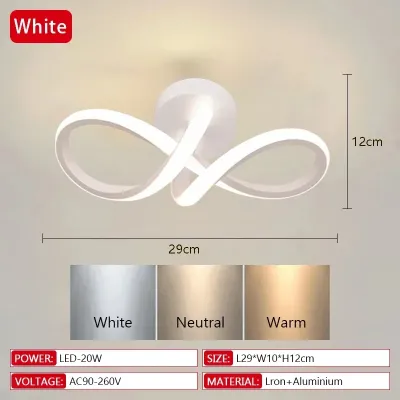
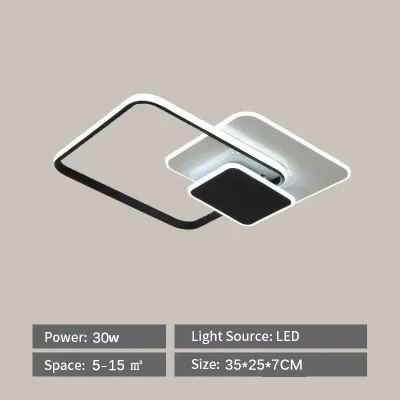
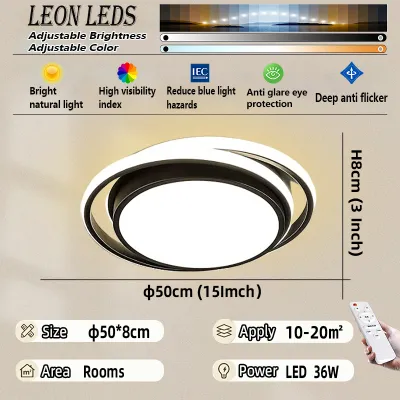
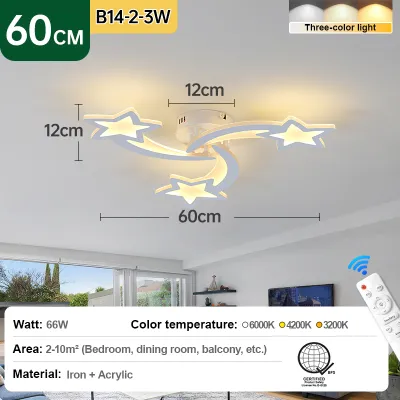
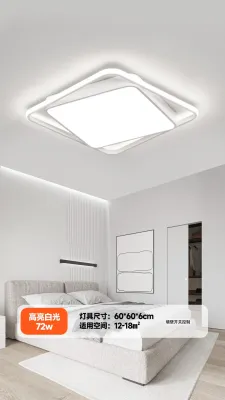
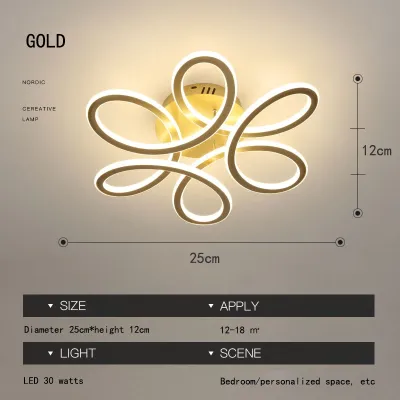
Prices are valid at publication and may change. Please refer to the product page for the latest price.
Next, evaluate the square footage of the room to determine the ideal fixture diameter. A fixture that is too small will look lost and insignificant, while one that is too large will overwhelm the room and make the ceiling feel lower. To find a balanced diameter, use a simple design formula: measure the length and width of the room in feet, add those two numbers together, and convert the sum directly into inches. For example, a typical condo bedroom measuring 10 feet by 10 feet would benefit from a fixture with a diameter of roughly 20 inches (about 50 centimeters).
Finally, consider the visual weight of the fixture. Visual weight refers to how heavy or dominant an object appears to the eye. Fixtures with thick, dark metal frames, dense opaque shades, or highly intricate, dangling ornamentation carry significant visual weight, which tends to pull the ceiling down visually. Conversely, fixtures featuring slim profiles, open frames, clear or frosted glass, and reflective metallic finishes have a lighter visual weight. These designs allow the eye to travel across the ceiling uninterrupted, preserving the illusion of height and openness.
Key Selection Criteria for Elegant Low-Profile Fixtures
Selecting an elegant flush mount light for a condo requires a careful balance of aesthetic appeal and technical compatibility. First, verify the physical dimensions of the fixture’s canopy—the metal plate that mounts directly to the ceiling—against your existing junction box. In many local condo developments, utility junction boxes are cast directly into the concrete ceiling slab during construction, meaning their positions cannot be easily adjusted. Ensure the fixture’s mounting bracket aligns with standard octagonal or round junction boxes, and that the canopy is wide enough to cover any rough edges or gaps in the surrounding concrete or plaster.

Electrical compatibility is another critical factor that must be verified prior to purchase. The standard utility voltage in the Philippines is 220V to 240V at 60Hz. When sourcing fixtures online or from international suppliers, always confirm that the internal driver or ballast is rated for this voltage range to prevent short circuits, overheating, or premature component failure. Additionally, check the bulb socket type; standard E27 screw bases are highly common and offer the widest selection of replacement bulbs locally, while integrated LED fixtures provide a sleeker, ultra-slim profile but require replacing the entire unit or driver if the light source eventually fails.
Light output and color temperature play a pivotal role in establishing the mood and functionality of your condo. For general ambient lighting in living areas, aim for a light output of roughly 30 to 40 lumens per square foot. Color temperature should be selected based on the room’s primary function and your personal preference. Warm white (2700K to 3000K) creates a cozy, inviting atmosphere perfect for bedrooms and living rooms, while cool white (4000K) offers a cleaner, more energizing light suitable for kitchens, home offices, and bathrooms. Avoid harsh daylight bulbs (6000K and above) in main living spaces, as they can make a compact condo feel clinical and cold.
Material finishes should complement your existing interior decor while actively working to enhance the room’s brightness. Polished metals, such as brass, chrome, or copper, act as subtle mirrors, reflecting both natural light from windows and artificial light from the fixture itself. Frosted glass, opal acrylic, and high-quality fabric diffusers are excellent choices for low ceilings because they scatter light evenly in all directions. This diffusion eliminates harsh, directional shadows on the ceiling and walls, which can otherwise make a small room feel enclosed and gloomy.
Elegant Design Styles That Maximize Perceived Height
When shopping for an elegant light, you will encounter several design styles that are particularly well-suited for low-ceiling environments. Minimalist and geometric profiles are highly popular in modern condos. These fixtures often feature ultra-thin metal rings, clean square frames, or interlocking linear shapes equipped with integrated LEDs. Because these designs are incredibly slim—often protruding less than 5 centimeters from the ceiling—they provide a clean, uncluttered look that aligns perfectly with contemporary, Scandinavian, or industrial interior themes.
For those who prefer a more traditional, transitional, or glamorous aesthetic, low-profile crystal or acrylic flush mounts offer a luxurious alternative. Instead of hanging down like a traditional chandelier, these fixtures arrange faceted crystals, glass droplets, or beaded elements closely against a polished chrome or gold ceiling plate. When illuminated, the crystals catch the light and cast beautiful, dancing patterns across the ceiling, drawing the eye upward and creating a sense of grandeur without sacrificing valuable vertical clearance.
Another highly versatile option is the classic drum shade flush mount. Modern drum shades feature a shallow, cylindrical profile wrapped in textured fabrics like linen, silk, or metallic-weave synthetics. To maintain an elegant look, choose a drum shade with a frosted glass or acrylic diffuser at the bottom to conceal the bulbs and prevent glare. Selecting a shade in a light, neutral color—such as cream, soft gray, or off-white—allows light to filter gently through the sides of the fabric, creating a soft halo effect on the ceiling that visually softens the boundaries of the room.
If you want to create a truly seamless look, consider semi-flush mount fixtures that feature a very short stem of only 2 to 5 centimeters. While technically not completely flush, these fixtures allow a small amount of light to escape upward, illuminating the ceiling itself. This ‘uplighting’ effect is a powerful design trick; by lighting the ceiling plane, you eliminate dark corners and make the entire room feel taller and more open. Ensure the overall drop of the semi-flush fixture still respects your calculated clearance limits before making a final decision.
Pre-Purchase Verification Checklist for Condo Units
Before finalizing your purchase and scheduling installation, it is essential to run through a practical checklist tailored to the unique realities of condo living. First, consult your condominium association’s house rules and fit-out guidelines. Many high-rise developments have strict regulations regarding structural modifications, drilling into concrete slabs, or altering electrical wiring. Some buildings also regulate the color temperature of lights visible from the exterior windows to maintain a uniform facade, so ensure your chosen bulbs comply with these aesthetic standards.
Next, verify the weight capacity of your existing ceiling junction box. Standard plastic or lightweight metal boxes installed in concrete ceilings are typically rated to support fixtures weighing up to 15 to 25 pounds (approximately 7 to 11 kilograms). If you have selected a heavy crystal or solid brass flush mount, you must confirm that the mounting hardware can be securely anchored to the structural concrete slab rather than relying solely on the junction box ears. Never attempt to hang a heavy fixture from a standard gypsum board ceiling without securing it directly to the underlying metal studs or using specialized heavy-duty toggle bolts.
Finally, confirm the compatibility of your selected fixture with your wall switches. If you plan to install a dimmable fixture to adjust the ambiance for movie nights or quiet evenings, ensure that the LED bulbs or integrated LED driver are explicitly labeled as dimmable. Standard LED bulbs will flicker, buzz, or fail prematurely if paired with a traditional incandescent dimmer switch. You will need to install a compatible LED-rated dimmer switch (often referred to as a trailing-edge or ELV dimmer) to ensure smooth, silent dimming performance.
Installation Limits and Safety Boundaries
Installing a new ceiling light fixture in a concrete condo unit presents unique challenges compared to working with standard drywall or timber ceilings. Concrete slabs require a rotary hammer drill and specialized masonry drill bits to create holes for mounting anchors. Standard impact drills will struggle to penetrate high-strength concrete and can easily overheat or damage the ceiling. Furthermore, there is always a risk of accidentally drilling into embedded electrical conduits or post-tensioning cables, which can cause catastrophic structural or electrical damage.
For any installation involving fixed electrical wiring, working at heights, or drilling into structural concrete, safety must be your absolute priority. Always isolate the power at the main circuit breaker panel before beginning any work. Use a reliable non-contact voltage tester to verify that the wires are completely dead before touching them. If you are uncomfortable working on a ladder, unsure of how to identify the hot, neutral, and ground wires, or if your condo’s wiring does not follow standard color-coding, stop immediately and hire a licensed electrician.
In the Philippines, hiring a professional electrician ensures that your installation complies with the Philippine Electrical Code and your building’s safety standards. Professional assistance is strictly required if you need to relocate a junction box, run new wiring conduits across a concrete ceiling, or upgrade an older unit’s electrical panel. Additionally, if your chosen elegant fixture weighs more than 15 kilograms, or if the ceiling material shows signs of cracking, moisture damage, or crumbling, do not attempt a DIY installation. A qualified professional can properly assess the structural integrity of the ceiling and install the appropriate heavy-duty anchors safely.
Frequently Asked Questions (FAQ)
How do I clean elegant flush mount lights without damaging the finish?
To maintain the brilliant shine and elegance of your flush mount light, regular and gentle cleaning is essential. Always turn off the wall switch and allow the bulbs to cool completely before cleaning. For delicate fabric drum shades, use a soft-bristled brush, a lint roller, or a vacuum cleaner with a brush attachment to gently remove accumulated dust without crushing the fabric fibers.
For metallic finishes like brushed brass or chrome, as well as glass and crystal elements, avoid using harsh chemical cleaners, ammonia, or abrasive scrubbing pads, which can permanently scratch or strip the protective clear coat. Instead, wipe the surfaces with a dry, ultra-soft microfiber cloth. If a deeper clean is necessary, check the manufacturer’s care label first; usually, a slightly damp microfiber cloth with a drop of mild dish soap is safe for glass and crystal, provided you dry the components immediately with a clean cloth to prevent water spots.
Can I use a smart bulb in an elegant flush mount fixture?
Yes, you can use smart bulbs in many elegant flush mount fixtures, provided you verify a few physical and electrical compatibility factors first. Start by checking the physical clearance inside the fixture’s shade or diffuser. Smart bulbs often have slightly larger profiles and bulkier bases than standard LED bulbs because they house internal wireless receivers and drivers; ensure the bulb does not touch the glass or fabric shade, which can cause localized heat buildup.
Additionally, you must verify your wall switch configuration. Smart bulbs require a constant, uninterrupted flow of electricity to remain connected to your home network, meaning they should not be used on a circuit controlled by a traditional wall dimmer switch. If your wall switch has a dimmer, keep it at maximum power or replace it with a standard on/off switch, and use your smartphone app or a compatible smart remote to adjust the brightness and color temperature of the bulb instead.

Community discussion
Share your experience or ask a question. Comments are reviewed before publication.