
Selecting the perfect ceiling fixture for a space with limited overhead clearance requires balancing physical safety, visual proportions, and optimal light distribution. In compact residential spaces, such as modern high-rise condominiums in Metro Manila, choosing the wrong fixture can make a room feel cramped, cast harsh shadows, or even present a physical hazard to taller occupants. To achieve the ideal balance, you must select low ceiling lights that maintain a minimum of 2.1 meters of vertical clearance from the floor while matching the physical diameter of the fixture to the overall square footage of the room.
By focusing on low-profile designs—specifically integrated LED models that sit almost flush against the ceiling surface—you can maximize overhead space without sacrificing illumination. Achieving this requires analyzing your room’s dimensions, understanding the visual weight of different materials, and verifying critical electrical and environmental specifications before making a purchase.
Understanding Ceiling Height and Clearance Requirements
Before browsing designs or finishes, you must establish the exact physical boundaries of your space. In residential architecture, a ceiling height of 2.4 meters (approximately 8 feet) or lower is generally classified as a low ceiling. This height limit is highly common in modern urban developments and high-rise condominiums, where structural concrete slabs restrict vertical space. When retrofitting or installing new overhead fixtures in these environments, maintaining adequate headroom is the most critical safety and comfort factor.
Products mentioned in this guide
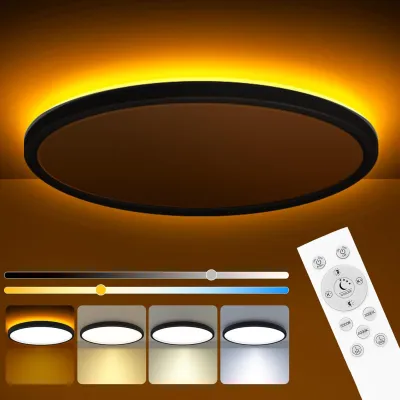
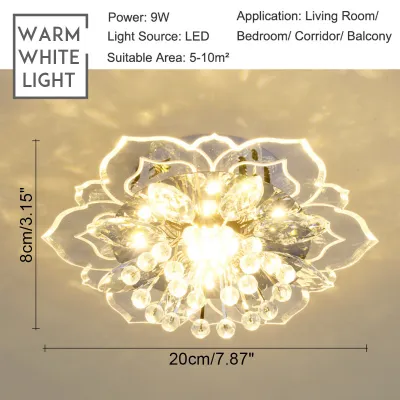
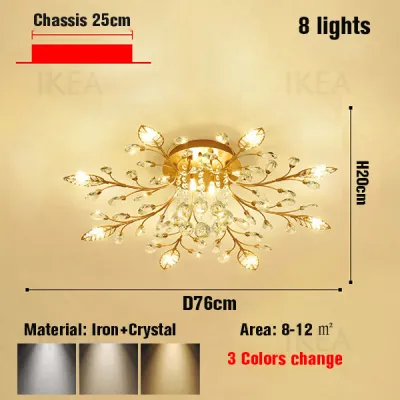
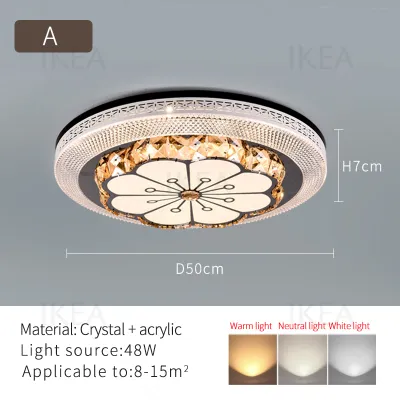
Prices are valid at publication and may change. Please refer to the product page for the latest price.
The standard building and design guideline recommends a minimum clearance of 2.1 meters (7 feet) from the finished floor to the lowest point of any hanging light fixture. This ensures that average-sized individuals, as well as taller guests, can walk freely beneath the light without any risk of contact. To determine your maximum allowable fixture profile, or thickness, use a simple calculation: measure your exact ceiling height from the floor to the ceiling slab, then subtract 2.1 meters. If your ceiling is exactly 2.4 meters high, your light fixture should have a maximum profile of 30 centimeters (approximately 12 inches), though a much thinner profile is highly recommended to preserve an open, airy feel.
This clearance calculation can be adjusted slightly based on the room’s layout and the placement of furniture. Walkway areas, such as hallways, entryways, and the main traffic paths of living rooms, require strict adherence to the 2.1-meter clearance rule because people are constantly in motion. Conversely, stationary areas—such as the space directly above a dining table, a kitchen island, or a bed—allow for slightly deeper fixture profiles. Because these areas have permanent furniture underneath that prevents foot traffic, you can install a slightly thicker flush mount or even a shallow semi-flush mount without risking physical collision.
Sizing Your Flush Mount Light by Room Dimensions
While fixture thickness dictates physical safety, the diameter of your flush mount light determines its visual proportion within the room. A fixture that is too small will look lost and fail to provide adequate ambient light, while an oversized fixture will visually overpower a low-ceiling space. To find the ideal baseline diameter, interior designers use a straightforward rule of thumb based on room dimensions.

To calculate this baseline, measure the length and width of the room in feet, add those two numbers together, and convert the sum directly into inches to find the ideal fixture diameter. For example, if you are lighting a compact bedroom that measures 10 feet by 10 feet (approximately 3 meters by 3 meters), adding 10 and 10 gives you 20. Therefore, a flush mount fixture with a diameter of 20 inches (roughly 50 centimeters) will look perfectly proportioned in that space. If your measurements fall between standard product sizes, it is generally best to round down slightly for low-ceiling rooms to prevent the fixture from dominating the ceiling plane.
This baseline calculation should be adjusted to match the specific function and layout of the room. In open-concept living areas where multiple functional zones merge, a single large flush mount may not suffice. Instead, these open spaces benefit from wider, flatter fixtures that spread light across a broader area. In contrast, narrow corridors or small utility rooms require much smaller diameters to prevent the ceiling from looking crowded.
Additionally, consider the visual weight of the fixture’s materials and colors. Fixtures featuring dark metal frames, heavy industrial ironwork, or thick opaque borders carry significant visual weight, making them appear larger and lower than they actually are. In a low-ceiling room, these heavy designs can make the ceiling feel as though it is pressing down on the space. To combat this, opt for fixtures with light-colored finishes, frameless glass, or white acrylic diffusers that blend seamlessly into a light-colored ceiling.
For long, narrow spaces or irregular layouts, installing multiple smaller flush mount lights is highly superior to relying on a single oversized central fixture. Placing two or three compact, low-profile lights in a row down a long hallway or across a studio apartment distributes illumination evenly. This approach eliminates dark corners and harsh shadows while keeping the ceiling line clean, uniform, and visually unobstructed.
Choosing the Right Profile and Thickness
The physical profile of a flush mount light refers to its depth—how far it extends downward from the ceiling surface. Managing this dimension is key to preserving the illusion of height in a low-ceiling room. Modern lighting technology offers two primary options: traditional bulb-housing flush mounts and ultra-thin integrated LED flush mounts.
Traditional flush mounts require physical space inside the housing to accommodate standard light bulbs (such as E27 screw-in bulbs) and their sockets. This mechanical requirement typically results in a fixture profile of 10 to 15 centimeters (4 to 6 inches) or more. While these fixtures allow for easy bulb replacement, their thickness can feel intrusive in very low spaces. On the other hand, integrated LED flush mounts utilize flat circuit boards lined with tiny light-emitting diodes. Because they do not require bulky sockets or large bulbs, integrated LED fixtures can achieve ultra-thin profiles of just 1.5 to 2.5 centimeters (0.6 to 1 inch). These slim profiles sit almost entirely flat against the ceiling, making them virtually invisible from a distance and preserving maximum vertical space.
The shape of the fixture also influences how light is distributed and how thick the unit appears. Flat drum profiles offer a clean, architectural look that aligns perfectly with modern minimalist interiors. Shallow dome shapes feature gently curved edges that help scatter light outward at wider angles, reducing the harsh, downward-pointing “spotlight” effect. Geometric shapes, such as low-profile squares or hexagons, can add subtle visual interest without extending vertically into the room’s headspace.
When the light source is physically closer to eye level, preventing glare is essential for comfort. This makes the choice of lens opacity and diffuser material highly critical. Clear glass covers with exposed bulbs should be avoided in low-ceiling rooms, as they create intense, blinding hot spots. Instead, look for fixtures equipped with high-quality frosted or milky white acrylic diffusers. These materials soften the light, spreading it evenly across the room while hiding the individual LED chips or bulbs from direct view.
Finally, color coordination plays a major role in how the fixture’s profile is perceived. Selecting a flush mount with a trim or housing that matches your ceiling color (typically matte white) allows the fixture to visually merge with the ceiling plane. This seamless transition tricks the eye into perceiving the ceiling as one continuous, uninterrupted surface, which instantly makes the room feel larger. If you prefer a contrasting finish, such as matte black, brushed brass, or chrome, ensure the physical profile of the fixture is exceptionally thin so the contrast acts as a subtle design accent rather than a heavy visual barrier.
Key Specifications to Verify Before Buying
Before purchasing any ceiling fixture, you must verify several technical and structural specifications to ensure a safe, durable, and compliant installation. This is particularly important when dealing with fixed electrical wiring and varying environmental conditions.
First, inspect the existing junction box in your ceiling. You must verify its shape (round, octagonal, or square), its depth, and its weight-bearing capacity. Standard plastic junction boxes may not support heavier glass or metal fixtures, whereas concrete-anchored metal boxes provide much higher stability. Additionally, check the mounting bracket compatibility; some slim LED fixtures require specialized mounting plates that must align perfectly with the screw holes of your existing ceiling box.
Electrical compatibility is another vital factor. In the Philippines, the standard residential electrical system operates at 220V to 240V at a frequency of 60Hz. Ensure that any fixture you purchase is explicitly rated for this voltage range to prevent premature driver failure, overheating, or electrical hazards. If you plan to use a dimming system to adjust light levels, you must verify that the fixture—especially if it features an integrated LED driver—is compatible with your specific type of dimmer switch (such as leading-edge, trailing-edge, or smart dimming protocols). Using incompatible components can result in annoying flickering, buzzing noises, or permanent damage to the LEDs.
| Specification | Requirement for Low Ceilings | Why It Matters |
|---|---|---|
| Voltage & Frequency | 220V–240V, 60Hz (Philippines standard) | Prevents driver damage, overheating, and fire hazards. |
| Profile Thickness | Less than 10 cm (Ideally 2.5 cm for ultra-thin) | Preserves headroom and maintains the 2.1-meter safety clearance. |
| IP Rating | IP44 or higher (for damp areas) | Protects internal electronics from tropical humidity and moisture. |
| Diffuser Material | Frosted acrylic or polycarbonate | Eliminates direct eye glare in low-overhead spaces. |
Environmental factors are equally critical in tropical climates. High humidity levels can cause moisture to accumulate inside ceiling fixtures, leading to short circuits, corrosion, and mold growth. For low ceilings in bathrooms, kitchens, laundry areas, or covered outdoor patios, you must select fixtures that are explicitly damp-rated or wet-rated (typically carrying an IP44 rating or higher). Dry-rated fixtures should only be used in climate-controlled bedrooms, living rooms, and dry hallways.
Always prioritize electrical safety during any installation or maintenance process. Before removing an old fixture or installing a new one, isolate the power supply by switching off the dedicated circuit breaker at your home’s main panel. Do not rely solely on a wall switch to cut the power. If your installation requires drilling into concrete ceiling slabs, modifying structural joists, running new fixed wiring, or dealing with older, ungrounded electrical systems, always consult and hire a licensed, qualified electrician to perform the work safely and in compliance with local electrical codes.
Common Sizing and Placement Mistakes to Avoid
Achieving a balanced lighting layout requires avoiding several common design and placement errors that can inadvertently highlight a room’s limited height.
One of the most frequent mistakes is choosing semi-flush mount fixtures or fixtures with decorative hanging elements for active walkways. While a semi-flush light may look beautiful in a showroom, its small drop stem can easily reduce the headroom below the safe 2.1-meter threshold in a standard condo. Save these designs strictly for spaces over dining tables or sideboards where people do not walk.
Another common error is ignoring the texture and color of your ceiling. If your ceiling has a rough concrete finish or a heavy plaster texture, placing a high-output flush mount directly against it can cast long, dramatic shadows across the uneven surface. This effect, known as “grazing,” highlights every imperfection and can make the ceiling feel lower and heavier. To minimize this, ensure your ceiling is painted with a flat, non-reflective white paint, which helps diffuse and scatter the light smoothly across the room.
Additionally, avoid placing flush mount fixtures too close to other ceiling-mounted utilities. High-rise apartments often feature split-type air conditioning units, structural concrete beams, ventilation grilles, and smoke detectors. Installing a wide light fixture too close to these elements can block the spread of light, create awkward shadows, and violate safety clearances. Maintain a reasonable distance between your light fixture and any wall-mounted or ceiling-mounted obstructions to ensure an even, uninterrupted light pattern.
Finally, always consider your furniture layout before finalizing your lighting placement. For example, if you place a wide, low-profile flush mount near a tall wardrobe or kitchen cabinet, you must verify that the cabinet doors have enough clearance to swing open fully without striking the side of the fixture. Taking the time to map out your furniture heights and door swings beforehand will prevent costly reinstallation mistakes later on.
Frequently Asked Questions (FAQ)
Can I use a semi-flush mount light in a low-ceiling room?
Yes, but only under specific conditions. A semi-flush mount light, which hangs slightly below the ceiling on a short stem, should only be used in zones where there is no foot traffic directly underneath. Suitable locations include directly over a dining table, a kitchen island, a coffee table, or a bed. In these stationary areas, the furniture naturally prevents people from walking under the light, eliminating the risk of anyone bumping their head. However, for active walkways, hallways, and open living room paths, a true flush mount or an ultra-thin LED panel is mandatory to maintain the standard 2.1-meter safety clearance.
Do flush mount lights provide enough brightness for a room with no other light sources?
While a single, properly sized flush mount light can provide sufficient general ambient light for a small room, relying on it as your sole light source in a low-ceiling space is rarely ideal. Because flush mounts sit high on the ceiling, their light spreads downward and outward, which can sometimes leave the corners of the room in shadow, making the space feel smaller and more enclosed. To create a bright, inviting atmosphere, it is highly recommended to layer your lighting. Combine your central flush mount with secondary light sources, such as slim wall sconces, floor lamps, or table lamps, to fill in dark corners and distribute light evenly throughout the room.

Community discussion
Share your experience or ask a question. Comments are reviewed before publication.