
Choosing the right ocean projection light depends on matching the projector’s throw distance and light output to your room’s physical dimensions, wall colors, and ambient light levels. In compact spaces like urban condominiums, a smaller, adjustable-angle lamp prevents the wave effect from becoming overly concentrated or washed out, while larger rooms require wider beam angles or multiple units to achieve an immersive underwater atmosphere. In the Philippines, where high humidity and warm evenings make indoor relaxation a priority, creating a cool, watery oasis at home is a popular way to unwind. However, achieving that perfect, soothing ripple effect requires careful planning of your space, placement, and device specifications.
Assessing Your Room Dimensions and Layout
Before buying an ocean projection light, you must assess the physical canvas of your room. Start by measuring the width and height of the wall or ceiling area where you want the waves to ripple. Knowing these dimensions prevents you from purchasing a device that is either too weak to cover the surface or so powerful that it causes visual discomfort in a small space.
Keep in mind that architectural features can disrupt the projection. Built-in shelves, hanging air conditioning units, tall wardrobes, and window frames can block or cut off the light beam, casting awkward shadows that break the illusion of an endless ocean. If your room has a ceiling fan—a common fixture in tropical homes—placing the projector directly beneath it can cause a distracting, chopped shadow effect as the blades rotate through the beam.
Products mentioned in this guide
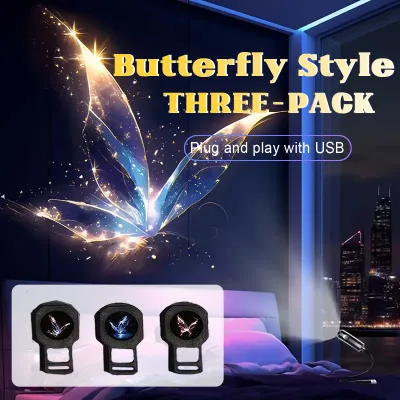
![KOQZM💖[HOT SALE]🎈🎈 360 Rotating LED Ocean Projector Night Light USB Charging Dynamic Lamp with Color Effects for Bedroom Relaxing](https://img.lazcdn.com/g/p/7b5a16199402537f077440522bbc71f5.jpg_400x400q80.jpg_.webp)
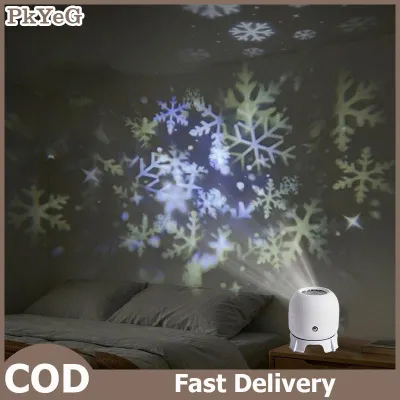
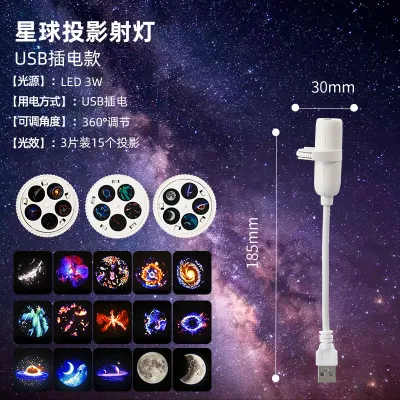
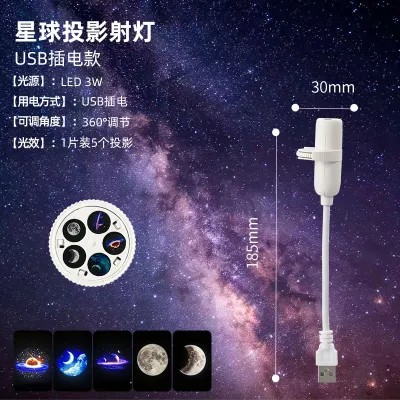
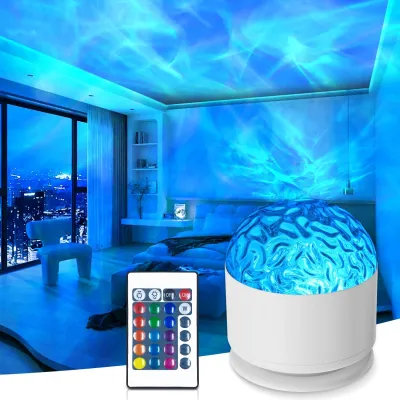
Prices are valid at publication and may change. Please refer to the product page for the latest price.
Identify your primary focal area where the ocean effect will be most visible and enjoyable. For most bedrooms, this is the ceiling directly above the bed or the wall opposite the headboard, allowing you to look at the waves while lying down. In living rooms, a large, unobstructed accent wall behind the television or sofa is often the best target. Take note of the distance from your planned projector placement to this target surface, as this throw distance directly dictates the size and clarity of the wave pattern.
Matching Light Coverage and Brightness to Your Space
To avoid a projection that is either too small to be immersive or too faint to be seen, you must match the light’s specifications to your room’s dimensions. Check the manufacturer’s product label or user manual for the recommended throw distance and maximum coverage area. In typical residential spaces, such as studio apartments or cozy bedrooms, a projector designed for a throw distance of 1.5 to 3 meters is usually ideal.

If the throw distance is too short, the wave pattern will be concentrated into a small, overly bright circle. If it is too long, the light will disperse too much and lose its vibrant color. Evaluate your room’s ambient light levels based on window placement and external light sources. If your room has large windows facing bright streetlights or if you prefer to keep a hallway light on, you will need a projector with higher light output to prevent the waves from washing out.
Look for models that feature adjustable focus rings and variable beam angles to customize the wave spread. An adjustable lens allows you to sharpen the wave ripples regardless of whether the lamp is placed on a low bedside table or a high shelf. Variable beam angles let you widen or narrow the spread of the light to fit your specific wall size without physically moving the device. Additionally, verify the dimming method—whether via a remote control, a smartphone app, or physical buttons—so you can easily adjust the intensity to match your personal comfort level.
Placement and Power Setup for Condos and Compact Rooms
Finding the right spot for your ocean projection light involves balancing visual impact with daily convenience and safety. Tabletop placement, such as on a nightstand, desk, or media console, is the most common and accessible option. This setup allows for easy adjustments, quick access to control buttons, and simple integration with existing decor.
Floor placement can create a dramatic, upward-flowing wave effect that covers the entire ceiling, but it requires a clear space free of foot traffic. If you choose to place the projector on the floor, ensure it is tucked away in a corner or beside a heavy piece of furniture to prevent it from being accidentally kicked or stepped on. For a permanent, unobstructed setup, some users prefer ceiling or wall mounting. If you choose a fixed installation, verify the mounting hardware is secure, check that the surface can support the weight, and always isolate the power supply before installing any fixed electrical brackets.
Power cord routing is a critical safety consideration, especially in compact condo layouts where outlets may be limited. Avoid running cords across walkways where they present a tripping hazard. Use adhesive cord clips along baseboards to keep the cable neat, secure, and out of sight. Because these devices are electronic, they generate heat during operation. Ensure the projector has adequate clearance for ventilation; blocking the ventilation grilles or placing the device in a tight, enclosed shelf can lead to overheating, which shortens the lifespan of the LEDs and internal motors.
In tropical environments, you must also consider the installation environment. Avoid placing the projector near open windows where sudden rain showers or high humidity could expose the electrical components to moisture. Unless the manufacturer explicitly states an outdoor or wet-area IP rating, treat the projector as an indoor-only device and keep it away from damp areas.
Common Room-Matching Mistakes to Avoid
One of the most common mistakes is placing the projector too close to the target wall. This results in a highly concentrated, intensely bright pool of light that can cause eye strain rather than relaxation. If your space is limited, look for a wide-angle lens model that can spread the light even at a short distance, or angle the projector diagonally across the room to maximize the throw distance.
Another frequent error is ignoring ambient light washout. Trying to run an ocean projector in a room with bright overhead fluorescent lights or unshaded windows during the day will result in a barely visible, faded pattern. To enjoy the deep blues and greens of the ocean effect, use blackout curtains or schedule your projection sessions for the evening when the room is naturally dark.
Overlooking ceiling height constraints can also distort the wave pattern. In rooms with very high ceilings, a low-powered projector may not reach the top surface with enough intensity. Conversely, in rooms with low ceilings or dropped soffits, the angle of projection must be carefully adjusted to prevent the wave pattern from warping or stretching unnaturally across the joints.
Finally, always verify the electrical specifications of your device before plugging it in. Ensure the voltage of the projector matches your home’s electrical supply, which is typically 220V in the Philippines. Using an incompatible adapter or plugging a 110V device directly into a 220V outlet without a proper transformer can permanently damage the electronics and pose a safety hazard. Look for recognized electrical certification marks on the packaging or device body to ensure it meets safety standards.
Frequently Asked Questions (FAQ)
Can I use an ocean projection light in a room with light-colored walls?
Yes, light-colored walls—such as white, cream, or light gray—are actually the ideal canvas for an ocean projection light. These light surfaces reflect the projected colors and wave patterns much more vividly than dark or highly saturated walls, which tend to absorb the light. If your walls are exceptionally bright white, you may even be able to lower the projector’s brightness setting to achieve a softer, more relaxing ambiance.
Do I need a special screen for ocean wave projectors?
No, you do not need a specialized projection screen to enjoy an ocean wave projector. Standard flat, painted walls or ceilings work perfectly for this type of ambient lighting. While highly textured surfaces like rough plaster or wood paneling can slightly distort the wave pattern, this often adds a unique, organic depth to the water effect rather than ruining it.
How do I clean the lens if the projection becomes blurry?
If the projected waves begin to look blurry or dusty, turn off and unplug the device first to ensure safety. Use a clean, dry microfiber cloth—similar to the type used for eyeglasses—to gently wipe the outer lens surface. Never use harsh chemical cleaners, alcohol, or abrasive paper towels, as these can scratch the lens coating or cloud the plastic, permanently degrading the projection quality. If dust has accumulated inside the housing, consult the manufacturer’s manual for safe cleaning instructions or contact their customer support.

Community discussion
Share your experience or ask a question. Comments are reviewed before publication.