
Choosing the right flush mount light size for a condo room requires balancing physical dimensions, ceiling clearance, and light output. In modern condominiums, where ceiling heights are often compact and spaces serve multiple purposes, selecting a fixture that is too large can overwhelm the room, while one that is too small will fail to provide adequate illumination. By measuring your space, calculating the necessary diameter, and verifying the electrical specifications of your Wellmax lighting fixture, you can achieve a balanced and well-lit home.
Measure Your Condo Room Dimensions and Ceiling Clearance
To find the ideal fit, start by measuring the length and width of the room using a standard tape measure. Multiply these two numbers to find the total area in square meters or square feet, which serves as the foundation for your lighting layout. In many urban condominiums, rooms are designed with multi-functional zones, so measuring the specific area intended for dining or lounging is just as important as measuring the entire room.
Next, measure the vertical distance from the floor to the ceiling. Many modern condo units feature structural concrete slabs or dropped gypsum ceilings that reduce vertical clearance, making low-profile flush mount fixtures highly practical. Be sure to account for any structural beams, columns, or built-in cabinetry that might obstruct the light distribution or limit where the fixture can be mounted.
Products mentioned in this guide
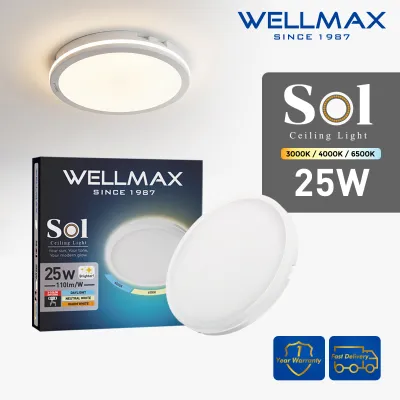
Prices are valid at publication and may change. Please refer to the product page for the latest price.
Finally, identify how the room is used. A kitchen or study requires focused, bright illumination, whereas a bedroom or living area benefits from softer, ambient light that does not cause glare. Understanding the room’s primary function helps you determine not only the physical size of the fixture but also the intensity of the light it needs to emit.
Calculate the Ideal Flush Mount Light Diameter
A reliable industry guideline for sizing ceiling fixtures is to add the room’s length and width in feet, then convert that sum directly into inches to find the ideal fixture diameter. For readers accustomed to the metric system, you can convert your measurements by multiplying meters by 3.28 to get feet. For example, if a condo bedroom measures 3 meters by 3 meters, that is approximately 10 feet by 10 feet. Adding those numbers yields 20, suggesting a fixture diameter of approximately 20 inches, which is roughly 50 centimeters.

For open-plan condo layouts, such as a combined living and dining area, you should size fixtures for individual functional zones rather than the entire open space. A narrow hallway, foyer, or walk-in closet requires a much smaller, streamlined fixture to prevent the space from feeling cramped. Using a massive fixture in a small entryway can make the ceiling feel lower and the walls feel closer together.
Consider the visual weight of the light fixture in relation to your furniture. A bulky, thick-profile light can make a low ceiling feel lower, whereas a slim, minimalist Wellmax lighting fixture preserves an open, airy feel. If your room features heavy, dark furniture, a slightly larger or more prominent light fixture can help balance the visual weight of the space.
Determine the Right Wattage and Brightness Level
Brightness is measured in lumens, and the amount you need depends on the room’s size and function. Generally, living rooms and bedrooms require about 10 to 20 lumens per square foot, while kitchens and bathrooms need closer to 70 to 80 lumens per square foot. To find the total lumens required, multiply the room’s square footage by the recommended lumens for that specific room type.
When browsing Wellmax lighting options, check the product packaging or specification sheet for the rated lumen output and LED wattage. Because LED technology is highly energy-efficient, focus on the actual lumen output rather than traditional incandescent wattage equivalencies to ensure the room is sufficiently bright. A lower wattage LED can produce the same brightness as a high-wattage older bulb, saving energy while keeping heat output low in tropical climates.
Take note of your condo’s natural light sources, window placements, and interior paint colors. Rooms with large windows or light-colored walls reflect light more efficiently, meaning you may require slightly lower wattage or fewer lumens to achieve the desired brightness. Conversely, rooms with dark accent walls or minimal natural light will require higher lumens to feel adequately illuminated.
Verify Installation Clearances and Electrical Compatibility
Before purchasing, verify the fixture’s profile height to ensure it leaves adequate headroom for tall occupants and complies with local building safety guidelines. A standard clearance of at least 7 feet (approximately 2.1 meters) from the floor to the bottom of the light fixture is highly recommended. This is especially critical in high-traffic areas like hallways and entryways where people move frequently.
Examine the ceiling junction box to ensure it can support the weight of the new fixture and that the mounting hardware matches. If you are replacing a lightweight fixture with a heavier model, you may need to reinforce the junction box or use specialized mounting brackets. Always check the manufacturer’s specifications for weight limits and mounting requirements.
Always confirm that the fixture’s rated voltage matches your condo’s electrical supply, which is typically 220V in the Philippines. Because working with fixed electrical wiring carries risks of shock or fire, always isolate the power at the main circuit breaker before starting, follow the manufacturer’s installation instructions, and consult a qualified professional for any complex wiring tasks.
Common Sizing and Selection Mistakes to Avoid
One frequent error is choosing a fixture that is too small for a spacious living area, which makes the light look visually lost and leaves the corners of the room in shadow. This mistake often results in uneven lighting, forcing you to rely heavily on secondary lamps to fill the dark spots.
Another mistake is ignoring the fixture’s drop length in rooms with exceptionally low ceilings, which can create a physical hazard or make the room feel claustrophobic. Always measure the total height of the fixture, including any mounting brackets, to ensure it does not hang too low.
Lastly, homeowners often forget to check if their chosen LED fixture is compatible with existing dimmer switches. Installing a non-dimmable LED light on a dimmer circuit can cause flickering, buzzing, or premature driver failure. Always verify the dimming specifications on the product label before making a purchase.
Frequently Asked Questions (FAQ)
Can I install a Wellmax flush mount light in a condo with a concrete ceiling?
Yes, but concrete ceilings present unique installation challenges because you cannot easily recess wiring or junction boxes. You may need to use a surface-mounted junction box or specialized masonry anchors and drill bits to secure the fixture safely. Always check your condominium association’s guidelines regarding drilling into structural concrete slabs, as some properties strictly prohibit or limit modifications to structural elements.
Are Wellmax flush mount lights suitable for condo bathrooms?
Suitability depends entirely on the fixture’s specific environmental rating. Bathrooms accumulate high levels of humidity and moisture, requiring fixtures rated for damp or wet locations. Before installing any light in a bathroom, inspect the product label or manual to verify its IP (Ingress Protection) rating or damp-location certification to ensure safe operation.

Community discussion
Share your experience or ask a question. Comments are reviewed before publication.