
Condos in the Philippines, especially in dense urban areas like Metro Manila, Cebu, and Davao, often feature low ceiling heights, typically ranging from 2.4 to 2.7 meters. When dealing with these compact vertical spaces, selecting the right overhead lighting is crucial to avoid making the rooms feel cramped or visually compressed. Tri-color LED flush mount lights and recessed pin lights led tri color offer an ideal solution by combining a low physical profile with the flexibility to change color temperatures to suit different times of day. By transitioning from a crisp daylight for working to a warm white for evening relaxation, these fixtures maximize both utility and visual space. However, finding the right fixture requires looking past marketing buzzwords and carefully evaluating physical dimensions, electrical compatibility, and installation constraints.
Essential Design and Profile Constraints for Low Ceilings
Many manufacturers label fixtures as “ultra-thin” or “slimline,” but these terms are highly subjective. To verify actual clearance, buyers must check the technical specifications sheet for the exact depth measurement. For low ceilings, a total fixture thickness of 2 centimeters to 5 centimeters is generally recommended to maintain an open feel. Anything thicker than 7 centimeters can begin to visually dominate a low-ceilinged room, drawing the eye downward and making the ceiling feel lower than it actually is.
The diameter of the fixture must also match the room’s scale. A massive 50-centimeter fixture in a small 10-square-meter condo bedroom can look overwhelming, while a tiny 15-centimeter light will look lost and fail to distribute light evenly. A helpful guideline is to measure the room’s dimensions and select a fixture diameter that provides balanced coverage without crowding the ceiling plane.
Products mentioned in this guide
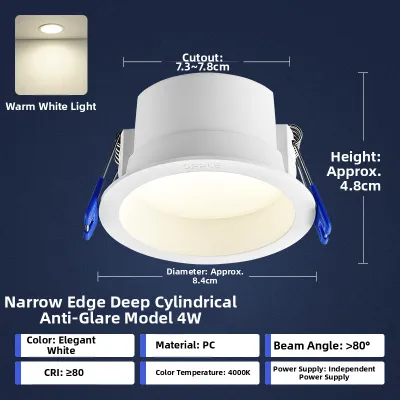
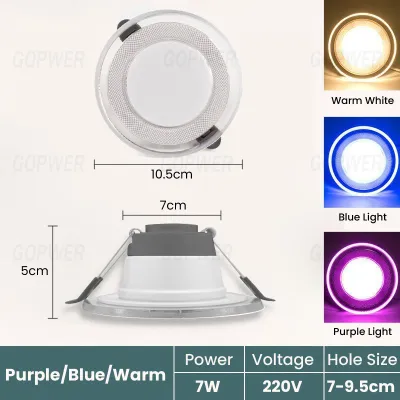
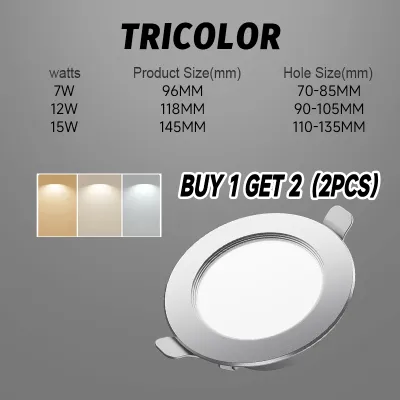
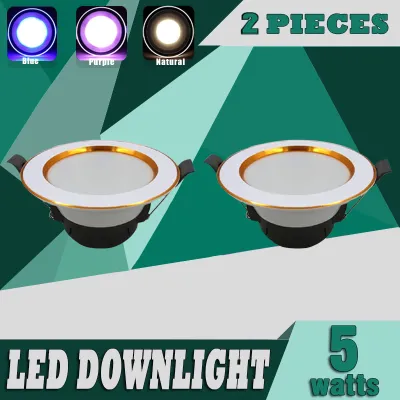
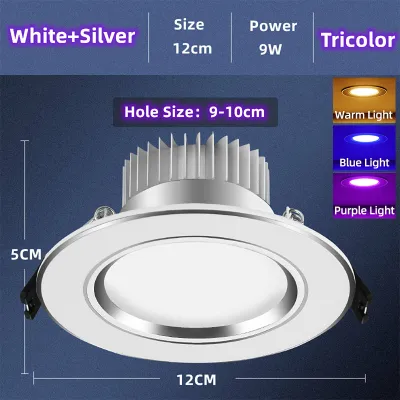
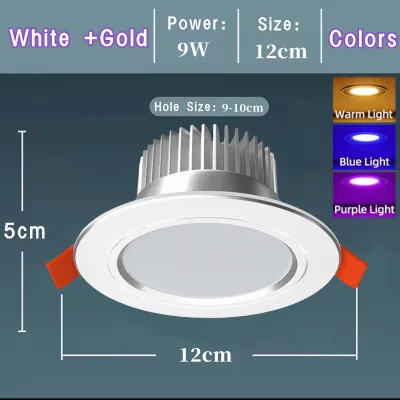
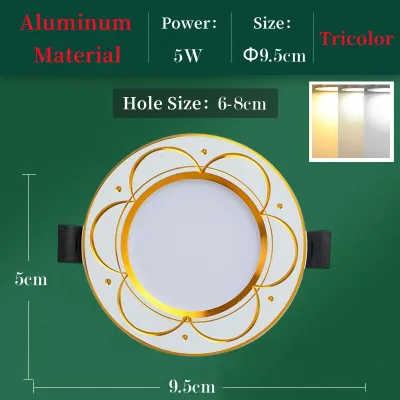
Prices are valid at publication and may change. Please refer to the product page for the latest price.
The design of the bezel (the outer rim) and the diffuser (the translucent cover) significantly impacts how thick the light looks when installed. Frameless or ultra-thin bezels blend seamlessly into white concrete or gypsum ceilings, reducing the visual footprint. Diffusers made of high-quality polycarbonate or acrylic should distribute light evenly across the entire surface, preventing harsh hotspots and creating a soft, wide-angle glow that washes over the walls, which visually expands the room.
Furthermore, the tropical climate in the Philippines introduces unique environmental factors. High humidity and ambient heat can cause concrete ceilings to retain warmth, which can affect the performance of flush-mounted fixtures. Choosing a design with adequate rear ventilation gaps or heat sinks helps dissipate heat away from the ceiling surface, preserving both the paint finish and the internal electronics of the light.
Many Philippine condos are built with solid concrete slab ceilings, which do not allow for recessed fixtures unless a gypsum drop ceiling is installed. For solid concrete ceilings, surface-mounted flush mount lights are the practical choice because they mount directly to the surface with minimal clearance. If your condo has a drop ceiling or a soffit, you can opt for recessed pin lights led tri color, which sit completely flush with the ceiling surface, offering the ultimate low-profile aesthetic.
Evaluating Tri-Color Functionality and Light Output
Tri-color LED fixtures typically offer three distinct color temperatures: warm white (around 3000K), cool white or neutral white (around 4000K), and daylight (around 6000K to 6500K). The switching mechanism is a critical usability factor. Most standard tri-color fixtures use a toggle system controlled by your existing wall switch. Flicking the switch off and on within a few seconds cycles the light through the three colors. While simple, this can sometimes lead to desynchronization if you have multiple lights on the same switch. Other models utilize a physical switch on the back of the fixture (set-and-forget), a dedicated remote control, or a mobile application. Buyers should choose the mechanism that best fits their daily routine and wiring setup.

Wattage measures energy consumption, while lumens measure actual light output. For a primary light source in a condo living room or kitchen, look for a fixture that delivers sufficient lumens to illuminate the entire space. As a general rule, kitchens and workspaces require higher lumen levels (around 300 to 400 lumens per square meter) compared to bedrooms or hallways (around 100 to 200 lumens per square meter). Check the product label for the lumen-to-watt ratio; efficient LED fixtures should produce a high lumen output with relatively low wattage.
The Color Rendering Index (CRI) rating indicates how accurately a light source reveals the true colors of objects, furniture, and skin tones compared to natural sunlight. A CRI of 80 or higher is standard for residential spaces, ensuring that your interior decor, food, and clothing do not look dull or distorted under artificial light.
Not all tri-color LED drivers are dimmable. If you plan to use a wall dimmer switch to adjust brightness levels, you must verify that both the LED fixture and its internal driver are explicitly labeled as dimmable. Using a non-dimmable LED light with a standard dimmer switch can cause flickering, buzzing, or premature driver failure.
Additionally, the stability of the internal driver is paramount in the Philippines, where voltage fluctuations and power surges can occur. A high-quality driver with built-in surge protection will safeguard the delicate LED chips from premature failure during sudden power interruptions, ensuring the tri-color switching mechanism remains reliable over years of daily use.
Electrical Safety and Installation Boundaries
In the Philippines, the standard residential electrical supply is 220V to 230V at a frequency of 60Hz. Many imported lighting fixtures are designed for 110V or 50Hz systems. Installing an incompatible fixture can lead to immediate electrical failure, overheating, or fire hazards. Always verify that the product specifications explicitly state compatibility with 220V-240V and 60Hz before purchasing.
Look for recognized electrical safety certification marks on the packaging. In the local market, look for the Philippine Standard (PS) mark or the Import Commodity Clearance (ICC) sticker, which indicate that the product has undergone safety testing. International certifications such as CE, RoHS, or UL also provide assurance of manufacturing quality and electrical safety.
Before mounting any fixture, inspect the existing ceiling structure. Concrete ceilings require sturdy masonry anchors, while gypsum or plasterboard ceilings require specialized toggle bolts or attachment to the underlying metal framing to support the weight of the fixture safely. Ensure the existing junction box is large enough to house the fixture’s driver and wire connectors without pinching or crimping the electrical wires.
While replacing an existing light fixture on a simple two-wire system can often be a straightforward DIY task, certain scenarios require a licensed professional. If your condo’s ceiling lacks a junction box, if you need to run new electrical lines, if the existing wiring is degraded or lacks a ground wire, or if you are installing a complex multi-light switching system, you must hire a qualified electrician. Working with live electricity poses severe risks of shock and fire, and professional installation ensures compliance with the Philippine Electrical Code.
Furthermore, the high humidity levels in tropical environments can accelerate the corrosion of exposed copper wires and terminal connections. A professional installer will ensure that all wire splices are properly insulated with high-quality electrical tape or enclosed within sealed terminal blocks to prevent moisture ingress, reducing the risk of short circuits or ground faults over time.
Building Your Shortlist: Pre-Purchase Verification Checklist
When comparing options on online marketplaces or in local hardware stores, do not rely solely on the front-facing product photos. Check the dimensional diagram. Ensure that the listed thickness includes the mounting bracket, any protruding screws, and the external LED driver (transformer). Some “slim” lights require an external driver box that must be tucked into the ceiling cavity, which is impossible with a solid concrete ceiling.
LED fixtures are electronic devices that can occasionally experience driver failure. Review the manufacturer’s warranty terms. A reliable brand should offer at least a one-year warranty. Additionally, check the return and exchange policies of the local retailer or online store to ensure you can easily replace a defective unit.
Most modern slim flush mount lights feature integrated LED chips soldered directly to the circuit board. While these have a long operational lifespan, if a single component fails, the entire fixture must usually be replaced. If long-term maintenance is a priority, look for fixtures with modular, replaceable LED drivers or light engines, which allow you to swap out the broken part without discarding the entire housing.
Verify what is included in the box. A complete kit should contain the mounting bracket, expansion plugs, screws, and wire connectors (such as terminal blocks or wire nuts). Having these components included saves time and ensures you do not have to make extra trips to the hardware store during installation.
In tropical climates, small insects (locally known as gamo-gamo) are frequently attracted to light sources and can find their way inside poorly sealed diffusers. When building your shortlist, check if the fixture has an Ingress Protection (IP) rating, such as IP20 or IP44, or if it features an insect-proof sealed design. A fully sealed housing prevents bugs, dust, and moisture from accumulating inside the diffuser, keeping your ceiling light clean and bright without requiring frequent disassembly.
Frequently Asked Questions (FAQ)
Can I install a flush mount light if my ceiling has no existing junction box?
Yes, but it requires careful structural and electrical preparation. For solid concrete ceilings, you can install a surface-mounted utility box or use a specialized mounting bracket that anchors directly into the concrete using masonry plugs. The wiring must then be run through surface-mounted conduits (such as PVC moldings) to connect to a power source. If you have a hollow gypsum ceiling, you must install a retro-fit junction box secured to the ceiling joists to support the weight of the fixture. Because this involves cutting into the ceiling and handling structural loads, you should consult a licensed electrician if you are unsure of the structural integrity or wiring path.
Does the tri-color feature require a special wall switch?
No, standard tri-color LED flush mount lights do not require a special wall switch. They are designed to work with standard, single-pole on/off wall switches. The internal LED driver contains a toggle memory chip that detects when the power is quickly turned off and on again, cycling the light to the next color temperature (e.g., from warm white to cool white, then to daylight). However, if you use a smart switch, a dimmer switch, or a remote-controlled system, you must verify compatibility, as some electronic switches can interfere with the driver’s toggle cycle or cause the lights to fall out of sync.
How do I clean the acrylic diffuser without yellowing it?
To clean an acrylic or polycarbonate diffuser without causing it to yellow, cloud, or crack, avoid using harsh chemical solvents, ammonia-based glass cleaners, or abrasive scrubbing pads. These chemicals degrade the plastic polymer over time, accelerating yellowing under UV and heat exposure. Instead, turn off the power, carefully remove the diffuser, and wipe it down with a soft microfiber cloth slightly dampened with lukewarm water and a drop of mild dishwashing soap. Rinse with clean water, dry it completely with a lint-free cloth, and reinstall it only when it is entirely dry to prevent moisture from entering the electrical components.

Community discussion
Share your experience or ask a question. Comments are reviewed before publication.