
Installing a solar flood light on a condo balcony is an excellent way to illuminate your outdoor space without adding a single ₱ to your monthly electricity bill. While a 200W-class solar flood light, such as a Bosca model, is typically designed for high-intensity security lighting, it can be adapted to create a warm, inviting ambient atmosphere. Achieving this balance requires careful planning, strategic positioning, and a clear understanding of your condominium’s structural guidelines. By focusing on indirect lighting techniques and secure, non-invasive mounting methods, you can transform your balcony into a cozy evening retreat.
Pre-Installation Checks for Condo Balconies
Before purchasing or mounting any equipment, you must evaluate your balcony’s environmental conditions. The primary factor for any solar-powered system is sun exposure. In the Philippines, balconies facing south, east, or west generally receive the most consistent sunlight throughout the year. If your balcony faces north or is heavily shaded by adjacent high-rise buildings, the solar panel may not receive enough direct sunlight to charge the battery fully. Observe the sun patterns on your balcony for a few days to identify the areas that receive at least four to six hours of unobstructed sunlight daily.
Next, consult your condominium’s Property Management Office (PMO) or review the tenant handbook. Most condominium corporations enforce strict rules regarding the building’s exterior appearance and structural integrity. Drilling into exterior concrete walls or columns is frequently prohibited because it can compromise waterproofing layers or structural concrete. Hanging heavy objects over railings is also highly regulated to prevent safety hazards during strong winds or typhoons. Understanding these boundaries beforehand will help you decide whether to proceed with a standard drilled installation or opt for non-invasive mounting alternatives.
Products mentioned in this guide
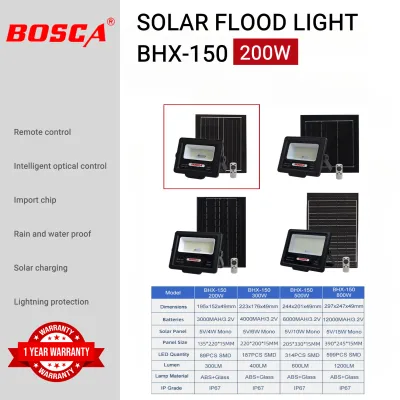
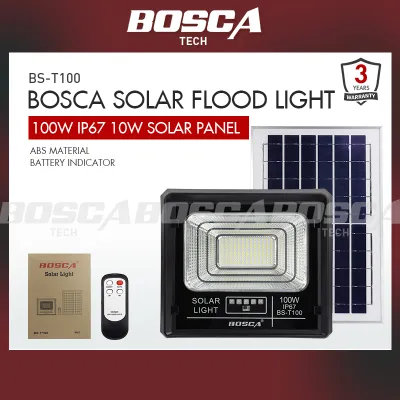
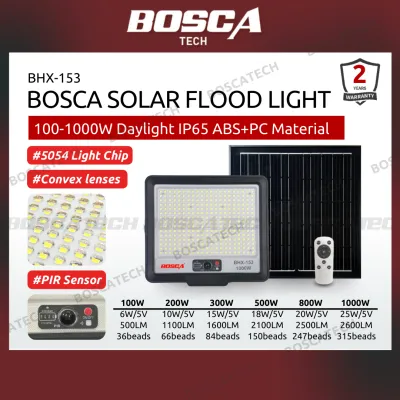
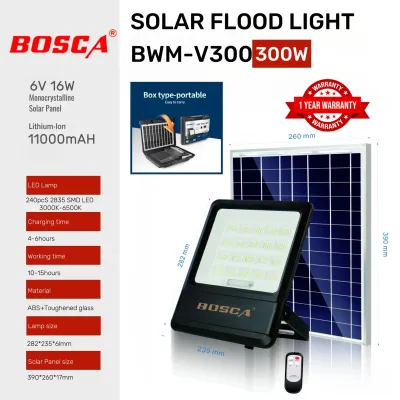
Prices are valid at publication and may change. Please refer to the product page for the latest price.
Finally, assess the physical materials of your balcony and verify the technical specifications of your lighting kit. Most modern condos feature concrete walls, glass panels, or metal railings. Each material requires a specific mounting strategy. Additionally, verify the fixture’s dimensions, weight, dimming capabilities, and electrical certifications to ensure it is rated for wet outdoor environments. Ensure that the chosen mounting surface can easily support the combined weight of the solar panel and the flood light fixture, especially when subjected to high wind loads.
Choosing the Right Mounting Location and Angle
To maximize the efficiency of your solar flood light, the solar panel and the light fixture should be treated as two separate components with different positioning requirements. The solar panel must be placed where it can capture the maximum amount of solar radiation. In the Philippines, which lies close to the equator, angling the solar panel at approximately 10 to 15 degrees facing south is generally recommended. This angle helps capture optimal sunlight year-round while ensuring that rainwater can easily slide off the surface, washing away accumulated dust and debris.

The light fixture itself requires a completely different positioning strategy to achieve ambient lighting. A 200W-class flood light produces a highly intense, direct beam of light. If you point this fixture directly downward onto your balcony floor or outward into the open air, it will create harsh glare and likely disturb your neighbors in opposite units. To create a soft, ambient glow, aim the light fixture toward a light-colored wall, a corner, or large potted plants. This technique, known as wall-washing or indirect lighting, reflects and diffuses the light, scattering it gently across the balcony space.
Because the Bosca 200W solar flood light features a split design, you have the flexibility to place the solar panel in a high-exposure area while keeping the light fixture tucked away in a shaded, comfortable spot. The two components are connected by a dedicated cable. When planning your layout, measure the path the cable will take from the railing or outer wall to the fixture. Ensure the cable can be routed neatly along corners, under railings, or behind planters where it will not be pinched by doors or present a tripping hazard for anyone walking on the balcony.
Step-by-Step Installation Guide
Before beginning the installation, gather all the necessary tools and materials. If your condo administration permits drilling, you will need a power drill, masonry drill bits that match your wall anchors, a hammer, a screwdriver, and safety glasses. If you are using a no-drill method, prepare heavy-duty, UV-resistant nylon zip ties, stainless steel hose clamps, or specialized mounting brackets designed for outdoor railings. Having these items ready will streamline the process and ensure a secure installation.
If you are proceeding with a drilled installation on a permitted concrete wall, start by holding the mounting bracket against the wall and marking the screw holes with a pencil. Use a spirit level to ensure the bracket is perfectly straight. Drill the holes using the appropriate masonry bit, taking care not to force the drill. If you encounter sudden resistance, metallic contact, or suspect the presence of hidden electrical conduits or water pipes within the wall, stop drilling immediately and consult a qualified professional. Insert the wall anchors, align the bracket, and tighten the screws securely.
For balconies where drilling is prohibited, no-drill alternatives are highly effective and safe. To mount the solar panel, position its bracket against the metal balcony railing. Thread heavy-duty, outdoor-rated zip ties or stainless steel hose clamps through the bracket holes and wrap them tightly around the railing bars. Tighten them using pliers or a screwdriver until the bracket is completely immobile. For the light fixture, you can use a heavy-duty C-clamp mount attached to the railing, or secure the fixture’s bracket to a heavy, stable outdoor shelf or planter stand that cannot be easily tipped over by strong winds.
Once both brackets are secure, attach the solar panel and the light fixture to their respective mounts. Connect the cable from the solar panel to the light fixture’s input port. These systems typically use a threaded, waterproof connector. Align the internal pins carefully, push the connectors together, and screw the outer collar tightly to prevent moisture from entering the connection. Secure any loose, hanging cable to the railing or wall using zip ties to prevent wind damage and maintain a clean appearance. Always prioritize safety when working near the edge of a high-rise balcony; secure yourself and your tools to prevent accidental falls, and hire a qualified professional if you are uncomfortable working at heights.
Configuring Settings for Ambient Lighting Effects
Once your solar flood light is physically installed, the next step is adjusting its settings to transition it from a harsh security light into a pleasant ambient light source. Most 200W-class solar lights come with a multi-function remote control. Instead of running the light at 100% brightness, use the remote to dim the output to 30% or 50%. This reduction not only creates a much softer, warmer atmosphere but also significantly extends the battery life, ensuring the light remains active throughout the night even after cloudy days.
Additionally, pay close attention to the operating modes. Security flood lights often default to a motion-sensor mode, which flashes to full brightness when movement is detected. For a relaxing balcony environment, switch the fixture to a constant-on mode or a timed mode (such as 3, 5, or 8 hours of continuous operation after dusk). If the light output feels too cool or clinical, you can place a heat-resistant, outdoor-rated diffusing panel or a decorative bamboo screen in front of the fixture to soften the beam. Ensure that any custom screen does not block the fixture’s heat dissipation vents, as excessive heat can shorten the lifespan of the LEDs.
Finally, understand how the built-in dusk-to-dawn sensor operates. The solar panel itself acts as the light sensor; when it stops detecting light, it signals the fixture to turn on. If your balcony is exposed to bright ambient light from your living room, streetlights, or neighboring units, the sensor may fail to trigger the light. Position the solar panel away from these artificial light sources, or adjust the angle slightly so it only responds to natural daylight transitions.
Maintenance and Safety Checks
Regular maintenance is essential to keep your solar lighting system operating safely and efficiently in tropical environments. In the Philippines, airborne dust, vehicle emissions, and salt spray can quickly form a film over the solar panel. Wipe the glass surface of the solar panel with a soft, damp microfiber cloth every few weeks. Avoid using harsh chemical detergents or abrasive scrubbing pads, as scratches on the glass can permanently reduce the panel’s ability to collect sunlight.
Safety inspections should be performed periodically, especially before and after the typhoon season. Check all mounting brackets, screws, zip ties, and clamps to ensure they remain tight and secure. High winds can cause vibrations that loosen hardware over time. Inspect the plastic zip ties for signs of UV damage, such as color fading, brittleness, or cracking, and replace them immediately if they show wear. Examine the connecting cable for any signs of fraying, pinching, or water ingress at the connector joint.
If your solar light stops working or appears dim, follow a basic troubleshooting sequence. First, check if any new obstructions, such as growing plants or newly installed balcony items, are shading the solar panel. Next, verify that the cable connection between the panel and the light is tight and dry. If the light still fails to activate, consult the manufacturer’s user manual to identify any specific battery indicator lights or reset procedures that can help diagnose internal hardware issues.
Frequently Asked Questions (FAQ)
Can I install a solar light on a balcony with no direct sunlight?
Solar panels require direct sunlight to charge their internal batteries efficiently. If your balcony is completely shaded or north-facing, a standard solar setup will struggle to function. However, because split-type solar lights have a separate panel and fixture, you can use a compatible extension cable to place the solar panel on an outer ledge, railing, or rooftop area that receives direct sun, while keeping the light fixture in your shaded balcony space.
Do I need an electrician to install a solar flood light?
No, you do not need a licensed electrician to install a solar flood light. These systems operate on low-voltage DC power generated by the solar panel and stored in an internal battery, making them completely safe for DIY installation. However, if your installation requires routing cables through exterior walls, structural drilling, or working at dangerous heights near the edge of a high-rise balcony, you should consult a professional contractor or your building’s maintenance team to ensure safety.
Will a 200W solar light be too bright for a small balcony?
A 200W-class LED flood light is highly powerful and can easily overwhelm a small balcony if left unadjusted. To make it suitable for ambient lighting, you must manage the light output. Use the remote control to lower the brightness setting, and position the fixture so the light bounces off a wall or is diffused by outdoor plants. This prevents direct glare and creates a soft, indirect glow that is perfect for relaxing.

Community discussion
Share your experience or ask a question. Comments are reviewed before publication.