
Installing an LED RGB controller allows you to customize the color, brightness, and dynamic patterns of your ambient lighting. To complete this setup, you must connect the controller between your DC power supply and the LED strip lights, ensuring all voltage and polarity requirements match perfectly. Once the physical wiring is secure, you can pair the controller with your chosen interface—such as a physical remote control or a smart mobile application—to manage your lighting environment.
In modern condominium units, ambient lighting is an excellent way to define distinct zones within open-plan layouts or add depth to compact spaces. Achieving a reliable and safe installation requires careful preparation, precise wiring, and an understanding of your components’ electrical limits.
Preparation and Safety Checks Before Installation
Before handling any electrical components, you must verify that the voltage ratings of your power supply, RGB controller, and LED strip lights are identical. Most residential LED systems operate on either 12V or 24V DC. Mixing voltages—such as connecting a 24V power supply to a 12V LED strip—will permanently damage the strip and create a serious safety hazard, while underpowering a system will result in weak or non-functional lights.
Products mentioned in this guide
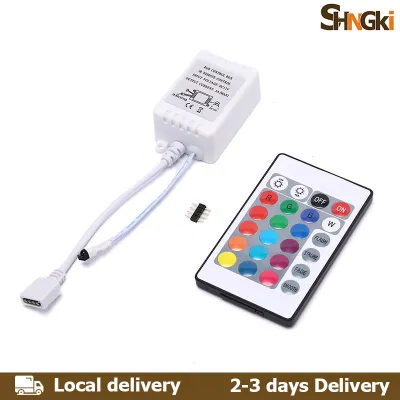
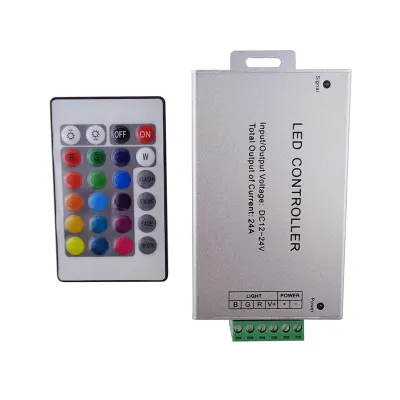
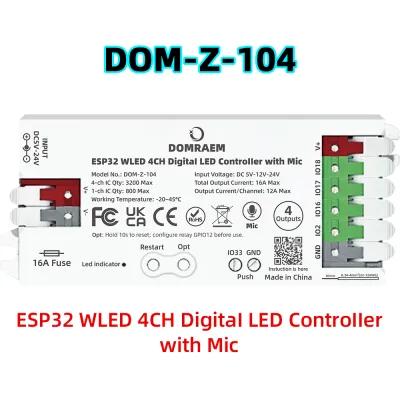
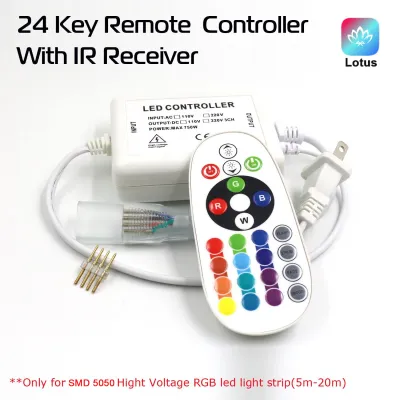
Prices are valid at publication and may change. Please refer to the product page for the latest price.
Next, calculate the total wattage of your planned installation to ensure your power supply can handle the load. Multiply the manufacturer’s specified wattage per meter by the total length of the strip you intend to run, then add a 20% safety margin to find the minimum required wattage for your power supply. For example, if your strip consumes 12 watts per meter and you install a 4-meter run, your total power draw is 48 watts; your power supply should be rated for at least 58 watts to prevent overheating and premature failure.
Always isolate the power source before beginning any physical installation work. For plug-in configurations, ensure the power adapter is completely unplugged from the wall outlet. If you are integrating the system into a hardwired setup connected directly to your condo’s electrical panel, switch off the corresponding circuit breaker and verify that the lines are dead using a non-contact voltage tester.
In high-density residential buildings, electrical safety is paramount to prevent fire hazards that could affect neighboring units. If your project requires running permanent wiring behind concrete walls, modifying your condo’s main electrical panel, or installing high-voltage hardwired power supplies, stop immediately and consult a licensed electrician. Complex structural modifications must comply with local building regulations and condominium association guidelines.
Tools and Materials Required
To ensure a smooth installation process without interruptions, gather all necessary components and tools before you begin. Your core components include the LED strip lights, a compatible LED RGB controller, a matched power supply, and the designated control interface, such as an infrared remote or a smart controller hub.

For the physical connections, prepare wire strippers, electrical tape, and heat shrink tubing to insulate and protect exposed wires. If you prefer a quick, solderless installation, procure 4-pin clip-on connectors designed specifically for the width of your RGB strip. If you choose to solder for a more permanent, vibration-resistant bond, prepare a soldering iron and lead-free solder.
Mounting accessories are essential for securing your installation on typical condo surfaces like painted drywall, concrete, or laminate cabinetry. High-quality double-sided mounting tape, mounting clips, or aluminum channels with diffusing covers are highly recommended. Aluminum channels not only provide a clean, professional aesthetic but also act as heat sinks, dissipating warmth to extend the lifespan of your LED strips in warm, tropical climates.
Step-by-Step Installation Process
Begin by preparing your power supply. If you are using an enclosed terminal power supply, connect the AC input wires (Line, Neutral, and Ground) to the designated input terminals, ensuring no bare copper strands are left exposed outside the terminal block. Tighten the terminal screws firmly, but do not plug the unit into the wall or turn on the breaker yet.
Next, connect the DC output of the power supply to the input side of the RGB controller. Locate the positive (V+) and negative (V- or COM) terminals on both devices. Using appropriate gauge wire, connect V+ to V+ and V- to V-. Double-check this polarity before proceeding; reversing these wires can instantly destroy the controller’s internal circuitry.
Now, connect the LED strip to the output side of the controller. Standard RGB strips feature four connection points: one positive common anode (marked V+ or a specific voltage like +12V/+24V) and three negative color channels (marked R, G, and B). Align these terminals precisely with the corresponding outputs on the controller.
If you are using solderless clip-on connectors, slide the end of the LED strip into the connector tray, ensuring the copper pads on the strip make direct contact with the metal pins inside, then snap the cover shut. If you are soldering, tin both the wire ends and the copper pads on the strip, then make brief, precise solder joints to avoid melting the flexible plastic substrate of the strip.
Once the connections are complete, plan the physical layout of your components. Mount the RGB controller in an accessible, well-ventilated location, such as behind a valance or inside an entertainment console. Use cable ties and adhesive mounting clips to secure loose wires, ensuring there is no physical strain or pulling force on the connection points, which can lead to loose wiring and intermittent power loss.
Setting Up the Control Interface
If your controller uses an infrared (IR) remote, position the controller’s small receiver wire so that the sensor probe has a direct, unobstructed line of sight to where you will stand when operating it. Remove the plastic battery saver tab from the remote control to activate it. For radio frequency (RF) remotes, direct line of sight is not required, allowing you to hide the controller completely inside cabinets, though you should keep it away from large metal objects that might block the signal.
For smart Wi-Fi or Bluetooth controllers, download the manufacturer’s official application onto your smartphone. Ensure your phone’s Bluetooth is enabled and that your local wireless router is broadcasting a 2.4GHz network, as most smart lighting controllers do not support 5GHz bands. Put the controller into pairing mode—usually achieved by holding down a physical button on the device or power-cycling the unit several times until the connected LED strip begins to flash.
Follow the on-screen prompts in the mobile application to connect the device to your home network. In high-density condo buildings with dozens of overlapping wireless networks, choosing a stable Wi-Fi channel on your router can help prevent connection drops and latency issues with your smart lighting.
Once the controller is successfully linked to the mobile application, you can integrate it with your preferred voice assistant ecosystem, such as Google Home or Amazon Alexa. Open your voice assistant app, search for the lighting manufacturer’s integration skill, log in with your account credentials to link the services, and assign the light strip to a specific room. This enables hands-free voice commands to adjust colors, brightness, and scenes.
Testing and Basic Troubleshooting
Before applying power to the system, perform a thorough visual inspection of the entire setup. Verify that no bare wires are touching each other, all terminal screws are tight, and the polarity from the power supply to the controller, and from the controller to the strip, is perfectly aligned.
Power on the system and perform an initial testing sequence. Use your remote or mobile application to turn the lights on, then cycle through the primary colors individually—red, green, and blue. This step confirms that the color channels are wired correctly and not swapped. Finally, test the dimming function from minimum to maximum brightness to ensure the controller modulates the power smoothly without causing the LEDs to buzz or flicker.
If the strip does not light up at all, re-verify the main power source and check the polarity of the DC input wires. If the colors do not match your selections (for example, pressing red displays green), the R, G, and B wires are likely swapped at the controller’s output terminals; turn off the power and correct the wiring order. If the lights flicker or dim significantly at the far end of the strip, check for loose connections or calculate if your power supply wattage is sufficient for the length of the run.
If you smell burning plastic, see smoke, or notice the controller or power supply becoming hot to the touch, immediately disconnect the power source. Do not attempt to turn the system back on. Contact the manufacturer’s support channel or a qualified professional to inspect the components for internal defects.
Frequently Asked Questions (FAQ)
Can I connect multiple LED strips to a single RGB controller?
Yes, you can connect multiple LED strips to a single controller, provided the total power draw does not exceed the controller’s maximum amperage and wattage limits. Check the controller’s specification label for its maximum output current per channel (often expressed in amperes, such as 3A per channel, totaling 9A).
When connecting multiple strips in a long continuous line (daisy-chaining), you will encounter voltage drop, where the resistance of the thin copper traces inside the strip causes the voltage to decrease over distance. This results in the far end of the strip appearing dimmer or shifting in color. To prevent this, connect the strips in a parallel configuration directly back to the controller, or use an RGB signal amplifier paired with an additional power supply to boost the control signal and power along the extended run.
Do I need a special controller for waterproof LED strip lights?
The necessity of a specialized controller depends entirely on where you install the system. For dry indoor areas of your condo, such as living room coves or bedroom headboards, a standard non-waterproof controller is perfectly safe. However, for damp or wet environments like bathrooms, kitchen sink backsplashes, or open balconies exposed to tropical humidity and rain, you must protect your electrical connections.
While the LED strip itself may have a high Ingress Protection (IP) rating (such as IP65 or IP67), standard RGB controllers are typically rated only for dry indoor use (IP20). If installing in a damp area, you must either place the controller in a dry, adjacent room and run low-voltage wires to the wet area, or house the controller inside a certified weatherproof, IP-rated junction box. Always consult the manufacturer’s guidelines and local electrical safety standards when planning installations near water sources.

Community discussion
Share your experience or ask a question. Comments are reviewed before publication.