
Installing ambient lighting is an effective way to personalize a condominium unit, especially when space is limited. Modern LED strip lights offer a versatile way to introduce accent lighting under cabinets, behind television screens, or along ceiling coves. However, condo living comes with specific structural and lease restrictions. Damaging the paint, drilling into concrete walls, or altering the electrical wiring can lead to costly repair deductions from your security deposit, which often ranges from ₱10,000 to ₱30,000 or more depending on your lease agreement.
Achieving a clean, professional look requires a systematic approach that balances aesthetic preferences with structural preservation. Whether you prefer the vibrant, dynamic colors of RGB setups for entertainment or the soft, relaxing glow of warm white strips for a cozy bedroom atmosphere, the installation process relies on the same core principles of surface preparation, careful layout planning, and secure, non-destructive mounting. By following a step-by-step method, you can enjoy customized ambient lighting while keeping your condo walls and electrical systems completely intact.
Pre-Installation Checks and Tools Needed
Before peeling any adhesive or plugging in your lights, you must verify that your equipment is fully compatible with your condo’s physical and electrical environment. Start by checking the product label on your LED strip light kit. Most residential LED strips operate on low-voltage direct current, typically 12V or 24V DC, which requires an external power adapter to convert the standard 220V alternating current found in household outlets. Ensure the power adapter carries recognized safety and electrical certifications, such as the Philippine Standard (PS) mark or Import Commodity Clearance (ICC) sticker, to guarantee it has been tested for safe operation.
Products mentioned in this guide
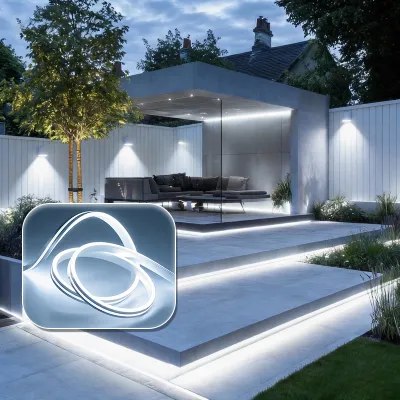
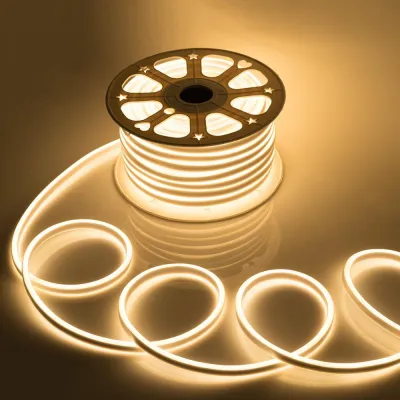
Prices are valid at publication and may change. Please refer to the product page for the latest price.
Next, inspect the installation environment. Condominium walls are frequently constructed from solid concrete finished with plaster and paint, which can behave differently than hollow drywall. Glossy or semi-gloss paints generally accept adhesive backings well, while matte, textured, or chalky paint finishes may resist standard adhesives. If you plan to install the lights in high-humidity zones, such as a kitchen backsplash or near a bathroom vanity, standard adhesive backing may degrade over time due to moisture.
Gather all necessary tools and materials before beginning the physical installation. You will need a reliable measuring tape to plan your runs, a clean microfiber cloth, and high-purity isopropyl alcohol (70% or higher) for surface preparation. Keep a sharp pair of household scissors nearby to cut the strips at designated points. If your walls have textured paint or if you are mounting the lights overhead, prepare supplementary mounting aids such as damage-free plastic mounting clips, silicone brackets, or lightweight plastic LED channels designed for temporary installation.
Preparing the Wall and Planning the Layout
A successful installation depends heavily on the preparation of the mounting surface. Dust, airborne grease from cooking, and ambient humidity can form an invisible film on your condo walls, preventing the adhesive backing from forming a secure bond. To clean the surface, dampen a microfiber cloth with isopropyl alcohol and wipe down the entire path where the LED strip will be mounted. Avoid using standard household glass cleaners or multi-surface sprays, as these often leave behind silicone or chemical residues that actually repel adhesives. Allow the cleaned area to dry completely for at least ten to fifteen minutes.

While the wall dries, map out your physical layout. Measure the exact length of the area you wish to illuminate, keeping in mind that LED strips can only be cut at specific intervals. These cut points are clearly marked on the strip with a scissor icon or copper solder pads. Cutting anywhere else will permanently damage that section of the light strip. If your layout requires navigating corners, do not bend the strip at a sharp 90-degree angle, as this can crack the delicate internal copper circuitry. Instead, plan to use flexible corner connectors or create a gentle, rounded loop at the turn.
Positioning is also critical for thermal management and safety. LED strips generate mild heat during operation, which must dissipate freely to prevent premature degradation of the light-emitting diodes. Avoid routing the strips directly behind heavy appliances, near cooking stoves, or in tight spaces where furniture will press tightly against the LEDs. Ensure the layout allows the power controller and adapter to sit in a well-ventilated area close to a wall outlet, eliminating the need for taut, dangling cords that present tripping hazards.
Step-by-Step Installation Process
With your layout planned and the surface clean, you can begin the physical mounting process. Start at the end of the run closest to your power source. Peel back approximately 30 to 50 centimeters of the adhesive backing paper from the LED strip. Align the strip carefully with your marked path and press it firmly against the wall. Use your thumb or a soft cloth to apply steady, even pressure along the center of the strip for at least ten seconds per section. This pressure activates the pressure-sensitive adhesive, ensuring a strong initial bond.
Work your way along the path in small, manageable sections. Do not pull or stretch the strip as you apply it, as stretching can weaken the adhesive and strain the internal electrical connections. If you are installing the lights on a ceiling, under a high cabinet, or along an uneven surface, gravity will continuously pull against the adhesive. In these areas, reinforce the installation by placing damage-free mounting clips or lightweight plastic channels every 30 to 40 centimeters. These clips provide physical support without requiring you to drill screws into the condo’s concrete structure.
Once the strip is physically mounted, it is time to establish the electrical connections. Connect the multi-pin connector of the LED strip to the receiver unit of the controller. Pay close attention to the polarity alignment; most connectors feature a small arrow or a positive (+) symbol that must align with the corresponding marker on the controller. Connecting them backward can prevent the lights from turning on or damage the controller. Finally, plug the controller into the power adapter, and connect the adapter to your wall outlet. Ensure all connections are snug and dry before turning on the power.
Testing, Troubleshooting, and Final Adjustments
After completing the physical setup, turn on the power to perform a comprehensive system check. If you installed an RGB system, cycle through all primary colors—red, green, and blue—using the remote control or smart application to verify that all light-emitting diodes are functioning correctly. For single-color warm white setups, test the dimming range from lowest to highest brightness. This step ensures that both the controller and the power adapter are operating within their rated capacity and that there are no manufacturing defects in the strip.
If you encounter issues such as flickering, dimming at the far end of the strip, or sections that fail to light up, begin troubleshooting systematically. Flickering or unresponsiveness is often caused by a loose connection at the pin joints; gently press the connectors together to ensure they are fully seated. If a specific section of the strip remains dark while the rest functions, inspect that area for physical creases or sharp bends that may have severed the internal copper traces. If the entire strip dims significantly toward the end, it may be experiencing voltage drop, which occurs when the strip length exceeds the power supply’s output capability.
Address any physical mounting issues immediately before the adhesive cures completely. If you notice any lifting or peeling at the ends of the strip, do not use permanent household superglues, which will ruin the paint and plaster when removed. Instead, apply a small piece of high-quality, removable double-sided acrylic tape designed for wall mounting, or secure the lifting end with an adhesive-backed plastic wire clip. This keeps the installation neat and secure while remaining fully reversible.
Condo-Specific Safety and Maintenance Rules
Living in a shared condominium building requires a mindful approach to electrical safety and property maintenance. Never overload your wall outlets by daisy-chaining multiple high-wattage appliances and LED power adapters onto a single extension cord. While LED strip lights are highly energy-efficient, combining them with other electronics on low-quality adapters can create electrical hazards. Always verify that the total wattage of all devices plugged into a single outlet does not exceed the rated capacity of your condo’s circuit breakers.
When the time comes to move out of your condo or update your decor, removing the LED strips safely is crucial to avoiding paint damage. Never pull the strip straight off the wall with force, as this will likely tear the paint layer or the paper backing of drywall. Instead, use a handheld hair dryer set to low or medium heat to gently warm the adhesive backing. Move the hair dryer back and forth along a 30-centimeter section for a few seconds to soften the glue. Once warmed, slowly peel the strip back at a sharp, 180-degree angle, keeping it flat against itself as you pull.
To maintain the brightness and efficiency of your lights, establish a simple cleaning routine. In tropical climates, dust and fine particles can settle on the sticky edges of the strip or on the silicone coating of the LEDs, which can trap heat and reduce light output. Every few months, disconnect the power supply and gently wipe the surface of the LEDs with a dry, clean microfiber cloth. Avoid using wet sponges, abrasive scrubbing pads, or harsh chemical solvents like acetone or paint thinner, as these will degrade the protective silicone coating and damage the delicate electronic components.
Frequently Asked Questions (FAQ)
Can I install LED strip lights on condo wallpaper without tearing it?
Directly adhering LED strip lights to wallpaper is highly risky, as the strong adhesive backing will almost certainly tear or bubble the wallpaper when you attempt to remove it. To avoid this damage, consider alternative mounting methods. You can place the LED strips inside lightweight, portable plastic channels and mount those channels using specialized removable hook-and-loop strips designed for delicate surfaces. Alternatively, you can run the lights along non-wallpapered wooden trim, the backs of large furniture pieces, or use tension rods to suspend the lighting without making direct contact with the wallpapered walls.
Do I need an electrician to install plug-in LED strip lights?
You do not need a licensed electrician to install standard, plug-in LED strip light kits. These systems are designed for safe, do-it-yourself installation because they utilize low-voltage external power adapters that plug directly into standard, pre-existing wall outlets. However, if your installation plan involves hardwiring the power supply directly into your condo’s main electrical junction box, running high-voltage cables behind drywall, or modifying the building’s permanent wiring, you must hire a qualified, licensed electrician. Modifying permanent building wiring without professional help violates local building codes and poses significant safety risks.
How do I hide the power cord and controller in a small room?
Managing cables in a compact condo room is essential for maintaining a clean, professional look. You can easily conceal dangling power cords and controllers by using paintable, self-adhesive plastic cable raceways, also known as cord covers, which run neatly along your baseboards or the corners of your walls. Another effective method is to position your furniture strategically; placing bookshelves, desks, or headboards slightly away from the wall allows you to tuck the power brick and controller out of sight. Always ensure that the hidden controller and power adapter have adequate ventilation space to prevent heat buildup.

Community discussion
Share your experience or ask a question. Comments are reviewed before publication.