
Installing tri-color LED strip lights in your condo is one of the most effective ways to transform a compact living space into a warm, inviting home. By combining multiple color temperatures—typically warm white, cool white, and neutral daylight—into a single flexible strip, these fixtures allow you to shift the mood of your unit instantly. Whether you want bright, energizing light for working in your kitchen or a soft, relaxing glow for winding down in the evening, the installation process is highly accessible. With a few basic tools and a systematic approach to mounting, wiring, and testing, you can achieve a professional-looking lighting upgrade without damaging your walls or violating your building’s policies.
Preparation and Condo-Specific Checks
Condo living in tropical climates like the Philippines brings unique considerations, particularly regarding humidity and building administration rules. Before purchasing your tri-color strip lights, consult your condo’s property management office or review your tenant agreement. Many buildings have strict guidelines against permanent structural alterations, drilling into concrete walls, or modifying the fixed electrical wiring. Opting for non-destructive mounting methods ensures you can personalize your space while keeping your security deposit intact.
Next, verify the electrical specifications of your chosen LED strip light. Check the product label to confirm its operating voltage, which is commonly 12V or 24V, and ensure the package includes a compatible power adapter designed for standard local outlets. In high-humidity environments, adhesive backing can degrade faster, so look for strips with high-quality adhesive or plan to use supplementary mounting accessories. Gather your tools before starting: a pair of sharp scissors, isopropyl alcohol, microfiber cloths, a measuring tape, and non-damaging cable management clips. Having these items ready will streamline the installation and prevent interruptions.
Products mentioned in this guide
![[Support Lalamove Bulk Order] Tri Color LED Strip Light Remote Control Change Color Switch Lighting Mode Super Bright Light Strip Outdoor Waterproof 3Color Dimmable Flexible Strip Light Home Ceiling Cove Decoration](https://img.lazcdn.com/g/p/36fcf2f832ea1591e5fd5c4244213234.jpg_400x400q80.jpg_.webp)
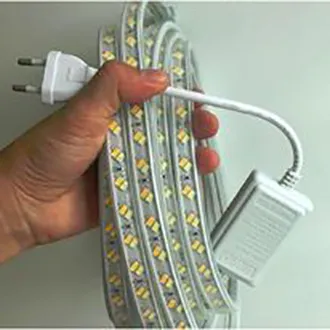
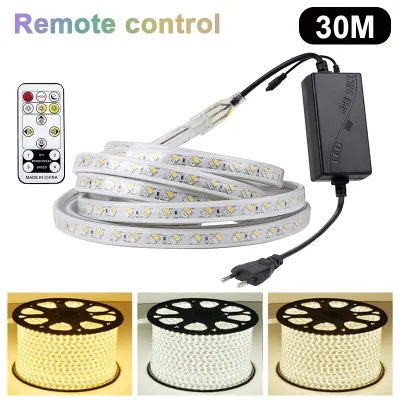
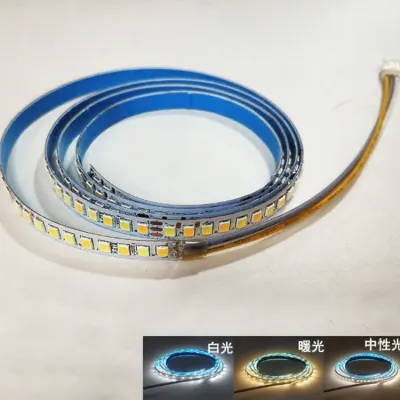
Prices are valid at publication and may change. Please refer to the product page for the latest price.
Step 1: Surface Cleaning and Measurement
Accurate measurement is the foundation of a clean, seamless LED installation. Begin by identifying the exact zones you want to illuminate, such as the underside of kitchen cabinets, the recessed cove of a drop ceiling, or the back panel of an entertainment console. Use your measuring tape to record the precise length of these areas, taking note of any sharp corners or obstacles where the strip will need to bend. Because LED strips are manufactured in fixed lengths, knowing your exact dimensions helps you determine where to make cuts or how many individual strips you need to link together.

Once you have your measurements, focus on preparing the mounting surface. In tropical climates, airborne dust, cooking grease, and ambient humidity create a thin, invisible film on walls and cabinetry that severely compromises adhesive performance. Pour a small amount of isopropyl alcohol onto a clean microfiber cloth and thoroughly wipe down the entire installation path. Avoid using household glass cleaners or multi-surface sprays, as these often leave behind a waxy residue that prevents the adhesive from bonding. Allow the cleaned surface to dry completely for at least ten to fifteen minutes before attempting to mount the lights.
Step 2: Cutting and Positioning the LED Strip
Cutting an LED strip incorrectly can permanently damage its internal circuitry, rendering entire sections useless. Unroll your tri-color strip light and locate the designated cut points, which are clearly marked at regular intervals with a scissor icon or a set of exposed copper pads. These copper pads serve as the electrical connection points, and cutting precisely down the center of these marks ensures that both halves of the strip remain functional. Never cut the strip while it is plugged into an active power source, as this can cause a short circuit or damage the controller.
Before peeling off the entire adhesive backing, perform a dry test fit along your planned route. Gently hold the strip against the surface to verify that the length is correct and that the strip transitions smoothly around corners. Avoid bending the strip at sharp ninety-degree angles, as this can crack the flexible copper pathways inside; instead, use specialized corner connectors or create a gentle, rounded loop. Plan the routing path so that the end of the strip with the controller connection sits close to your chosen power outlet, keeping the power cable hidden from plain sight.
Step 3: Wiring the Controller and Power Supply
Connecting the electrical components correctly is vital for both safety and performance. For most condo dwellers, especially those renting their units, a plug-in power adapter is the safest and most practical choice. These adapters plug directly into standard wall outlets, converting high-voltage alternating current into safe, low-voltage direct current without requiring any modifications to your condo’s electrical panel. If you prefer a completely hidden, hardwired setup integrated into your wall switches, you must hire a licensed electrician to handle the installation, ensuring compliance with local electrical codes and building safety standards.
When connecting the tri-color LED strip to its dedicated controller, pay close attention to the alignment markings on the plastic connectors. Most systems use a multi-pin connection where a small arrow or positive symbol (+) on the strip’s connector must align perfectly with the corresponding mark on the controller’s plug. Misaligning these pins can prevent the lights from turning on, cause incorrect color mixing, or damage the controller’s internal circuitry. Once the strip is securely connected to the controller, plug the controller’s input cable into the power adapter, and then plug the adapter into a high-quality surge protector to safeguard your new lighting system from local power fluctuations.
Step 4: Testing and Final Adjustments
With all the components connected, it is time to test the system before finalizing the physical mounting. Plug in the power adapter and use the included remote control or companion smartphone app to turn the lights on. Cycle through all three color modes—warm white, cool white, and neutral daylight—to verify that the colors transition smoothly and match your expectations. Adjust the brightness levels from lowest to highest to ensure the dimming function operates without any visible flickering or buzzing sounds.
While the lights are illuminated, inspect the entire length of the strip for any dark spots, dead LEDs, or uneven brightness. If the light output appears dimmer at the far end of a long run, this may indicate a voltage drop, which can often be resolved by using a more robust power supply or feeding power from both ends of the strip. Once you are satisfied with the performance, peel away the adhesive backing in small sections, pressing the strip firmly onto the cleaned surface. Use your cable management clips or adhesive wire channels to secure the controller, power brick, and excess cabling neatly against the wall or cabinet underside, keeping your condo’s aesthetic clean and uncluttered.
Troubleshooting Common Setup Issues
Even with careful installation, you may encounter minor issues that are easily resolved with a systematic approach. If your tri-color strip light fails to turn on or displays the wrong colors when you select a specific mode, the most common culprit is a loose or misaligned pin connection. Disconnect the power supply, unplug the connector between the strip and the controller, and inspect the pins for any bends or debris. Realign the arrows carefully and press the connection together firmly, securing it with electrical tape if the fit feels loose.
If you notice the adhesive backing beginning to peel or sag, particularly in humid areas like kitchens or bathrooms, do not rely solely on the factory tape. You can reinforce the installation by applying small drops of high-strength, double-sided mounting tape at regular intervals, or by installing lightweight plastic mounting clips secured with non-damaging adhesive strips. For a highly professional and durable finish, consider mounting the LED strips inside slim aluminum channels. These channels not only protect the strips from dust and moisture but also act as heat sinks to prolong the lifespan of the LEDs.
Flickering lights or sudden shutoffs usually point to an overloaded power supply or an unstable electrical connection. Verify that the total wattage of your installed LED strip does not exceed eighty percent of your power adapter’s maximum rated output. If you have connected multiple strips together to cover a larger area, the standard adapter included in single-pack kits may not provide sufficient current. Upgrading to a higher-amperage power adapter that matches your strip’s voltage, or installing an inline amplifier, will restore stable, consistent illumination across your entire setup.
Frequently Asked Questions (FAQ)
Can I hardwire LED strip lights directly into my condo's electrical system?
Hardwiring LED strip lights directly into your condo’s electrical system involves altering the fixed wiring of the building, which is generally discouraged for DIYers. Most condominium associations require formal written approval, building permits, and the services of a licensed electrician for any modifications to the permanent electrical infrastructure. For renters and DIY enthusiasts, using a standard plug-in power adapter is highly recommended, as it requires no structural changes, complies with building safety rules, and can be easily removed when you move out.
Do tri-color LED strips require a special wall dimmer switch?
No, tri-color LED strips should not be connected to traditional in-wall dimmer switches designed for standard household light bulbs. These strips rely on their own dedicated controllers—operated via remote control, inline buttons, or smart apps—to manage both color temperature and brightness levels. Connecting a standard LED strip power adapter to a wall dimmer can cause severe flickering, buzzing, or permanent damage to the electronic components. Always check the manufacturer’s product labels and instructions to verify compatibility before attempting any custom dimming configurations.

Community discussion
Share your experience or ask a question. Comments are reviewed before publication.