
Selecting the right recessed panel light size is a critical step in achieving balanced, comfortable illumination that complements your room’s physical dimensions. The ideal choice prevents the common pitfalls of residential lighting design: installing fixtures that are too large, which can create an overwhelming, clinical glare, or choosing panels that are too small, leaving corners cast in deep shadows. By evaluating your ceiling type, measuring your floor area, and understanding standard fixture dimensions, you can create a layout that distributes light evenly across your living or working space. This guide will help you navigate the technical and spatial considerations necessary to choose the appropriate panel size for your home.
Understanding Standard Recessed Panel Light Sizes
Recessed panel lights are widely available in several standard dimensions designed to fit into common ceiling structures. The most prevalent sizes in the market are 2×2 feet, 2×4 feet, and 1×4 feet. In many regions, including the Philippines, these dimensions are also labeled by their metric equivalents, which are approximately 60×60 centimeters, 60×120 centimeters, and 30×120 centimeters respectively. Understanding these standard sizes is the first step in planning your ceiling layout, as they dictate how much physical space the fixture will occupy on your ceiling plane.
The compatibility of these sizes depends heavily on your ceiling construction. In commercial spaces or modern residential utility areas featuring T-bar suspended drop ceilings, these panels are designed to rest directly on the metal grid system, replacing a standard ceiling tile. However, if you are installing them in a solid ceiling—such as gypsum board, plasterboard, or marine plywood—you cannot simply drop them into place. Instead, you must cut a precise opening in the ceiling material, which requires verifying the manufacturer’s specified cutout dimensions rather than relying solely on the nominal outer dimensions of the panel.
Products mentioned in this guide
Prices are valid at publication and may change. Please refer to the product page for the latest price.
It is also vital to understand that the physical size of a recessed panel light does not directly correlate to its brightness. A common misconception is that a larger 2×4 panel will always provide more light than a smaller 2×2 panel. In modern LED technology, brightness is determined by lumen output and wattage, not physical footprint. A highly efficient, high-wattage 2×2 panel can emit more lumens than a lower-wattage 2×4 panel. When selecting a size, focus on how the physical dimensions will look visually on your ceiling, and rely on the lumen rating to determine if the fixture will provide adequate light.
Calculating Room Dimensions and Lighting Needs
Before choosing a specific panel size, you must calculate the total lighting requirements of your space. Begin by measuring the room’s length and width to determine its total square footage or square meters. Once you have the physical dimensions, identify the primary function of the room. Different activities require different levels of illumination; for example, a home office, kitchen, or study area demands focused task lighting, whereas a bedroom, hallway, or living room benefits from softer, ambient lighting.

To estimate your total brightness needs, you can apply general lumens-per-square-foot or lumens-per-square-meter guidelines. While these guidelines offer a helpful starting point, they should not be treated as rigid, universal thresholds. A task-oriented space typically requires more lumens per unit of area than a purely recreational space. By calculating the total estimated lumens needed for the entire room, you can determine whether it is more practical to install a single large fixture or distribute the light source across multiple smaller panels.
Deciding on the number of fixtures is crucial for achieving visual symmetry and even light distribution. In a rectangular or irregularly shaped room, relying on a single large panel in the center can create harsh shadows in the corners and uneven light levels. Distributing the required lumen load across two or more smaller panels—such as placing two 2×2 panels in a balanced layout—often results in a much more comfortable environment. This approach ensures that light overlaps effectively, minimizing shadows and reducing eye strain.
Matching Panel Sizes to Room Layouts and Ceiling Constraints
Matching the physical proportions of your panel lights to your room’s layout is essential for maintaining aesthetic harmony. Larger panels, such as the 2×4 foot variety, are well-suited for spacious, open-plan areas, large home offices, or rooms with high ceilings. In these environments, a larger panel provides a broad, sweeping distribution of light that matches the grand scale of the room. Using small fixtures in a massive room can make the ceiling look cluttered and fragmented.
Conversely, smaller or narrower panels are ideal for compact rooms, square spaces, or transitional areas. A 2×2 panel is highly versatile and fits naturally into square bedrooms, utility rooms, or small kitchens. For long, narrow spaces like hallways, walk-in closets, or galley kitchens, a 1×4 panel is often the most appropriate choice. Its elongated shape mirrors the proportions of the room, drawing the eye forward and providing uniform illumination along the entire path without overwhelming the narrow ceiling.
Beyond visual aesthetics, you must carefully evaluate your ceiling’s internal structural constraints. In tropical climates like the Philippines, residential buildings often feature concrete slab ceilings or shallow plenum spaces behind gypsum board. Before purchasing any recessed panel, measure the available vertical clearance inside your ceiling cavity. You must ensure that the panel’s housing, integrated LED driver, and heat sink can fit comfortably within this space without coming into contact with structural concrete, wooden joists, or utility pipes. Failing to check this clearance can result in a fixture that cannot be fully recessed, forcing you to abandon the installation or modify your ceiling structure.
Installation Clearances and Safety Checks
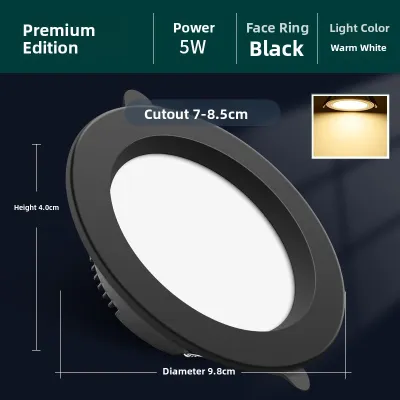
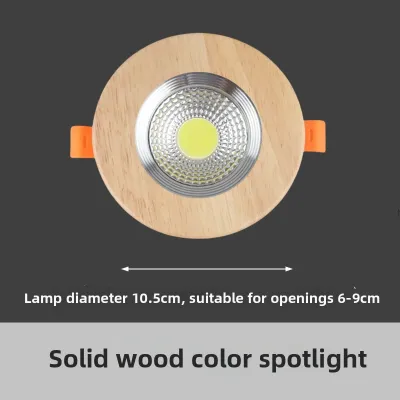
Ensuring a safe and compliant installation requires careful attention to physical clearances and electrical standards. If you are installing recessed panels in a solid ceiling, always verify the exact cutout dimensions provided in the manufacturer’s installation manual. The cutout must be precise; if it is too large, the panel’s outer flange or trim will not be able to cover the rough edges of the drywall, leaving unsightly gaps. If it is too small, forcing the fixture into the opening can damage the ceiling material or the light itself.
Proper heat dissipation is another critical safety factor, especially in warm, humid environments. Although LED panels are highly efficient, their drivers and internal components still generate heat that must escape. Ensure there is adequate clearance around the fixture as specified by the manufacturer to prevent heat buildup, which can shorten the lifespan of the LED driver. Additionally, verify whether the fixture is Insulation Contact (IC) rated. Non-IC rated fixtures must never be covered by or placed in direct contact with thermal insulation, as this poses a safety hazard.
Finally, always prioritize electrical safety when planning your installation. Before handling any fixed wiring, modifying ceiling joists, or mounting fixtures at a height, isolate the power supply at the main circuit breaker. For complex installations—such as adding new junction boxes, running new electrical lines, or modifying structural ceiling elements—always consult a qualified professional. Ensure that all selected fixtures are compatible with the local 220V-240V voltage standard and carry recognized safety certifications, such as the Philippine Standard (PS) mark or the Import Commodity Clearance (ICC) sticker, to guarantee long-term safety and reliability.
Frequently Asked Questions (FAQ)
Can I replace a 2×4 panel light with two 2×2 panels?
Replacing a single 2×4 panel light with two 2×2 panels is possible, but it requires both structural and electrical modifications. In a standard T-bar suspended ceiling grid, you will need to install additional cross-tees to support the new grid configuration and hold the two smaller panels securely. Electrically, you must verify that the existing wiring and junction box can safely accommodate the additional fixture. Since you will be powering two separate drivers instead of one, you must ensure the circuit’s capacity is not exceeded and that all connections are housed in approved junction boxes with the power fully isolated during installation.
Do recessed panel lights require a drop ceiling?
No, recessed panel lights do not strictly require a suspended drop ceiling. While they are designed to fit standard T-bar grids, many manufacturers offer surface-mount frames or specialized flange kits that allow you to install them on solid ceilings made of gypsum board, plaster, or wood. However, before choosing a recessed installation in a solid ceiling, you must verify the depth of your ceiling joists to ensure there is enough cavity space to house the fixture’s depth. You must also ensure that cutting the required opening will not compromise any load-bearing structural elements of your home.

Community discussion
Share your experience or ask a question. Comments are reviewed before publication.