
Finding the perfect replacement ceiling light cover requires identifying the exact shape of your existing fixture, measuring the critical connection point known as the “fitter,” and verifying the internal clearance height for your bulbs. Because ceiling light fixtures do not follow a single universal standard, guessing the size of a replacement shade almost always results in a poor fit, unstable mounting, or even safety hazards. Measuring the components yourself ensures a secure, flush installation that restores both the safety and aesthetic appeal of your room.
Whether you are dealing with a cracked glass dome in a high-humidity kitchen, updating a yellowed acrylic diffuser in a hallway, or looking to refresh the style of your living room, the process begins with precise physical measurements. Taking the time to document the exact dimensions of your fixture’s hardware, rather than relying on generic category names, will save you from the hassle of failed online orders and unsafe DIY modifications.
Safety and Preparation Before You Measure
Working with ceiling-mounted fixtures requires strict adherence to safety protocols to prevent electrical shock, falls, and burns. Before you reach for your measuring tape, locate your home’s main electrical panel and turn off the power to the lighting circuit at the circuit breaker. Do not rely solely on the wall switch; single-pole switches in some wiring configurations can leave the fixture socket live even when turned off. Use a non-contact voltage tester to verify that the power is completely isolated before touching any metal components.
Products mentioned in this guide
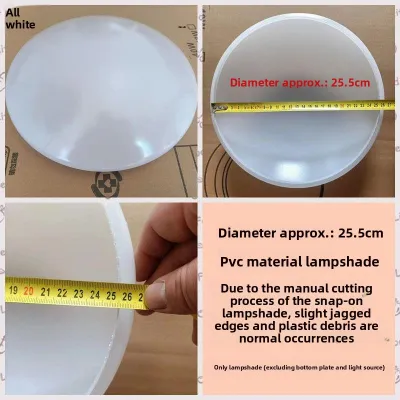
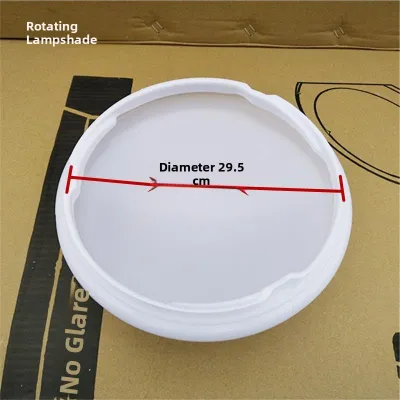
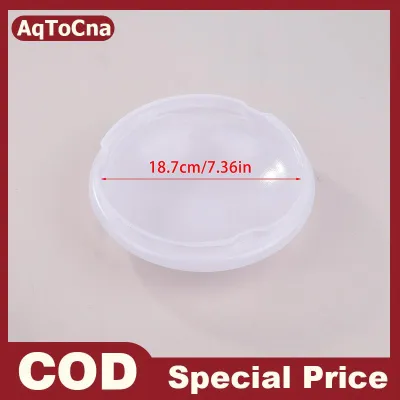
Prices are valid at publication and may change. Please refer to the product page for the latest price.
If the light has been turned on recently, allow the bulbs to cool completely. Incandescent and halogen bulbs generate intense heat that can cause severe burns or cause a fragile glass cover to shatter if handled with cold hands or damp cloths. Always use a sturdy, level step ladder positioned directly beneath the fixture rather than stretching from a chair or table. Whenever possible, have a second person nearby to spot you, hold the ladder steady, and safely take the old cover from you as you detach it.
To ensure your measurements are accurate, gather a flexible steel measuring tape, a notepad, a pen, and a smartphone. Avoid using soft fabric sewing tapes, as they can stretch over time and introduce errors of several millimeters. Use your smartphone to take high-resolution photos of the fixture base, the mounting brackets, the wiring layout, and any electrical certification labels or manufacturer stamps. These photos will serve as invaluable references when comparing replacement options later.
How to Measure Different Ceiling Light Cover Shapes
Ceiling light covers come in a wide array of geometric configurations, each requiring a specific approach to capture the dimensions that dictate a proper fit. Understanding how to measure these shapes prevents alignment errors and ensures the replacement cover sits symmetrically against your ceiling.

Round, Bowl, and Dome-Shaped Covers
Round glass or acrylic domes are among the most common ceiling fixtures, but their curved profiles can make measurement tricky. To find the correct replacement, you must capture three distinct dimensions:
- The Fitter Diameter: Turn the cover over so the open end faces upward. Measure the absolute inner diameter of the opening where the cover physically contacts the metal fixture base. This is the fitter size and is the single most critical dimension for compatibility.
- The Outer Diameter: Measure across the widest external part of the bowl or dome. This dimension determines the visual scale of the fixture and ensures the new cover will completely hide the underlying mounting plate and ceiling cutout.
- The Depth or Height: Place the cover flat on a table with the opening facing down. Hold a ruler vertically next to the dome and lay a flat card across the top center of the dome to read the exact height. This measurement ensures your light bulbs will have sufficient clearance and will not press against the glass.
- Material Thickness: Check the thickness of the glass or acrylic lip. If your fixture uses tension clips or tight-tolerance grooves, a replacement cover with a lip that is too thick will not slide into place, while one that is too thin may wobble or slip out.
Square, Rectangular, and Flush-Mount Covers
Flat panel diffusers and angular flush-mount covers require linear precision to prevent gaps that allow dust and insects to enter the fixture.
- Edge-to-Edge Dimensions: Measure the exact length and width of the existing cover from outer edge to outer edge. Record these numbers in both millimeters and inches, as manufacturers use both systems.
- The Diagonal Distance: Measure from one corner to the opposite diagonal corner. Compare this with the second diagonal measurement. If these numbers differ, your fixture frame may be slightly warped or asymmetrical, meaning a perfectly square replacement panel may not slide in without binding.
- Inner Frame Dimensions: For flush-mount troffers or panel lights, measure the inner channel of the metal frame where the acrylic sheet actually sits. The replacement panel must be slightly smaller than this channel to allow for natural thermal expansion as the fixture warms up.
- Lip Depth and Flange Thickness: If your square cover has a stepped edge (a flange) that rests inside a metal frame, measure the depth of this lip and the thickness of the flat outer edge. A flange that is too deep will prevent the outer frame from closing or latching securely.
Identifying the Fitter and Attachment Mechanism
The “fitter” refers to the specific part of the replacement cover that secures it to the electrical fixture base. Identifying how your cover attaches is just as important as getting the dimensions right, as different mounting styles are completely incompatible with one another.
- Lip or Neck Fitters (Thumb Screw Mounts): This style features a pronounced, raised collar or neck on the glass cover. The neck slips inside a metal cup on the fixture base and is held in place by three or four thumb screws tightened from the outside. For this style, measure the outer diameter of the neck. The replacement neck must be slightly smaller than the inside of the metal cup but large enough for the thumb screws to grip securely.
- Threaded or Screw-In Collars: Some glass globes feature a threaded neck that screws directly into the fixture base like a jar lid. Measure the outer diameter of these threads. Because thread pitches can vary, try to match the brand of the original fixture if possible.
- Center-Hole and Finial Mounts: Many bowl-shaped covers have a hole drilled directly through the center. A threaded metal rod extends down from the fixture base through this hole, and a decorative nut (a finial) screws onto the rod to hold the bowl up. For these, measure the diameter of the center hole in the glass. Also, measure the drop depth from the ceiling base to the end of the threaded rod to ensure your new bowl is not too deep for the rod to reach.
- Spring-Loaded Clips and Twist-Locks: Flush-mount covers often use spring-loaded metal clips that grip the inner lip of the glass dome, or a twist-lock channel where you push the cover up and rotate it clockwise to lock it. Measure the inner diameter of the glass rim where these clips or channels engage, and ensure the replacement has a compatible molded lip.
Always photograph the mounting hardware and the bare fixture base before shopping. If the original clips are rusted or warped—a common issue in humid tropical environments—they must be replaced to ensure the new cover does not fall.
Common Measuring Mistakes That Lead to Poor Fits
Small errors during the measuring process can lead to significant installation issues, structural damage, or electrical hazards. Avoiding these common pitfalls will ensure a successful replacement on your first attempt:
- Confusing Overall Width with Fitter Width: The most frequent mistake is ordering a replacement cover based solely on the overall width of the dome (e.g., buying a 30-centimeter dome because the old one was 30 centimeters wide). If the fitter opening of the replacement is 10 centimeters but your fixture base requires a 12-centimeter opening, the cover cannot be installed.
- Neglecting Internal Clearance Height: Modern LED retrofits and smart bulbs are often taller and wider than older incandescent bulbs. If you choose a replacement cover that is shallower than the original, the glass may press directly against the bulb. This physical contact can damage the bulb's electronics or place constant mechanical stress on the glass, eventually causing it to crack.
- Ignoring Slight Dimensional Variances: Do not assume your fixture uses a standard size. A difference of just 2 to 3 millimeters can prevent a glass neck from fitting into a metal collar, or make it loose enough to slip past the retaining screws and shatter on the floor.
- Overlooking Weight and Ceiling Support: Replacing a lightweight acrylic cover with a thick, heavy glass cover can overload your ceiling box. If your ceiling is made of thin plywood or gypsum board without direct structural wood backing, a heavy glass cover can pull the entire fixture out of the ceiling over time.
Using Your Measurements to Find the Right Replacement
Once you have documented your measurements, you can begin your search. When reading product specifications on manufacturer websites or online marketplaces, always look for technical diagrams that clearly distinguish between the overall outer dimensions and the critical fitter dimensions.
In the Philippines, you can find replacement covers at local hardware stores, specialized lighting showrooms, or online marketplaces. When searching online, use highly specific search terms that include your measurements and material preferences (for example, “round glass ceiling light cover 10cm fitter” or “acrylic diffuser panel 60x60cm”).
Consider your local environment when choosing replacement materials. In high-humidity areas, lightweight acrylic or polycarbonate covers are often preferred over heavy glass because they do not pose a shattering hazard if mounting clips degrade due to rust. If you choose a glass cover, ensure your mounting hardware is made of brass or stainless steel to resist corrosion.
Because minor manufacturing variances are common in molded glass and acrylic, always check the seller’s return policy before purchasing. Ensure they offer exchanges or refunds in case the cover has a slight deviation that prevents a flush fit.
Solutions When an Exact Replacement Cover Is Unavailable
If your ceiling light fixture is older or discontinued, finding an exact matching cover may be impossible. Fortunately, several practical alternatives can restore your lighting without requiring a full renovation:
- Adapter Rings and Conversion Collars: If you find a replacement cover that fits your style but has a fitter diameter that is slightly too small for your fixture base, you can install a metal adapter ring. These rings bridge the gap between different fitter sizes, allowing you to mount a standard cover onto an non-standard base.
- Replacing the Canopy or Fixture Base: If the internal wiring and ceiling mount are in good condition, you can replace just the metal base plate (the canopy) while keeping the existing electrical box. This allows you to update to a modern base that is compatible with widely available, standard replacement covers.
- Consulting a Professional: For antique, custom, or high-value fixtures, consider consulting a licensed electrician or a specialized lighting repair shop in the Philippines. They can safely modify metal frames, source rare vintage hardware, or cut custom acrylic panels to fit your unique fixture.
- Replacing the Entire Fixture: If you cannot find a safe, compatible cover and the existing base shows signs of wear, replacing the entire ceiling light fixture is often the most cost-effective and safest path forward. Modern integrated LED fixtures eliminate the need for separate bulbs and covers entirely, offering superior energy efficiency and a longer lifespan.
Frequently Asked Questions (FAQ)
Can I use a standard table lamp shade on a ceiling fixture?
No, you should not use a standard table lamp shade on a ceiling fixture. Table lamp shades are engineered for vertical, upright use and typically rely on spider fitters, harps, or uno rings that slide over a bulb socket from below. They lack the secure collar, lip, or screw-mount fitters required to hang safely from a ceiling. Additionally, table lamp shades are often made of fabric, paper, or plastic that is not rated for the high heat that rises and collects at the ceiling level, creating a serious fire hazard. Only use covers specifically rated for ceiling installation.
How do I remove a ceiling light cover with no visible screws?
Many modern flush-mount fixtures use hidden attachment mechanisms to maintain a clean aesthetic. To remove these safely, first support the weight of the cover with one hand. If the cover uses a twist-lock mechanism, gently rotate the dome counterclockwise a quarter-turn to release it from the base. If it uses spring-loaded clips, gently pull the cover straight down until you can see the metal tension clips, then carefully pull one clip outward to release the glass rim. For snap-fit acrylic panels, wrap a flathead screwdriver in a soft cloth to protect the finish, then gently pry the edge of the panel away from the metal frame until it pops free.
Does the bulb wattage limit my choice of replacement cover material?
Yes, bulb wattage is a critical factor when choosing a replacement cover material. Traditional incandescent and halogen bulbs generate high temperatures that can warp, discolor, or melt acrylic and polycarbonate covers, and can even crack low-quality glass. If you use high-wattage bulbs, you must choose a heat-resistant glass cover. However, if you upgrade your fixture to low-wattage, low-heat LED bulbs, you can safely choose from a wider variety of lightweight acrylic, polycarbonate, or textured covers. Always check the maximum wattage rating printed on your fixture’s socket and ensure your bulbs and replacement cover do not exceed that limit.

Community discussion
Share your experience or ask a question. Comments are reviewed before publication.