
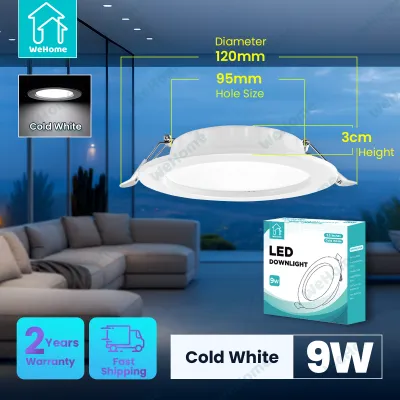
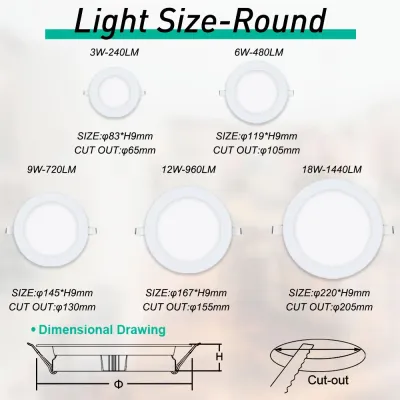
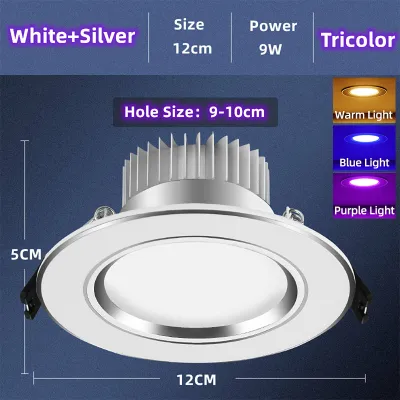
Installing a recessed ceiling light—often called a downlight or panel light—requires a precise match between the physical opening in your ceiling and the fixture’s specifications. To ensure a seamless fit, you must focus on two distinct measurements: the cut-out size and the panel dimensions. The cut-out size represents the actual hole diameter needed for the light’s rear housing and spring clips to pass into the ceiling cavity. In contrast, the panel dimensions refer to the outer flange or bezel that sits flush against the ceiling surface to conceal the rough edges of the cut.
Selecting the wrong size can lead to costly ceiling repairs, sagging fixtures, or exposed gaps that let dust and insects slip through. Whether you are replacing an old fixture in a gypsum board ceiling or planning a new layout for a renovated space, understanding how these dimensions interact is the key to a clean, professional installation.
Understanding Cut-Out Size vs. Panel Dimensions
When shopping for recessed ceiling lights on an online marketplace or at a local hardware store, you will notice two primary measurements listed on the product specification sheet. The first is the cut-out size, which dictates the exact dimensions of the hole you need to cut into your ceiling. This measurement is critical because the internal housing, driver box, and spring-loaded tension clips must slide through this opening without resistance.
Products mentioned in this guide
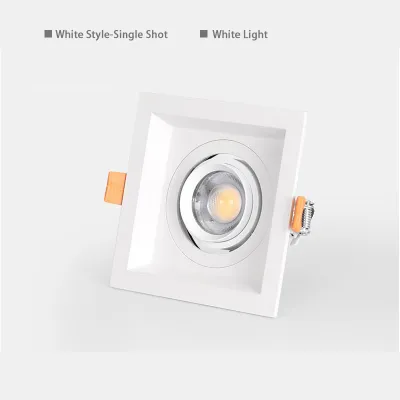
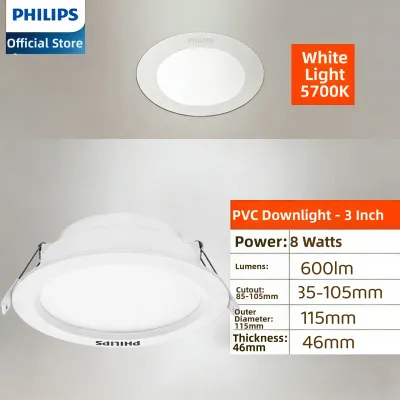
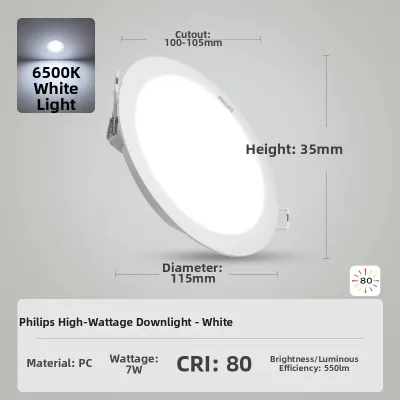
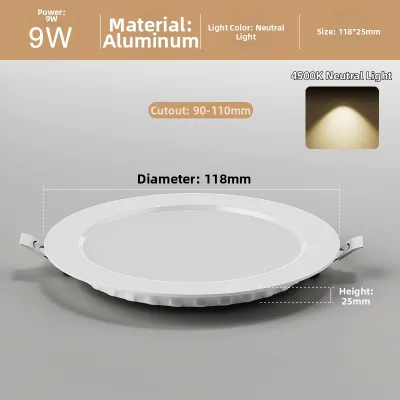
Prices are valid at publication and may change. Please refer to the product page for the latest price.
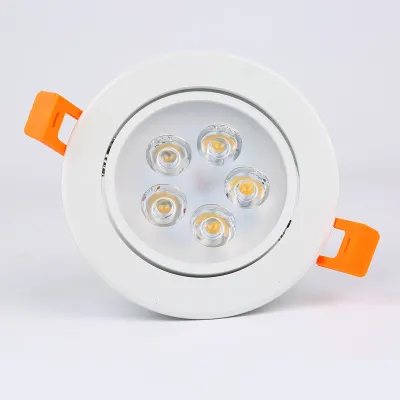
The second measurement is the panel dimension, which represents the total outer diameter or width of the visible fixture. This outer bezel acts as a decorative and functional border, resting flat against the ceiling surface. Its primary job is to provide an aesthetic overlap that covers any minor imperfections, chips, or rough cuts made in the ceiling material during installation.
To achieve a secure fit, the panel dimensions must always be significantly larger than the cut-out size. This difference creates a safe mounting margin, ensuring that the tension clips have enough solid ceiling material to grip onto while the outer flange completely seals the opening. If the overlap is too narrow, the fixture may slip through the hole or leave visible gaps that compromise the room’s insulation and appearance.
How to Measure Your Existing Ceiling Opening
Before purchasing any new fixtures, you must accurately measure the existing openings in your ceiling. Safety is the absolute priority when performing these checks. Always turn off the electrical power at the main circuit breaker before removing an old light or inserting measuring tools into a ceiling cavity. Because you will likely be working at height, ensure you use a stable, secure ladder and have a helper nearby if possible.

To measure a round ceiling opening, stretch a tape measure across the widest part of the hole to find the diameter. It is highly recommended to measure across multiple angles—such as vertically, horizontally, and diagonally—because manual drywall cuts are rarely perfectly circular. If the measurements vary slightly, record the smallest diameter to ensure the new fixture’s housing will fit through the narrowest point without forcing.
For square or rectangular openings, measure both the length and the width of the hole. Take these measurements at the narrowest points of the opening to avoid buying a light that gets stuck during installation. Write down these exact dimensions in millimeters or inches, as manufacturers often list specifications in both units to accommodate different regional standards.
Matching Light Specifications to Your Measurements
Once you have your ceiling measurements, you can compare them against the technical specifications of your desired recessed ceiling light. Never rely solely on the nominal size listed in the product title, such as a “4-inch” or “6-inch” light, as these terms are often generalized marketing categories rather than exact installation requirements. Instead, locate the dedicated “Cut-out Size” or “Hole Size” specification on the product packaging or manufacturer’s data sheet.
Verify that your measured ceiling hole falls within the manufacturer’s recommended cut-out range. For example, a light specified for a 100mm cut-out will typically not fit securely in a hole that has been worn down or enlarged to 115mm. Additionally, check that the overall panel dimensions provide at least 10 to 20 millimeters of outer coverage beyond the cut-out size to guarantee a clean, gap-free finish.
You must also account for the physical clearance required above the ceiling line. Recessed lights require adequate vertical space in the ceiling cavity to accommodate the height of the light housing, the external LED driver box, and the movement of the spring clips. Ensure there are no hidden obstructions, such as wooden joists or metal framing channels, directly behind the drywall that could block the installation of the fixture.
Solutions for Mismatched Ceiling Openings
If you discover that your existing ceiling holes do not match the specifications of the lights you want to install, you have several practical options. When dealing with a ceiling hole that is too large for your new fixture, do not attempt to patch it with unstable fillers. Instead, look for manufacturer-approved adapter rings or conversion plates, which are designed to bridge the gap cleanly by extending the outer bezel’s coverage.
If the existing ceiling opening is too small, you can enlarge it, but you must first assess the ceiling material. Gypsum board and plasterboard are relatively easy to trim using a manual drywall saw or a hole saw attachment on a power drill. However, before making any cuts, you must establish a strict stop condition: if you encounter structural joists, hidden electrical wiring, or plumbing pipes behind the ceiling, stop immediately.
Attempting to cut through structural elements or active utility lines poses severe safety risks and can compromise your home’s structural integrity. If you are unsure of what lies behind the ceiling surface, or if the modification requires complex structural changes, always consult a qualified contractor or a licensed electrician to complete the work safely.
Essential Electrical and Clearance Specifications
Beyond physical dimensions, a successful recessed light installation depends on verifying key electrical and environmental specifications. In the Philippines, the standard household electrical supply operates at 220V to 240V, so you must verify that your chosen fixture is rated for this voltage range to prevent immediate driver failure or electrical hazards. Always check for local electrical safety certifications on the product label before proceeding with the installation.
Environmental factors are equally critical, especially in tropical climates characterized by high humidity and ambient heat. Ensure the ceiling cavity has sufficient depth and ventilation to allow heat to dissipate from the LED driver, as excessive heat buildup can drastically shorten the lifespan of the fixture. If you are installing lights in damp areas like bathrooms, kitchens, or outdoor eaves, verify that the fixture holds an appropriate IP (Ingress Protection) rating, such as IP44 or IP65, to protect against moisture entry.
Finally, remember that any fixed wiring modifications, new circuit runs, or installations in wet zones must adhere to local electrical codes. If your project involves more than a simple plug-and-play replacement of an existing fixture, isolate the power at the breaker and hire a licensed electrician to handle the wiring. This ensures your home remains safe, compliant, and free from fire hazards.
Frequently Asked Questions (FAQ)
Can I install a recessed ceiling light in a solid concrete ceiling?
Traditional recessed ceiling lights are designed specifically for hollow ceiling cavities, such as those found in gypsum board, plasterboard, or suspended drop ceilings. These cavities provide the necessary empty space to house the fixture’s body, the spring clips, and the electrical wiring connections. Solid concrete ceilings do not have this built-in void, making standard recessed installation impossible without major structural modifications.
If you have a solid concrete ceiling, the most practical and safe alternatives are surface-mounted ceiling panels, track lighting systems, or exposed conduit designs. Attempting to core-drill deep holes or cut structural channels into a concrete slab to recess a light fixture is highly dangerous and can weaken the building’s structural integrity. Always consult a structural engineer or a licensed electrician before attempting any drilling or structural modifications to concrete surfaces.

Community discussion
Share your experience or ask a question. Comments are reviewed before publication.