
To find a compatible ceiling fan light cover replacement, you must first identify your fixture’s mounting mechanism and then measure the fitter size, which is the exact diameter of the neck or lip that connects to the fan’s light kit. For set screw and clip-on styles, you will measure the outer diameter of the glass neck. For threaded screw-on styles, you must measure the outer diameter of the threaded neck or the inner diameter of the threaded collar. Combining these measurements with the overall cover diameter and internal bulb clearance ensures a secure, rattle-free fit that accommodates your light bulbs safely.
In the tropical climate of the Philippines, ceiling fans are essential for daily air circulation and cooling. Over time, high humidity can degrade mounting hardware, or accidental bumps during cleaning can crack the glass globes. Replacing a damaged or outdated cover is a straightforward DIY task, provided you take precise measurements before purchasing a replacement online or at a local hardware store.
Preparation and Safety Before You Measure
Before you begin handling an overhead light fixture, safety must be your absolute priority. Working at height with electrical components requires systematic preparation to prevent shocks, falls, or burns.
Products mentioned in this guide
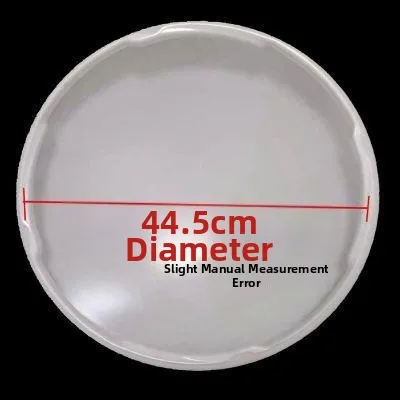
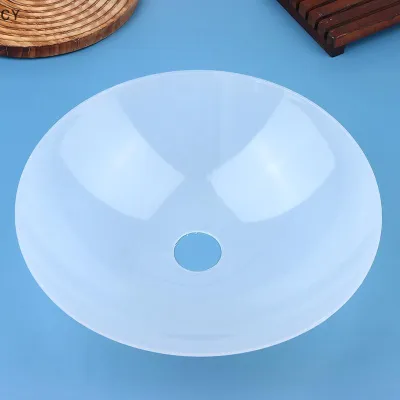
![KOQZM💖[HOT SALE]🎈🎈 Semicircle Shape Plastic Lampshade Home Decor Light Shade For Wall Ceiling Fan Globe Replacement Light Bulb Cage Lighting](https://img.lazcdn.com/g/p/70f109dc1698978dfdf8236da0ed0965.jpg_400x400q80.jpg_.webp)
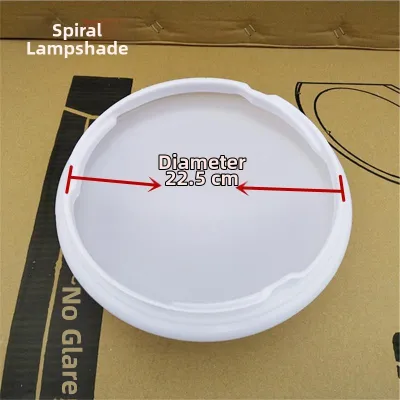
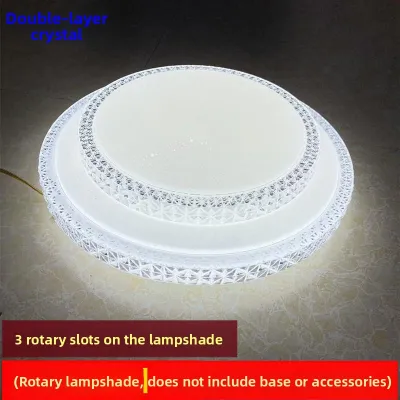
Prices are valid at publication and may change. Please refer to the product page for the latest price.
First, isolate the power supply. Do not rely solely on the wall switch or a remote control to turn off the fan, as these can easily be flipped back on by someone else in the household. Locate your home’s main electrical panel or sub-panel and switch off the circuit breaker dedicated to the ceiling fan’s room. If your panel is not clearly labeled, turn off the main breaker entirely to guarantee a safe working environment.
Second, establish a stable working platform. Never stand on plastic Monobloc chairs, dining stools, or sofas to reach the fan. Instead, use a sturdy, slip-resistant A-frame step ladder that allows you to work comfortably without overextending your reach. Ensure the ladder is placed on a flat, even floor surface, and have a family member stand nearby to spot you if possible.
Third, allow the fixture to cool. If the ceiling fan light was recently turned on, the bulbs and the glass cover can retain significant heat. Wait at least 15 to 20 minutes for the components to become cool to the touch before attempting to handle them.
Finally, gather your measuring and recording tools. You will need a flexible measuring tape or a digital caliper that displays both metric (millimeters) and imperial (inches) units, a bright flashlight or headlamp to inspect the interior of the light kit, a soft microfiber cloth to lay the old glass on, and a smartphone to take reference photos of the mounting assembly and labels.
Identify the Light Cover Mounting Type
Ceiling fan light covers, often referred to as globes, shades, or bowls, attach to the fan’s light kit using specific mounting designs. Identifying your mounting type is crucial because it dictates how you remove the old cover safely and what structural features your replacement must have.

Threaded or Screw-on Collars
This style features a glass shade with a threaded neck that screws directly into the light kit housing, or a separate threaded metal ring (collar) that screws onto the socket exterior to sandwich the glass flange in place. To remove this type, hold the glass cover securely with one hand while gently unscrewing the decorative metal ring counterclockwise with the other. If the glass itself is threaded, slowly rotate the entire glass globe counterclockwise until it releases from the housing.
Clip-on or Snap-in Mounts
Clip-on covers are held in place by spring-loaded metal clips located inside the light kit cup. These clips exert outward pressure against the inside neck of the glass shade. To remove a clip-on cover, support the weight of the glass and gently pull it straight down, or carefully compress the internal spring clips inward to release the tension holding the glass rim. Because these clips can snap back quickly, maintain a firm grip on the glass to prevent it from slipping.
Set Screw Mounts
This is one of the most common traditional designs. The neck of the glass cover slides into a metal collar cup and is secured by three or four small thumb screws or machine screws tightened against the outer lip of the glass. To remove the cover, hold the glass globe steady with one hand while using a manual screwdriver to loosen the screws counterclockwise. You do not need to remove the screws entirely; loosen them just enough so the glass neck can slide out of the collar cup without catching.
If the glass cover feels stuck, rusted, or fused to the housing, do not force it. Applying excessive torque can shatter the glass or damage the fan’s internal wiring. Stop immediately, consult the manufacturer’s manual, or contact a qualified professional to assist with the removal.
Measure the Key Dimensions for a Perfect Fit
Once you have safely removed the existing light cover, you can take the precise measurements required to select a compatible replacement. Standardizing your measurements in both millimeters and inches will help you navigate different manufacturer specifications.
Measuring the Fitter Size
The “fitter” refers to the specific part of the glass cover that physically interfaces with the fan’s metal light kit. An incorrect fitter measurement is the most common reason replacement covers fail to install.
- For Set Screw Covers: Measure the exact outside diameter (OD) of the smooth glass neck that slides into the metal cup. Do not measure the metal cup itself; measure the glass lip. Common standard sizes include 2-1/4 inches (approximately 57mm), 3-1/4 inches (approximately 83mm), and 4 inches (approximately 102mm).
- For Threaded Covers: If the glass has integrated threads, measure the outside diameter of the threaded neck. If the glass is held by a threaded collar ring, measure the inside diameter (ID) of the metal ring and the outside diameter of the glass flange that the ring supports.
- For Clip-on Covers: Measure the outer diameter of the glass lip where the spring clips rest, as well as the maximum distance between the expanded spring clips inside the fan housing.
Always record these dimensions precisely. A discrepancy of even two millimeters can prevent the neck from fitting into the collar or cause the cover to hang loosely and vibrate during fan operation.
Measuring Overall Diameter and Bulb Clearance
Beyond the fitter size, the physical envelope of the replacement cover must match your space, your fan’s scale, and your light bulbs.
- Overall Diameter: Measure the widest part of the existing glass cover. If you choose a replacement that is significantly wider, verify that it will not interfere with the path of the spinning fan blades.
- Total Height: Measure from the very top of the fitter neck to the lowest point of the cover. This ensures the shade does not hang too low, especially in rooms with low ceiling clearances.
- Bulb Clearance: Measure the height and width of the light bulbs currently installed in the sockets. If you plan to upgrade your bulbs—for instance, switching from small candelabra-base bulbs to standard E27 LED bulbs—you must ensure the replacement cover has enough internal clearance. The bulb must not touch the glass cover; direct contact can cause localized heat buildup, which increases the risk of thermal shock and glass breakage.
Checklist for Selecting the Replacement Cover
Before finalizing your purchase from an online marketplace or local lighting retailer, run through this comprehensive compatibility checklist to ensure long-term safety and performance.
- Exact Fitter Match: Confirm that the replacement fitter matches your recorded measurements exactly. Do not guess or round up.
- Weight and Material Limits: Verify the weight of the replacement cover. Heavy glass shades require robust light kit housings. If your fan was originally designed for lightweight acrylic or polycarbonate covers, replacing them with heavy glass can strain the mounting brackets or cause the fan motor to wobble. Check your fan's manual for maximum weight limits.
- Environmental Suitability: In the high-humidity environment of the Philippines, metal components are highly susceptible to rust and corrosion. Ensure any replacement hardware, such as set screws, clips, or threaded collars, is made of rust-resistant materials like stainless steel, solid brass, or treated aluminum. This prevents the hardware from seizing over time, making future bulb changes easier.
- Voltage, Wattage, and Heat Ratings: Check the maximum wattage sticker located inside the fan's light socket or on the light kit housing. In the Philippines, the standard electrical supply is 220V. Ensure your bulbs match this voltage and do not exceed the socket's maximum wattage rating (e.g., Max 9W LED or Max 40W Incandescent). The replacement cover must have adequate venting or thermal properties to dissipate heat safely, particularly if you are using heat-generating halogen or incandescent bulbs.
- Aesthetic and Light Diffusion: Decide between clear, frosted, or seeded glass. While clear glass provides maximum light output, it can create harsh glare. Frosted glass diffuses light evenly, which is ideal for living rooms and bedrooms where soft, ambient lighting is preferred.
Installing and Verifying the New Light Cover
With the correct replacement cover in hand, you can proceed with the installation. Follow these steps to ensure a secure, long-lasting setup.
First, clean the fixture. Use a dry microfiber cloth to wipe away accumulated dust, spider webs, or dead insects from the light kit housing, socket, and surrounding fan body. Avoid using wet cloths or liquid sprays near open electrical sockets.
Second, mount the cover carefully based on its specific type:
- For Set Screw Models: Insert the glass neck flat into the metal cup. Tighten the set screws evenly, rotating among them rather than tightening one fully at a time. Tighten them hand-tight plus a gentle quarter-turn with a screwdriver. Do not over-tighten, as the glass needs a tiny amount of room to expand naturally when heated by the bulb.
- For Threaded Models: Align the threads carefully to avoid cross-threading. Spin the glass or the collar ring clockwise until it is snug.
- For Clip-on Models: Gently compress the spring clips, push the glass neck up into the housing, and release the clips slowly, ensuring they seat securely against the glass lip.
Third, restore power at the main circuit breaker and turn on the wall switch.
Finally, verify the installation. Leave the light and the fan running on low speed for a few minutes, then gradually increase the fan to high speed. Observe the fixture closely. There should be no visible wobbling, rattling noises, or buzzing. If you notice any movement or unusual sounds, turn off the power immediately, let the fixture cool, and check the tightness of the mounting hardware. If the cover remains loose, if the mounting mechanism appears damaged, or if you notice frayed wiring during the process, discontinue use and consult a licensed electrician.
Frequently Asked Questions (FAQ)
Can I use a standard lampshade on a ceiling fan light kit?
No, standard lampshades designed for table or floor lamps are not compatible with ceiling fan light kits. Standard lampshades rely on different mounting mechanisms, such as spider fitters that rest on a lamp harp or UNO fitters that slip over a socket. Furthermore, standard shades are not engineered to withstand the continuous vibrations generated by a spinning ceiling fan motor. Using a non-compatible shade can cause it to loosen, wobble, and eventually fall, posing a safety hazard. Always use covers specifically designated for ceiling fans or verified universal fan adapters.
What if my ceiling fan light cover has no visible screws or clips?
If your ceiling fan light cover lacks visible screws, collars, or clips, it likely utilizes a twist-lock or magnetic mounting system. Twist-lock covers feature molded glass notches that slide into corresponding slots inside the light kit housing; you secure them by gently pushing upward and twisting the entire globe clockwise about a quarter-turn. Other modern fixtures use high-strength magnetic bases. To remove these, try gently twisting the cover counterclockwise or pulling straight down with light pressure. If the cover does not budge easily, do not force it. Locate your fan’s specific model number and consult the manufacturer’s manual to identify the exact proprietary mechanism and avoid breaking the glass.

Community discussion
Share your experience or ask a question. Comments are reviewed before publication.