
Finding the perfect replacement ceiling lamp shade requires a systematic approach to measuring the fixture’s physical dimensions, identifying its mounting mechanism, and verifying safety clearances. Whether your original glass globe shattered during cleaning or you are updating an outdated design, a mismatched shade can lead to installation frustration, poor light distribution, or even safety hazards. By taking precise measurements of the fitter opening, assessing the weight limits of your ceiling box, and accounting for the environmental conditions of your room, you can confidently select a replacement shade that fits securely and functions beautifully.
In tropical climates like the Philippines, selecting the right shade also involves considering how heat and humidity interact with different materials. High ambient temperatures mean that heat dissipation around the light bulb is critical, while elevated humidity levels can affect metal fitters and mounting hardware over time. Taking the time to measure your fixture accurately ensures that your new shade not only complements your interior decor but also maintains a safe and efficient lighting environment.
Safety First: Preparing Your Fixture for Measurement
Before you begin handling your ceiling fixture or attempting to measure its parts, establishing a safe working environment is paramount. Working with overhead electrical installations carries inherent risks of electrical shock and physical injury from falls or dropping heavy components.
Products mentioned in this guide
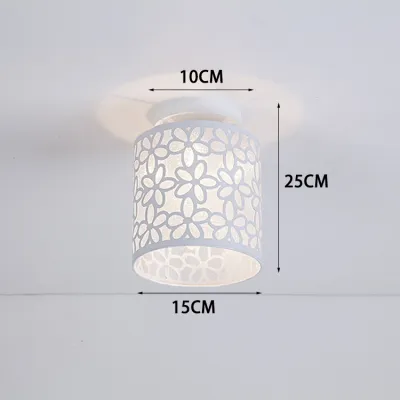
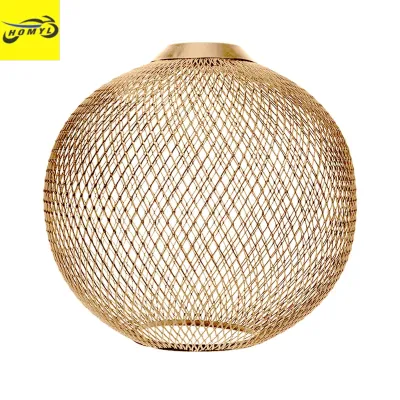
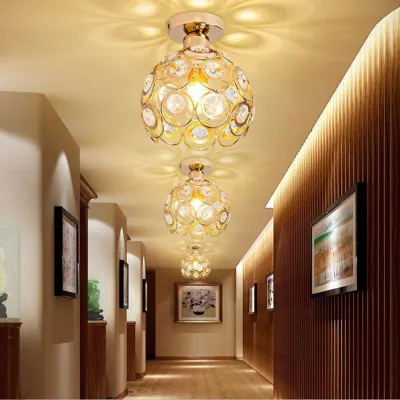
![KOQZM💖[HOT SALE]🎈🎈 E27 Plastic Lampshade Long Tube Conical PP Circular E14 Bulb Cover for Modern Interior Ceiling Pendant Lighting](https://img.lazcdn.com/g/p/87bea486a0c264e8cafc31a34b57c622.jpg_400x400q80.jpg_.webp)
Prices are valid at publication and may change. Please refer to the product page for the latest price.
First, isolate the power supply. Do not rely solely on the wall switch to turn off the light, as some wiring configurations may still leave live current at the socket. Locate your home’s main electrical panel or sub-panel—often situated in utility areas, kitchens, or hallways in Philippine homes—and switch off the specific circuit breaker dedicated to the lighting circuit. Verify that the power is completely off by attempting to turn the light switch on.
Next, allow the fixture and the bulb to cool down completely. Incandescent bulbs, halogens, and even high-wattage LED bulbs can reach high temperatures during operation, posing a significant burn risk. Wait at least 15 minutes after turning off the power before touching any part of the fixture.
To reach the ceiling safely, use a sturdy step ladder placed on a flat, even floor. Avoid improvising with dining chairs, plastic stools, or unstable tables, which can easily tip over. Position the ladder directly beneath the fixture so you can work comfortably without overreaching or losing your balance. If you encounter any signs of structural damage, such as a loose ceiling box, exposed or fraying wires, or crumbling plaster around the mount, stop immediately. Do not attempt to measure or remove the shade yourself; instead, contact a qualified professional electrician to inspect and repair the wiring and mounting assembly.
Identifying the Fitter Type and Mounting Mechanism
The compatibility of a replacement ceiling lamp shade depends heavily on its fitter type and how it attaches to the fixture. The fitter is the portion of the shade that physically connects to the lamp holder or fixture body, narrowing down your search to compatible designs.

One common style is the lip fitter, which features a raised neck or flange at the opening of the shade. This lip is designed to slide into a metal cup on the fixture and is held in place by three or more thumb screws that tighten gently against the neck. Another prevalent design is the straight-sided or neckless fitter, often seen in globe-style shades, where the opening is completely flat and relies on internal spring clips or a threaded collar to stay in place.
Threaded collar systems, also known as uno or socket-ring fitters, are widely used in modern semi-flush mounts and pendant lights. In this setup, the shade has a plain hole at the top that slides directly over the electrical socket. A threaded plastic or metal ring (the socket collar) is then screwed onto the outside of the socket, sandwiching the shade securely against the fixture body.
Pay close attention to the orientation of the fitter. Ceiling fixtures can hold shades in an upright position (pointing toward the ceiling) or a downward position (pointing toward the floor). A shade designed for an upright fixture might rely on gravity to sit in a cup, whereas a downward-facing pendant requires a positive locking mechanism, such as thumb screws or a threaded collar, to prevent the shade from falling. Ensure your replacement shade is explicitly compatible with the physical orientation of your fixture.
Measuring the Critical Dimensions for a Perfect Fit
Once you understand how the shade attaches, you must take precise physical measurements to ensure a seamless fit. Using a caliper or a precise ruler is recommended, as even a difference of a few millimeters can prevent a proper fit.
Start by measuring the fitter diameter. For fixtures with thumb screws, measure the inner diameter of the metal fitter cup where the shade’s neck will sit. If you are measuring an existing glass shade that you want to duplicate, measure the outer diameter of the shade’s neck (the lip). Common nominal sizes include 2-1/4 inches, 3-1/4 inches, and 4 inches, but actual physical measurements may vary slightly. For threaded collar fixtures, measure the outer diameter of the socket threads to ensure the opening at the top of the new shade is large enough to slide over the socket but small enough to be held by the collar.
Next, measure the overall physical limits of the space where the shade will hang. Record the maximum allowable width (or diameter) and height for the new shade. Consider nearby obstructions such as tall cabinet doors, ceiling fans, or adjacent walls. An oversized shade may interfere with nearby fixtures or make the space feel cramped.
Finally, verify the bulb clearance and heat dissipation space. This is especially critical in warm climates where ambient temperatures are already high. Measure the distance from the center of the socket to the inner walls of the proposed shade. There should be a minimum clearance of 1 inch (approximately 2.5 centimeters) between the bulb and the shade material to allow air to circulate. This prevents heat buildup, which can degrade LED driver components, shorten bulb lifespans, or damage delicate shade materials. Also, check the bulb’s physical size and base type (such as E27 or E14) to ensure it fits comfortably inside the new shade without touching the sides.
Evaluating Weight Limits and Environmental Constraints
A replacement shade must not only fit the physical dimensions of the fixture but also respect the structural limits of the installation and the environmental conditions of the room. Failing to account for these factors can lead to sagging fixtures or rapid material degradation.
Always check the fixture’s manufacturer label, if available, for maximum weight limits. Heavy materials like thick glass, stained glass, or solid metal place significant stress on the ceiling junction box and the mounting bracket. If your existing fixture originally held a lightweight paper, fabric, or thin plastic shade, upgrading to a heavy glass globe may exceed the safe load capacity of the mounting bracket. If the bracket appears bent or corroded, stop and consult a professional to reinforce the mounting system.
Environmental factors play a major role in material selection. In high-humidity areas like bathrooms, laundry rooms, or semi-outdoor patios, moisture can quickly rust steel components or cause mold to grow on fabric and paper shades. For these damp environments, opt for moisture-resistant materials such as sealed glass, acrylic, or treated aluminum, and ensure the fixture itself is rated for damp locations.
In kitchens, airborne grease and heat from cooking present unique challenges. Fabric, paper, or highly textured shades can trap grease and dust, making them difficult to clean and creating a potential fire hazard. Smooth glass or metal shades are highly recommended for kitchen environments because they can be easily wiped down and tolerate the elevated temperatures near cooking surfaces.
Creating a Specification Checklist for Your Search
To streamline your shopping experience, whether you are browsing local hardware stores or searching online marketplaces, compile your measurements and requirements into a structured specification checklist. Having these details readily available prevents purchasing errors and helps you quickly filter out incompatible options.
Your checklist should include the following essential parameters:
- Fitter Type: (e.g., Lip, Threaded Collar, Spring Clip)
- Fitter Diameter: (e.g., Inner cup diameter or outer socket diameter in millimeters or inches)
- Maximum Shade Dimensions: (Maximum width and height allowed by ceiling clearance)
- Bulb Base and Voltage: (e.g., E27 base, 220V compatibility)
- Maximum Wattage Limit: (Verify the fixture's socket rating, such as 40W or 60W, to prevent overheating)
- Material and Environment: (e.g., Moisture-resistant glass for bathrooms, easy-clean metal for kitchens)
- Budget Range: (Establish a realistic budget, such as ₱300 to ₱1,500, to guide your selection)
Matching every potential replacement shade against this checklist ensures your final choice is safe and compatible.
Frequently Asked Questions (FAQ)
Can I use an adapter if the new shade has a different fitter type?
Using an adapter to bridge the gap between mismatched fitter types is sometimes possible, but it requires careful safety evaluation. Common adapters, such as reducer rings or shade converters, are widely available in hardware stores and online marketplaces. These accessories can help adapt a shade with a larger opening to fit a smaller socket. However, adding an adapter can alter the fixture’s center of gravity or add extra weight, which may strain the ceiling mount. Always check the weight rating of both the adapter and the fixture, and ensure that the modification does not block airflow around the bulb or trap excess heat inside the shade.
What should I do if my ceiling fixture has no visible markings or specifications?
When a ceiling fixture lacks manufacturer labels or markings, you must rely entirely on precise physical measurements rather than assuming standard sizes. Use a caliper or ruler to measure the socket diameter, fitter cup, and screw threads directly. Take clear, high-resolution photos of the mounting mechanism, socket, and overall fixture from multiple angles. You can show these photos to lighting specialists at local hardware stores to help identify compatible parts. If the fixture is outdated, shows signs of brittle or ungrounded wiring, or has corroded components, do not attempt to modify it. Consult a licensed electrician to evaluate the system and determine if replacing the entire fixture is the safest course of action.

Community discussion
Share your experience or ask a question. Comments are reviewed before publication.