
Pairing and programming a remote for solar lights allows you to control your outdoor ambiance effortlessly, transforming your condo balcony into a cozy retreat with the press of a button. To establish a connection, ensure both the remote and the solar light unit have fresh batteries, turn on the physical power switch on the light fixture or solar panel, point the remote directly at the receiver, and hold down the pairing or power button until the light flashes to confirm the link. This simple setup eliminates the need to manually toggle switches on hard-to-reach fixtures, especially when they are mounted high on balcony railings or ceilings.
Quick Answer: Basic Pairing Steps for Solar Light Remotes
Setting up a remote for solar lights is a straightforward process that takes only a few minutes. Begin by installing fresh batteries into the remote control, typically a button cell or standard AAA batteries, and ensure the solar light’s internal battery has been charged under direct sunlight. Next, locate the physical power switch on the solar panel or the light fixture itself and turn it to the “ON” position. Point the remote control directly at the light’s receiver sensor from a short distance of one to two meters. Press and hold the power or designated pairing button on the remote for three to five seconds until the LED lights flash or blink, indicating that the wireless connection has been successfully established.
Before You Start: Checking Compatibility and Preparation
Before attempting to program your outdoor setup, it is essential to verify the technical specifications of your equipment to ensure seamless operation. First, identify whether your system uses an infrared (IR) or radio frequency (RF) receiver. Infrared systems require a direct, unobstructed line-of-sight between the remote and the sensor, whereas radio frequency systems can operate through light barriers but are still subject to local signal limits. Check the manufacturer’s manual to confirm the operating frequency, voltage requirements, and whether the system utilizes physical dip-switches inside the battery compartments to match channels.
Products mentioned in this guide
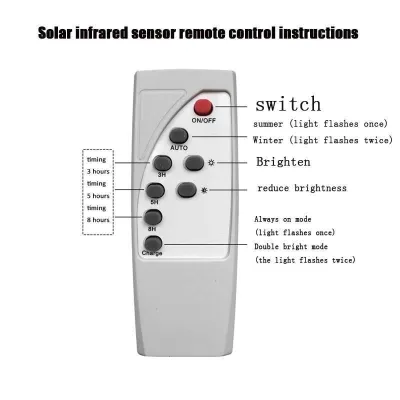
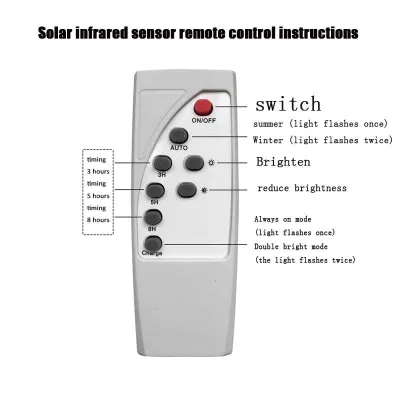
![[🇵🇭 Stock&COD] Universal Solar Light Remote Controller Replacement for Solar Street Light Panels Outdoor Use](https://img.lazcdn.com/g/p/fe5c1631676c637a388c2f9086eeb8ef.jpg_400x400q80.jpg_.webp)
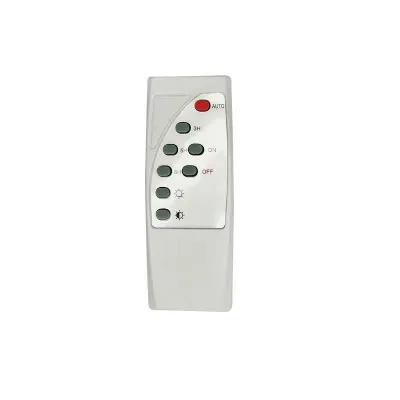
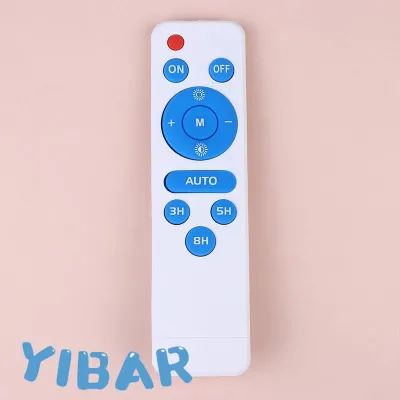
![[COD] General LC-1299 Keys IR Remote Controller Pad Lamp For LED Solar Light Flood Light And Street Light](https://img.lazcdn.com/g/p/cddb0ba62bbf244de7c307e8c6b38d3a.jpg_400x400q80.jpg_.webp)
Prices are valid at publication and may change. Please refer to the product page for the latest price.

Because balcony installations are exposed to tropical weather conditions, including high humidity and heavy seasonal rains, verify that your solar lights carry an appropriate outdoor ingress protection rating, such as IP65 or higher. Ensure that all electrical connections between the solar panel and the light fixture are fully sealed and dry before turning on the power. If your installation involves mounting fixtures at a height or routing cables along the balcony ceiling, always prioritize safety by securing the ladder, isolating any connected power sources, and consulting a qualified professional if you are integrating the system with fixed household wiring. Finally, allow the solar panel to charge the internal battery in direct sunlight for at least eight hours before initiating the pairing sequence, as low voltage can cause pairing failures or erratic remote behavior.
Step-by-Step Guide to Pairing Your Remote for Solar Lights
Auto-Connect and Standard Pairing Methods
Most modern remote-controlled solar lights utilize an automatic pairing sequence designed for quick installation. To begin, turn off the physical power switch on the solar light fixture or panel and wait approximately ten seconds to allow the internal circuit board to discharge completely. Turn the physical switch back to the “ON” position, which opens a brief pairing window of about five to ten seconds. Immediately point the remote control at the receiver and press and hold the “ON” or “Pair” button. Continue holding the button until the connected LED lights flash, change brightness, or blink repeatedly, confirming that the receiver has locked onto the remote’s unique frequency.
Manual Code Entry and Dip-Switch Alignment
For older models, heavy-duty commercial solar floodlights, or multi-channel systems, manual frequency matching is required to prevent interference from neighboring balcony setups. Locate the small access panel on the back of the solar light housing and open the battery compartment of the remote control to find the dip-switch array, which consists of a row of tiny plastic toggles. Use a small screwdriver or a pen tip to slide these switches into an identical pattern on both the remote and the light fixture. Once the patterns match exactly, turn on the main power switch and test the remote’s functionality from various points on your balcony to ensure the manual configuration is complete.
Confirming a Successful Connection
Verifying a successful link relies entirely on observing the physical behavior of the light fixture, as outdoor solar lights rarely feature audible indicators. A successful pairing is typically confirmed when the LEDs emit a single long flash, three rapid blinks, or a temporary shift in color temperature. If the light does not respond or remains continuously lit without flashing during the pairing attempt, turn the main power switch off, wait a few moments, and repeat the process. Ensure you are standing within the recommended operating range, which is usually within three meters for initial setup.
Configuring Light Modes and Timer Settings
Selecting Lighting Modes and Color Temperatures
Once paired, you can use the remote to customize the visual atmosphere of your condo balcony to suit different occasions. Use the mode selection buttons to cycle through various pre-programmed patterns, such as steady illumination, gentle fading, or dynamic flashing effects. If your solar lights feature adjustable color temperatures, you can toggle between a crisp cool white for functional tasks or a soft warm white to create a relaxing, intimate evening environment. These lighting styles and color temperatures are highly subjective preferences, allowing you to tailor the space to your personal taste.
Adjusting Brightness Levels
Controlling the brightness of your balcony lights is crucial for managing both visual comfort and energy consumption. Use the dimming buttons on your remote, which are often marked with sun icons or specific percentage increments like 25%, 50%, and 100%, to adjust the light output. Lowering the brightness to a moderate level helps minimize harsh glare in the compact space of a condo balcony while significantly reducing the drain on the internal battery. This power-saving practice is especially beneficial during consecutive rainy days when solar charging capacity is limited.
Setting Built-in Timers
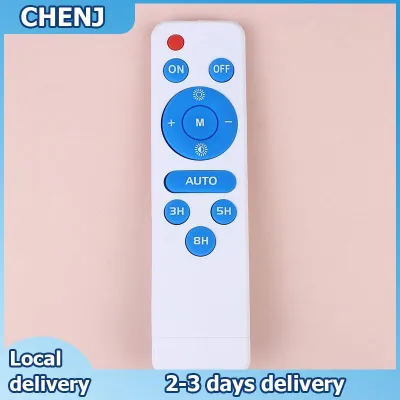
Automating your balcony lighting helps conserve battery power and ensures the lights do not remain active throughout the entire night. Most remotes feature dedicated timer buttons labeled with hour durations, such as “3H”, “5H”, or “8H”. Pressing one of these buttons programs the internal controller to turn the lights on automatically at dusk and shut them off after the specified number of hours. This automated cycle preserves the battery’s longevity and ensures that your solar lights have sufficient charge to operate reliably the following evening.
Troubleshooting Common Pairing and Connection Issues
Resolving Line-of-Sight and Range Obstructions
If your remote control stops responding, the most common culprit is a blocked signal path between the transmitter and the receiver. For infrared remotes, even minor obstructions like glass sliding doors, plastic privacy screens, or hanging balcony plants can completely block the signal. Clean the sensor window on the remote and the receiver lens on the solar fixture using a soft, dry microfiber cloth to remove accumulated dust, pollen, or salt spray from the air. Ensure you are pointing the remote directly at the sensor without any physical barriers in the way.
Performing a Hard Reset
When the system becomes unresponsive or exhibits erratic behavior, a complete hard reset can clear temporary programming glitches. Remove the batteries from the remote control and turn off the physical power switch on the solar light fixture. Leave both devices completely unpowered for at least two minutes to allow the internal capacitors to drain fully. Reinsert fresh batteries into the remote, turn the solar light’s physical switch back on, and perform the standard pairing sequence from a close distance to re-establish the connection.
Managing Signal Interference
Radio frequency remotes can occasionally experience signal interference from other wireless devices operating nearby, such as smart home hubs, wireless routers, or neighboring balcony lighting systems. If you suspect interference is preventing a successful connection, try programming the lights during a time of day when wireless traffic is minimal. Alternatively, temporarily turn off nearby wireless routers or electronic devices while performing the initial pairing sequence to allow the remote and receiver to lock onto each other without disruption.
Optimizing Solar Light Placement on a Condo Balcony
Maximizing Sunlight Exposure
Condo balconies often present unique challenges for solar charging due to overhanging ceilings, structural pillars, and adjacent buildings that cast shadows. Mount your solar panel in the highest, most unshaded position available, typically along the outer railing where it can capture direct sunlight. Ensure the panel is angled upward to maximize solar absorption throughout the day, keeping the surface clean and free from shadows cast by laundry racks or decorative plants. Proper charging is vital, as a weak battery will drastically reduce the receiver’s ability to detect remote signals.
Balancing Signal Reception and Safety
When positioning your fixtures, place the light unit so that the receiver sensor faces inward toward your balcony seating area, ensuring an unobstructed path for the remote control. Secure all light fixtures, solar panels, and connecting cables tightly using heavy-duty, UV-resistant zip ties or mounting brackets to prevent them from shifting or falling during strong tropical winds. Avoid placing the solar panel behind thick glass windows or tinted balcony doors, as these materials filter out the specific light wavelengths required to charge the internal battery efficiently.
Frequently Asked Questions (FAQ)
Can I use a universal remote for my solar lights?
Standard universal remotes designed for home entertainment systems, such as televisions or audio equipment, are not compatible with solar lights because they operate on different infrared protocols and radio frequencies. Most remote-controlled solar lights require their proprietary remote control or a specialized outdoor lighting controller designed specifically for that product line. If you lose your original remote, check with the manufacturer or search an online marketplace for a compatible replacement remote that matches the exact model and frequency of your solar light system.
Why does my remote only work when I am very close to the light?
A severely limited operating range is typically caused by low battery power in the remote control, which weakens the transmitted signal. Other common causes include a dirty receiver lens on the solar fixture, physical obstructions on the balcony, or intense ambient sunlight causing glare that interferes with infrared signals. To resolve this issue, replace the remote’s battery with a fresh cell, which typically costs around ₱50 to ₱100, clean the sensor windows on both devices, and try operating the remote from an angle that avoids direct sunlight glare on the receiver.

Community discussion
Share your experience or ask a question. Comments are reviewed before publication.