
Placing an acrylic soft mirror wall in a small room is one of the most effective, budget-friendly ways to create the illusion of double the square footage. Unlike heavy glass mirrors, these lightweight, flexible sheets can be mounted directly to almost any flat surface without drilling or heavy anchors. To maximize this spatial illusion, you must strategically position the mirrors to capture natural light, align them to extend the room’s sightlines, and ensure the mounting surface is perfectly flat to prevent optical distortion.
In compact living spaces, such as urban condominiums or studio apartments in the Philippines, maximizing natural light is essential for comfort. The tropical sun provides bright, ambient light that, when bounced correctly off a reflective surface, makes a cramped room feel airy and expansive. However, achieving this effect requires more than just sticking a mirror sheet onto a random wall. It demands a careful understanding of how acrylic behaves, where the light falls throughout the day, and how to prepare your walls to handle the adhesive in warm, humid conditions.
Assessing Your Room and Acrylic Mirror Properties
Before purchasing your acrylic soft mirror panels, understand how this material differs from traditional silvered glass. Acrylic is a synthetic polymer that is highly impact-resistant, incredibly lightweight, and flexible. These properties make it exceptionally safe for households with children or pets, as there is no risk of shattering. However, because acrylic is flexible, it lacks the structural rigidity of glass. Any slight curve, bump, or texture on the wall behind it will cause the mirror to bend, resulting in a distorted, “funhouse” reflection.
Products mentioned in this guide
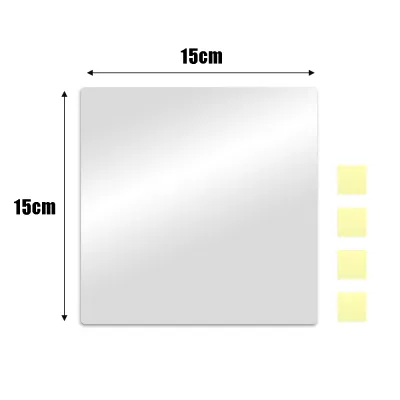
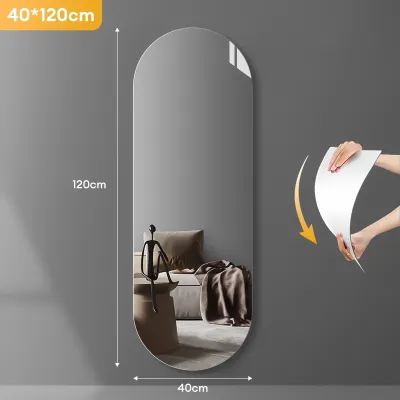
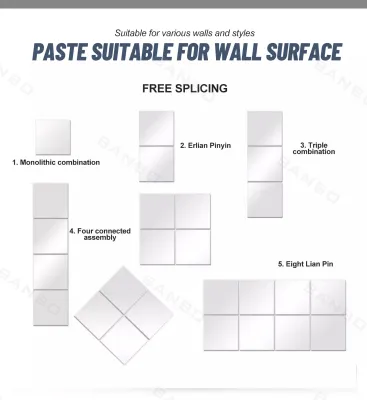

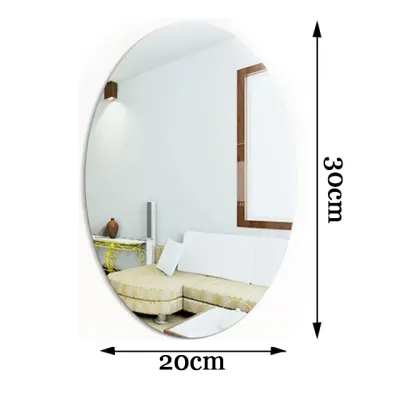
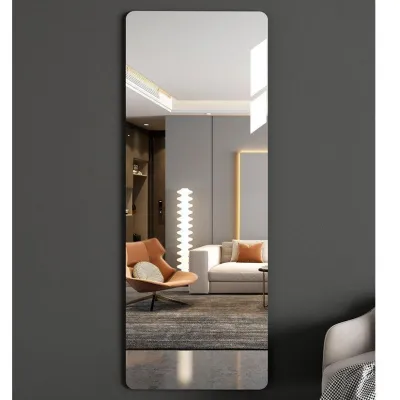
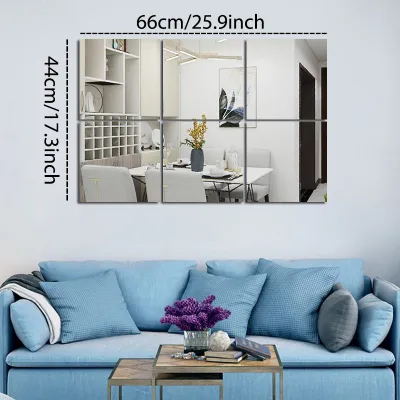
Prices are valid at publication and may change. Please refer to the product page for the latest price.
To determine if your room is suitable, start by evaluating your wall surfaces. Run your hand across the plaster or drywall; it must be completely smooth and flat. If your home features textured concrete walls, common in many local residential builds, you will need to address the texture before mounting the sheets directly, or consider mounting the acrylic to a flat backing board first.
Next, observe the natural light patterns in your room. Identify where the sunlight enters through windows or glass doors and how it moves across the space during the day. The goal is to find a wall section that receives direct or indirect light but does not experience extreme heat buildup. Additionally, look at what the mirror will actually reflect. A mirror placed directly opposite a cluttered storage shelf or a busy utility area will only double the visual clutter, making the room feel more chaotic rather than larger.
Strategic Placement Techniques for Maximum Space Illusion
The placement of your acrylic soft mirror wall determines how successfully it tricks the eye into perceiving a larger space. One of the most powerful techniques is opposite-light placement. By positioning your mirror panels on the wall directly across from a primary window, you capture the incoming tropical daylight and bounce it deep into the darker corners of the room. This not only brightens the entire space but also creates a visual “window” on an otherwise solid wall, effectively breaking the boundary of the room.

Another highly effective strategy is focal point extension, which works exceptionally well in narrow hallways, entryways, or tight corners. Placing a vertical strip of acrylic mirrors at the end of a narrow corridor makes the hallway appear to continue indefinitely. In a small bedroom or living room, positioning mirrors in a corner can soften the sharp, enclosing angles of the walls, making the boundaries of the room feel less defined and more open.
When planning the arrangement of your mirror sheets, you have several design paths to choose from, each offering a distinct visual impact. A single, large-format sheet provides a seamless, continuous reflection that mimics a solid glass wall, but it requires an absolutely flawless wall surface to avoid distortion. Alternatively, a grid layout using smaller square or rectangular acrylic tiles is highly popular. The gaps or decorative frames between the tiles create a stylish window-pane effect that naturally masks minor wall imperfections while still bouncing light effectively. For a more modern, artistic touch, an asymmetrical gallery layout of geometric mirror shapes can draw the eye upward, emphasizing the height of the room rather than its limited floor area.
Regardless of the layout you choose, always prioritize clutter avoidance. Before finalizing the position, stand where the mirror will be placed and look at what lies directly opposite. Aim to reflect clean, open spaces, minimalist decor, or indoor plants. Reflecting green foliage from indoor potted plants or outdoor trees visible through a window can bring a refreshing, natural element indoors, enhancing the peaceful, spacious feel of your home.
Preparing Tools and Adhesives for Wall Installation
A successful installation relies heavily on using the correct tools and selecting adhesives that can withstand local environmental conditions. Because the Philippines experiences high humidity and warm temperatures year-round, standard adhesives can degrade over time, leading to peeling corners or falling mirror sheets.
To begin, gather your measurement and marking tools. You will need a reliable tape measure, a spirit level to ensure perfectly straight lines, and low-tack painter’s tape to map out your layout on the wall before applying any permanent adhesive. For wall preparation, prepare a mild cleaning solution, such as a mix of dish soap and water, along with lint-free microfiber cloths to remove any dust, grease, or oils from the wall surface.
When selecting your adhesive, check the manufacturer’s specifications to ensure compatibility with both acrylic and your specific wall paint. Double-sided foam tape is excellent for absorbing minor wall irregularities, but you must choose a moisture-resistant, heavy-duty variety. Damage-free hanging strips are a fantastic option for renters, as they allow for clean removal later, provided the wall paint is fully cured and stable. Avoid using aggressive solvent-based glues or construction adhesives unless they are explicitly labeled as safe for acrylic mirrors, as harsh chemicals can eat through the reflective backing, leaving permanent dark spots on your mirror.
Step-by-Step Wall Installation Guide
Follow this step-by-step guide to ensure your acrylic soft mirror wall is installed flat, aligned correctly, and securely bonded to the wall.
Step 1: Clean and dry the wall surface. Begin by wiping down the designated wall area with your mild cleaning solution and a lint-free cloth. This step is vital in tropical climates, where airborne dust and humidity can create a thin, invisible film on walls that prevents adhesives from bonding properly. Allow the wall to dry completely for at least one to two hours before proceeding.
Step 2: Map out your layout. Use your tape measure and spirit level to mark the exact boundaries of your mirror arrangement. Apply painter’s tape to the wall to outline where each panel will go. This visual guide allows you to step back and verify that the placement looks balanced and straight before you commit to sticking the panels down.
Step 3: Apply the adhesive and mount the panels. If your acrylic mirrors came with pre-applied adhesive backing, carefully peel off the protective paper. If you are using separate double-sided foam tape or hanging strips, apply them evenly around the perimeter of the back of the mirror, about one centimeter from the edge, and add a few strips across the center for support. Align the mirror panel with your painter’s tape guides on the wall. Press the mirror firmly against the wall, starting from the center and smoothing outward toward the edges. This outward motion helps eliminate trapped air pockets that could cause the flexible acrylic to bulge and distort the reflection.
Step 4: Allow the adhesive to cure. Once all panels are mounted, leave them undisturbed to allow the adhesive to cure fully. This curing process typically takes 24 to 48 hours, depending on the specific adhesive and the humidity levels in your home. Avoid cleaning or putting pressure on the mirrors during this time. Finally, peel off the protective plastic film from the front surface of the acrylic to reveal your clear, reflective new wall.
Common Installation Mistakes and Stopping Conditions
While installing acrylic soft mirrors is a straightforward DIY project, certain mistakes can ruin the visual effect or damage your walls. The most common error is attempting to force a flexible mirror sheet over a highly textured, uneven, or curved wall. Doing so will inevitably result in severe optical distortion, making the reflection look warped and dizzying, while also causing the edges of the mirror to lift and peel away over time.
Additionally, avoid installing standard acrylic mirrors in high-heat zones, such as directly behind a kitchen stove or near heat-emitting appliances. Extreme heat can cause the synthetic polymer to warp, expand, or even melt. Similarly, do not install them in unventilated, damp areas without first verifying that both the mirror backing and the adhesive are rated for continuous moisture exposure.
You must establish clear stopping conditions during the installation process. If you notice that your wall paint is peeling, the wallpaper is tearing under the weight of the test strips, or the adhesive fails to stick during a small test patch, halt the installation immediately. Do not proceed with mounting the entire wall of mirrors. Instead, consult a professional painter or a home improvement specialist to assess whether your wall requires priming, scraping, or an alternative mounting method, such as attaching the mirrors to a lightweight plywood backing board first.
Cleaning and Maintaining Acrylic Mirror Clarity
To keep your acrylic soft mirror wall looking pristine and spacious, you must adopt a gentle cleaning routine. Acrylic is significantly softer than glass and can scratch easily if subjected to abrasive materials or harsh chemicals.
Always use a clean, ultra-soft microfiber cloth and mild soapy water or a dedicated acrylic cleaner. Strictly avoid using standard glass cleaners that contain ammonia, alcohol, or abrasive agents, as these chemicals can degrade the acrylic polymer, causing it to cloud, yellow, or develop fine cracks over time.
Before wiping the surface, gently dust the mirrors to remove any loose particles. In dry or dusty seasons, hard dust particles can act like sandpaper if dragged across the mirror surface with a cloth. Blowing on the surface or using a very soft feather duster first is highly recommended.
Finally, perform a periodic inspection of the mirror edges, especially in humid environments. Look for any signs of lifting or moisture ingress behind the panels. If you notice a corner starting to peel, carefully reapply a small amount of compatible adhesive to secure it, preventing moisture from slowly degrading the reflective backing over time.
Frequently Asked Questions (FAQ)
Can acrylic soft mirrors be used in bathrooms or high-humidity areas?
Acrylic itself is highly resistant to moisture and will not rust or degrade like traditional glass mirrors when exposed to humidity. However, the primary challenge in bathrooms is the adhesive. High humidity and steam can quickly break down standard double-sided tapes and glues, causing the mirrors to fall. If you plan to install them in a bathroom, ensure the area is well-ventilated, use a specialized moisture-resistant adhesive, and seal the edges of the mirror to prevent water from seeping behind the reflective backing.
How do I remove acrylic mirrors from the wall without damaging the paint?
To remove acrylic mirrors safely, you must soften the adhesive before pulling the panel away. Use a hair dryer on a low-heat setting to gently warm the mirror surface, which will loosen the bond of the double-sided tape or glue. Once warmed, slide a piece of dental floss or thin fishing line behind the mirror and use a sawing motion to cut through the adhesive. If you feel significant resistance, or if the wall paint begins to peel and tear, stop immediately. Apply more gentle heat or use a dedicated adhesive remover safe for painted walls to dissolve the remaining residue without ripping the drywall.

Community discussion
Share your experience or ask a question. Comments are reviewed before publication.