
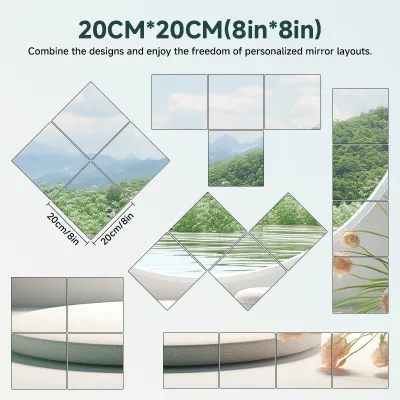
Placing an acrylic full body mirror wall sticker is one of the most effective, budget-friendly ways to visually double the size of a cramped room. By strategically positioning these lightweight, shatterproof panels, you can bounce natural light into dark corners, create the illusion of an extended hallway, and make low ceilings feel significantly higher. Unlike heavy glass mirrors that require drilling and sturdy wall anchors, acrylic stickers adhere directly to the wall, making them an excellent choice for renters in studio apartments, boarding houses, or cozy condominiums. To achieve a convincing spatial illusion without a distorted reflection, you must carefully plan where the mirror goes, how the surface is prepared, and how the panels are aligned.
Assess Your Room and Choose the Right Wall
Before peeling off any adhesive backing, take a walk around your room to identify the wall that offers the greatest spatial impact. The primary goal of a full-body mirror sticker is to trick the eye into perceiving depth where a solid wall exists. Look for a wall that directly faces a natural light source, such as a window, a balcony door, or an open doorway. Reflecting the outdoors or an adjacent brightly lit area instantly makes a small room feel airy and connected to the outside world.
Equally important is considering what the mirror will reflect. Avoid placing the mirror directly opposite cluttered areas, such as open wardrobe racks, laundry baskets, or busy work desks. Reflecting clutter only doubles the visual noise, which makes a small room feel even more cramped and chaotic. Instead, aim to reflect clean, minimalist zones, a beautiful indoor plant, or an attractive piece of art.
Products mentioned in this guide
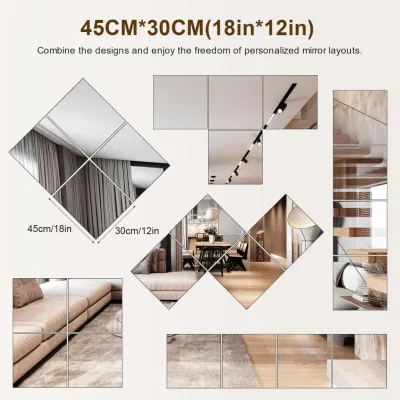
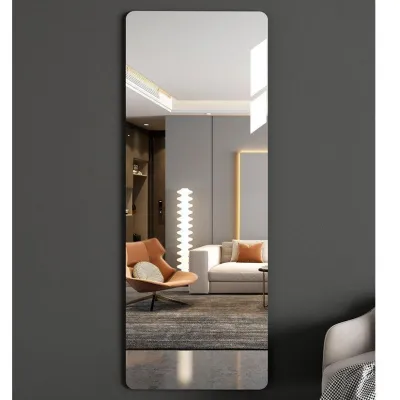
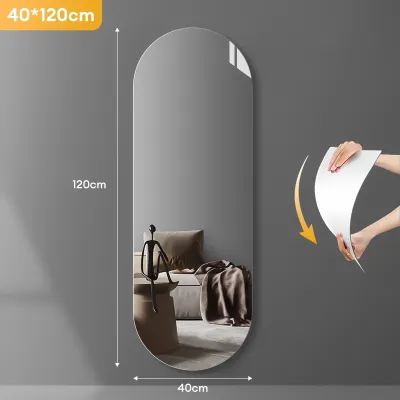
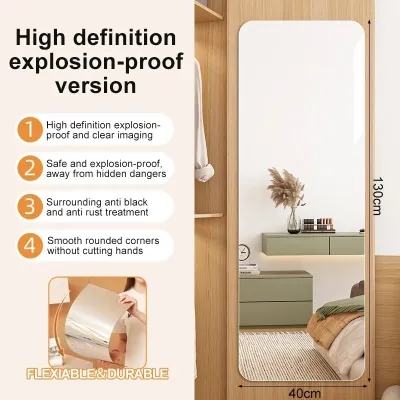

Prices are valid at publication and may change. Please refer to the product page for the latest price.
In tropical climates like the Philippines, wall materials and indoor humidity play a massive role in where you can safely mount adhesive decor. Many homes feature solid concrete walls finished with plaster and paint, while newer partition walls are often made of drywall or fiber cement boards. Ensure the wall you choose is completely dry and free from rising dampness, which is common on ground-floor concrete walls during the rainy season. High humidity can compromise the adhesive backing over time, so choose a wall that is well-ventilated and away from direct splashes or steam from an adjacent bathroom.
Prepare the Wall Surface for Secure Adhesion
A secure, long-lasting bond depends entirely on how well you prepare the wall surface before installation. Dust, oil, and moisture are the primary enemies of pressure-sensitive adhesives. Even a thin layer of household dust can prevent the sticker from gripping the wall, leading to peeling edges or the entire mirror panel falling off over time.

Start by wiping down the selected wall area with a clean, dry microfiber cloth to remove loose dust and cobwebs. For stubborn grime or oily residues, use a mild cleaning solution, such as a mixture of water and a few drops of dishwashing liquid, or a diluted isopropyl alcohol solution. Avoid using heavy household detergents or ammonia-based cleaners, as they can leave a slick residue that prevents the adhesive from bonding. After cleaning, allow the wall to dry completely. In humid tropical environments, this drying process can take several hours; do not rush this step, as trapping moisture behind the acrylic panel can lead to mold growth or adhesive failure.
Inspect the wall surface closely for any structural defects. Look for peeling paint, hairline cracks, or bubbling wallpaper. If the paint is already flaking, the weight of the acrylic mirror will likely pull the loose paint right off the wall. Sand down any rough patches or flaking paint, and wipe away the sanding dust before proceeding. If you are dealing with a freshly painted wall, check the paint manufacturer’s guidelines; most paints require at least two to four weeks to fully cure and release gasses before you can safely apply adhesive stickers without risking damage or poor adhesion.
Step-by-Step Installation for a Seamless Look
Installing an acrylic full body mirror wall sticker requires patience and precision to avoid misalignment and distorted reflections. Because acrylic is highly flexible, any slight bump, curve, or speck of dust behind the panel will cause the mirror to bend, resulting in a warped, funhouse-style reflection.
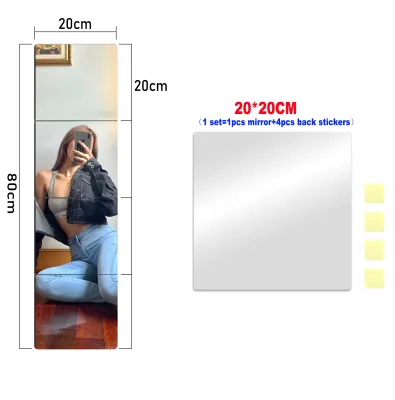
Begin by planning the layout on the wall. Use a measuring tape, a pencil, and a spirit level to draw light guide marks where the edges of the mirror panels will sit. If you are installing a multi-panel vertical mirror to create a full-body view, applying painter’s tape along the outer boundaries helps you visualize the final alignment before committing to the adhesive.
Once your guide marks are ready, carefully peel a small portion of the protective backing from the first panel. Align the top edge of the panel with your pencil marks. Slowly press the mirror onto the wall, working your way from the top down. Use a soft, clean microfiber cloth or a plastic squeegee wrapped in a soft cloth to press the panel firmly against the wall. Work from the center of the panel outward to the edges to push out any trapped air bubbles.
If you notice a trapped bubble or a slight misalignment, gently peel the panel back immediately before the adhesive cures, and reapply it. Do not pull too hard, as stretching the flexible acrylic can permanently warp the mirror sheet. Once all panels are securely pressed onto the wall, remove the protective film from the front surface of the acrylic to reveal the clear, reflective finish.
Positioning Techniques to Maximize the Space Illusion
To truly maximize the illusion of space, you must use strategic positioning techniques that play with light and perspective. One of the most effective methods is placing the full-body mirror sticker opposite or adjacent to a window. This positioning allows the mirror to act as an additional window, bouncing natural light deep into the darker corners of the room. This is particularly beneficial in urban apartments or studio condos where window space is limited.
Another technique is aligning the mirror with existing architectural lines or furniture. For example, placing the mirror sticker at the end of a narrow hallway makes the corridor appear to extend twice its actual length. Alternatively, positioning the mirror panels flush against the side of a wardrobe or next to a large piece of furniture can soften the heavy visual weight of the furniture, making it blend seamlessly into the room.
Avoid placing the mirror where it will reflect a blank, dark wall. A mirror reflecting nothing but empty space does little to enhance the room’s depth and can actually make the environment feel cold and sterile. Instead, position it to capture dynamic angles of the room, such as a view of a cozy seating area or a pathway leading to another room. This creates a sense of flow and continuity, making the overall layout feel much larger and more open than it actually is.
Maintenance and Safe Removal
Acrylic mirrors require gentle care to maintain their clarity and reflective quality over time. Unlike traditional glass, acrylic is a softer material that scratches easily. Avoid using paper towels, rough sponges, or abrasive scrubbing pads, as these can leave fine scratches that dull the surface. Instead, use a clean, damp microfiber cloth and a mild, ammonia-free glass cleaner or a simple mixture of water and mild dish soap. Always test any cleaning solution on a small, inconspicuous corner of the mirror first to ensure it does not cause clouding or chemical damage.
When it comes time to move out or redecorate, removing the adhesive mirror sticker safely requires a patient approach to protect your wall paint. Standard double-sided adhesives can grip walls tightly, especially after being exposed to tropical heat and humidity over several months. To soften the adhesive, use a handheld hairdryer on a low-to-medium heat setting, directing the warm air along the edges of the mirror panel. Gently slide a thin putty knife, a dental floss thread, or a plastic scraper behind the warmed adhesive to lift the panel away from the wall. Work slowly and stop immediately if you feel the wall paint or plaster beginning to tear, applying more heat as needed to ensure a clean release.
Frequently Asked Questions (FAQ)
Can I apply an acrylic mirror sticker over wallpaper?
Applying an acrylic mirror sticker directly over wallpaper is generally not recommended. The strong adhesive backing on the mirror can easily tear or peel the wallpaper when you eventually try to remove it. Additionally, if the wallpaper has a textured pattern or is lifting at the seams, the mirror sticker will not bond securely and may fall off, or the texture will transfer through the flexible acrylic, causing a distorted reflection. If you must apply it over wallpaper, ensure the paper is completely flat, clean, and firmly adhered to the wall, and consult both the wallpaper and mirror manufacturers’ guidelines first.
Will the mirror sticker distort my reflection?
Yes, acrylic mirror stickers can experience slight visual distortion if they are not installed on a perfectly flat surface. Because acrylic is thinner and more flexible than glass, it conforms to any imperfections, bumps, or curves on the underlying wall. To minimize distortion and achieve a clear, true-to-life full-body reflection, ensure the wall surface is completely smooth, flat, and rigid before installation. Using a solid backing board, such as a thin sheet of plywood or MDF mounted to the wall, can also provide the flat foundation needed for a distortion-free reflection.

Community discussion
Share your experience or ask a question. Comments are reviewed before publication.