
Installing a 220V direct plug LED strip light is an efficient way to elevate your condo’s ambiance without the complexity of low-voltage transformers or the need for professional electrical rewiring. Because these systems plug directly into standard household outlets, they carry a higher voltage than typical 12V or 24V alternatives, requiring careful planning and strict adherence to safety protocols. By understanding how to handle high-voltage components, prepare your mounting surfaces, and secure your connections, you can achieve a seamless, modern lighting setup that complies with typical condominium guidelines.
Assess Your Condo Space and Electrical Safety
Before purchasing or unrolling your lighting, you must evaluate your condo’s layout and electrical capacity. Standard high-rise units often feature concrete walls and columns that limit where you can easily run wires or install new outlets. Identify an existing, functional 220V wall outlet near your planned installation path. Relying on temporary extension cords or daisy-chained adapters to power high-voltage lighting is a significant fire hazard, especially in enclosed spaces like coves or behind valances. The outlet must be close enough that the strip’s integrated power cord can reach it naturally without being stretched or strained.
Next, inspect the physical surface where you plan to mount the strip. Whether you are highlighting a ceiling cove, a kitchen cabinet underside, or a living room display shelf, the surface must be completely dry, flat, and structurally sound. High humidity levels, common in tropical climates, can severely compromise standard adhesive backings over time. If the surface is uneven, dusty, or prone to moisture, the strip will eventually sag or detach.
Products mentioned in this guide
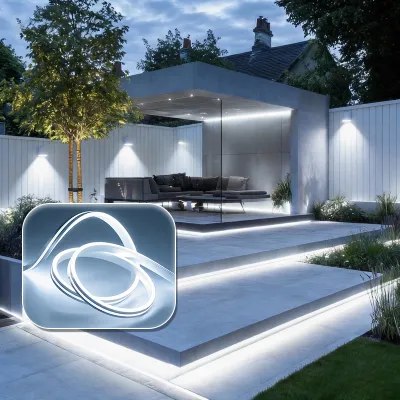
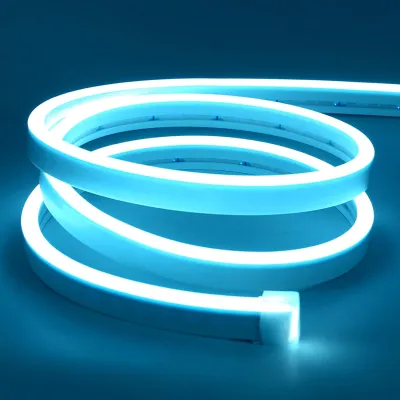
![[CLEARANCE] 220V LED Strip Light 2835 120LED IP65 Waterproof Rope Light Plug Type Outdoor Indoor](https://img.lazcdn.com/g/p/2f3cd20f68253ab6a14875c472a0d1bd.png_400x400q80.png_.webp)

Prices are valid at publication and may change. Please refer to the product page for the latest price.
Additionally, consult your condominium’s property management office (PMO) guidelines regarding unit alterations. Many high-rise buildings strictly prohibit drilling into structural concrete ceilings or columns, as this can compromise the building’s integrity or damage hidden utility conduits. If your layout requires mounting on concrete, you will need to plan for non-invasive mounting methods, such as heavy-duty double-sided mounting tapes designed for high temperatures, or lightweight aluminum channels secured with construction adhesive.
Gather the Right Tools and Materials
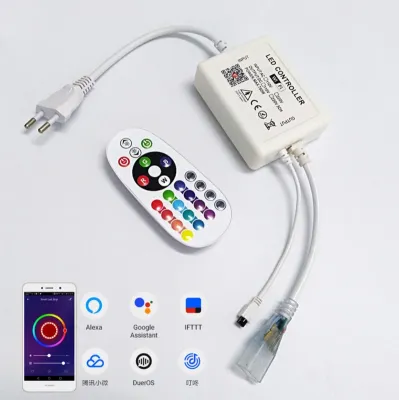
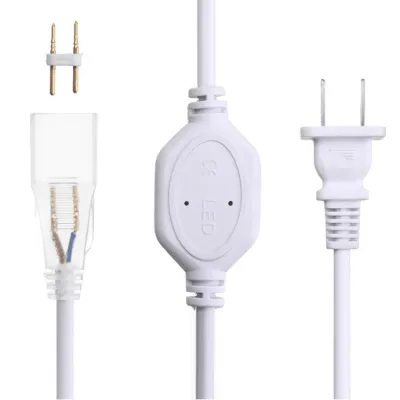
Having the correct tools on hand ensures a smooth installation and prevents dangerous improvisations. Your primary material is the 220V direct plug LED strip light kit, which typically includes the LED ribbon, an integrated rectifier plug (which converts household AC power to DC power for the LEDs), and end caps. Because 220V strips carry mains voltage throughout their entire length, they are encased in a thick, protective PVC sleeve. To mount this heavier profile securely, gather compatible mounting clips or slim aluminum channels, as the pre-applied adhesive on thick PVC strips is rarely sufficient for long-term overhead use. Budgeting a small amount in Philippine Pesos (₱) for quality mounting clips or channels will save you from dealing with sagging lights later.

For safety, keep a pair of insulated gloves and a non-contact voltage tester nearby. The voltage tester allows you to verify that your target outlet is functioning correctly and is completely de-energized if you are working near any exposed wiring. You will also need a standard measuring tape, a clean microfiber cloth, and isopropyl alcohol for surface preparation.
Unlike low-voltage strips that can be cut every few centimeters, 220V LED strips can only be cut at specific, widely spaced intervals—typically every one meter. Check your product specifications to identify these designated cut marks, which are usually indicated by a printed scissor icon or a clear gap in the internal circuitry. Ensure you have a sharp utility knife or heavy-duty shears to make clean, straight cuts through both the thick PVC casing and the internal copper conductors.
Step-by-Step Installation Guide
Installing your high-voltage LED strip requires a systematic approach that prioritizes physical alignment before electrical connection. Never plug the strip into the wall outlet while it is still coiled on its reel, as the concentrated heat can melt the PVC casing and cause a short circuit or fire. Keep the power cord completely disconnected from the wall throughout the entire mounting process, reserving the electrical connection solely for the final testing phase.
Prepare the Surface and Plan the Layout
Begin by thoroughly cleaning the mounting surface to remove dust, grease, and ambient grime. Pour isopropyl alcohol onto a microfiber cloth and wipe down the entire path where the strip will sit. Allow the surface to dry completely; any remaining moisture or cleaning residue will prevent the adhesive from bonding properly. In humid tropical environments, this step is critical to prevent premature peeling.
Measure the exact length of your planned run and map out the route. When navigating corners or transitions, do not bend the thick PVC-encased strip at sharp 90-degree angles, as this can crack the internal copper busbars and cause a section of the strip to fail. Instead, maintain a gentle curve that respects the manufacturer’s specified minimum bending radius.
If your layout requires you to shorten the strip, locate the nearest designated cut mark. Make a single, clean, perpendicular cut directly through the marked line using your utility knife or shears. Any jagged cuts or off-center slicing can bridge the internal positive and negative tracks, leading to a short circuit when powered. Immediately seal the cut end with a compatible silicone end cap and outdoor-grade silicone sealant to prevent moisture ingress and accidental contact with live wires.
Mount the LED Strip and Manage the Power Cord
With your path prepared, begin mounting the strip. If you are using the adhesive backing, peel away a small section of the protective liner at a time, pressing the strip firmly against the surface for at least thirty seconds to establish a strong bond. For overhead installations, ceiling coves, or vertical surfaces, do not rely solely on adhesive tape. Space out compatible plastic mounting clips or aluminum channels every 30 to 50 centimeters to support the weight of the heavy PVC sleeve.
Once the strip is physically secured, focus on routing the power cord to the outlet. Use adhesive-backed cable clips to secure the cord neatly along the edges of walls or cabinetry, ensuring it does not hang loosely where it could be snagged or present a tripping hazard. Keep the cord away from sharp metal edges, sliding cabinet doors, or heat-producing appliances like stoves and ovens.
The plug end, which often houses a bulky rectifier block, must remain fully accessible. Never bury the rectifier or plug behind drywall, inside sealed ceiling cavities, or within unventilated cabinets. These components require ambient airflow to dissipate the heat generated during AC-to-DC conversion. Keeping the plug accessible also ensures you can quickly disconnect the system during maintenance or emergencies.
Connect to Power and Test the Setup
Before inserting the plug, conduct a final visual inspection of the entire run. Ensure there are no exposed copper wires, the end cap is securely in place, and the strip is not pinched or twisted. Once satisfied, plug the power cord directly into your designated 220V wall outlet. Do not connect the strip to low-voltage transformers, standard wall dimmers, or electronic control systems unless they are explicitly certified by the manufacturer for 220V direct-voltage operation.
Switch on the outlet or inline switch and observe the light output. The entire length of the strip should illuminate instantly and uniformly. Look closely for any dark sections, flickering segments, or localized dimming, which can indicate a damaged internal conductor or a poor connection at the power feed.
Let the strip run for 10 to 15 minutes while monitoring its physical state. Gently touch the outer PVC casing and the rectifier block; they should feel warm to the touch but never hot enough to cause discomfort or emit a plastic odor. If you notice excessive heat, unusual buzzing sounds, or flickering, turn off the power immediately and unplug the unit.
Troubleshooting Common Installation Issues
Even with careful planning, you may encounter minor issues during or after the installation process. Adhesion failure is the most common problem in high-humidity condo environments. If your strip begins to sag, avoid using standard household glue or tape, which can degrade under the heat of the LEDs. Instead, install mechanical mounting clips or press the strip into dedicated aluminum LED profiles. These profiles not only hold the strip securely but also act as heat sinks, extending the lifespan of the LEDs.
If the strip fails to light up entirely, start your diagnosis at the power source. Use your non-contact voltage tester to confirm that the wall outlet is active. If the outlet has power, inspect the plug assembly. Some 220V direct plug kits feature an integrated fuse within the plug head or rectifier casing; check if this fuse has blown and replace it with one of the exact same rating if necessary. Ensure the pin connectors linking the power cord to the strip are pushed firmly into the internal conductors without any misalignment.
Flickering is another common issue that usually points to a loose connection or a faulty rectifier. Because 220V strips operate on alternating current, a failing or low-quality rectifier plug will fail to smooth out the electrical cycles, resulting in a rapid, visible strobe effect. If the flickering is localized to a specific section after a cut point, the internal copper tracks may have been damaged during cutting, requiring you to trim back to the next designated cut mark and re-establish the connection.
Maintenance and Safety Reminders for Condo Living
Maintaining your high-voltage LED strip light is straightforward but requires strict adherence to safety boundaries. Always unplug the power cord from the wall outlet before dusting, cleaning, or adjusting the physical layout of the strip. When cleaning, use a dry or slightly damp microfiber cloth; never spray liquid cleaners directly onto the strip, plug, or outlet, as moisture can seep through microscopic gaps in the PVC casing and cause an electrical shock.
Because 220V LED strips operate at a higher voltage and generate more heat than low-voltage systems, ventilation is critical. Avoid covering the strip with fabrics, paper decorations, or other flammable materials. If you are installing the strip inside a deep cove or a recessed shelf, ensure there is adequate open space for heat to dissipate naturally into the room.
Establish a clear stop condition for your lighting setup. If you observe any signs of physical degradation—such as a frayed power cord, a cracked PVC sleeve, a discolored or melting plug, or a persistent burning smell—unplug the unit immediately. Do not attempt to patch damaged high-voltage wires with electrical tape or perform DIY repairs on a compromised rectifier. High-voltage electrical failures in multi-family condo buildings carry severe risks; always replace the damaged assembly entirely or consult a qualified professional.
Frequently Asked Questions (FAQ)
Can I use a standard wall dimmer switch with a 220V direct plug LED strip?
No, you cannot use a standard low-voltage wall dimmer switch with a 220V direct plug LED strip. Standard wall dimmers are designed for traditional incandescent or compatible low-voltage LED fixtures and can damage the strip’s integrated rectifier or cause severe flickering and overheating. If you want to adjust the brightness, you must use a specialized inline dimmer rated specifically for 220V high-voltage LED strips, or connect the strip to a smart plug rated for your unit’s voltage and the strip’s total wattage.
Is it safe to install a 220V LED strip in a condo bathroom or kitchen?
Standard 220V direct plug LED strips are generally not safe for wet areas like bathrooms or the immediate vicinity of kitchen sinks unless they carry a certified ingress protection (IP) rating of IP65 or higher, indicating a completely sealed, waterproof casing. High-voltage electricity poses a severe shock hazard when exposed to moisture or steam. Always check the product label for its IP rating, ensure all connections and end caps are sealed with outdoor-grade silicone, and consult a qualified professional before installing high-voltage lighting in damp environments.
How do I hide the power cord without drilling into condo walls?
To hide the power cord without damaging your condo’s walls or violating rental agreements, use paintable, adhesive-backed cable raceways. These plastic channels stick directly to your walls or baseboards, enclosing the cord neatly, and can be painted to match your wall color. Alternatively, you can route the cord behind existing furniture, bookshelves, or valances, or use peel-and-stick decorative cord covers that can be removed cleanly without stripping the paint when you move out.

Community discussion
Share your experience or ask a question. Comments are reviewed before publication.