
Restoring a fading solar garden light to its original brightness often requires nothing more than a simple battery replacement. Over time, the rechargeable cells inside these outdoor fixtures degrade due to continuous daily charge cycles and exposure to environmental heat. Instead of discarding the entire decorative fixture, you can safely open the housing, swap out the old cell, and extend the life of your landscape lighting with minimal tools.
In tropical climates, where outdoor fixtures endure intense sun, high humidity, and heavy seasonal rains, internal components are subjected to harsher wear. Moisture can slowly seep past seals, and high ambient temperatures can accelerate the chemical aging of rechargeable batteries. Understanding how to access and service these components safely allows you to maintain a well-lit pathway or garden without unnecessary replacement costs.
Signs Your Solar Light Battery Needs Replacing
Before purchasing replacement parts or dismantling your garden lights, confirm that a degraded battery is indeed the root cause of the issue. The most common indicator of a failing battery is a drastic reduction in runtime. If your solar light receives a full day of direct, unshaded sunlight but only stays illuminated for an hour or two after dusk, the battery has likely lost its ability to hold a full charge.
Products mentioned in this guide
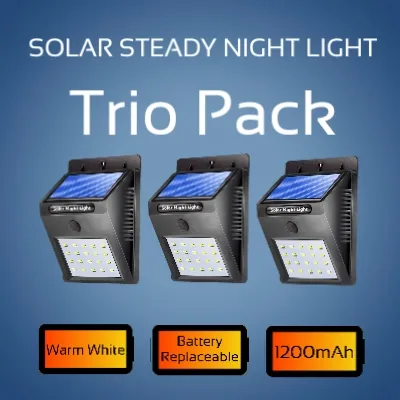
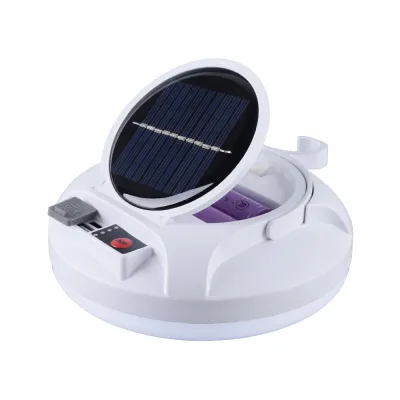
Prices are valid at publication and may change. Please refer to the product page for the latest price.
Another clear sign is erratic behavior, such as flickering, dim illumination, or a complete failure to activate automatically when darkness falls. While these symptoms can sometimes point to a faulty light sensor or a damaged LED, they are most frequently caused by a battery that can no longer supply stable voltage. In some cases, you might also observe physical indicators if the battery compartment is externally accessible, such as visible swelling of the battery casing, white powdery corrosion around the terminals, or rust on the metal contacts.
To rule out other common environmental issues before proceeding with a replacement, ensure the solar panel itself is clean and free of debris. A thick layer of dust, fallen leaves, or pollen can block sunlight and prevent the battery from charging properly. Additionally, verify that nearby plants or garden structures have not grown to cast shadows over the panel during peak daylight hours. Finally, double-check that the physical power switch on the fixture is firmly in the “ON” or “AUTO” position, as switches can sometimes be accidentally bumped during routine garden maintenance.
Tools and Materials Needed for the Replacement
To complete the replacement successfully, you must first identify the correct type of battery required for your specific fixture. Solar garden lights do not use standard household batteries; instead, they rely on specialized rechargeable cells. Open the battery compartment or consult the product manual to check the existing battery’s label for its exact chemistry, voltage, and physical size. Most common path lights utilize Nickel-Metal Hydride (NiMH) or older Nickel-Cadmium (NiCd) batteries, typically in AA or AAA sizes with a voltage of 1.2V. More modern or high-output fixtures may use Lithium-ion (Li-ion) or Lithium Iron Phosphate (LiFePO4) cells, which operate at higher voltages such as 3.2V or 3.7V.

Using a battery with the wrong chemistry or voltage can damage the fixture’s internal circuit board, prevent the solar panel from charging the cell, or create a safety hazard. Once you have sourced the correct replacement battery—which typically costs between ₱100 and ₱300 depending on the specifications—gather a few basic tools. You will need a small Phillips-head screwdriver (usually size #0 or #1) to remove the housing screws, a plastic prying tool or spudger to gently separate sealed plastic parts, and a soft, dry microfiber cloth to clean the components.
For safety, always perform this repair in a shaded outdoor area or indoors. When a solar panel is exposed to direct light, it continuously generates an electrical current. Working in a low-light environment ensures that the charging circuitry is inactive, minimizing the risk of accidental short circuits or static damage to the delicate electronic components while you handle the internal wiring. Note that while low-voltage, self-contained solar garden lights are safe for DIY battery replacement, any fixed-wiring outdoor lighting or high-voltage fixtures require strict power isolation and the expertise of a qualified professional.
Step-by-Step Guide to Replacing the Solar Light Battery
Replacing the battery is a straightforward process, but it requires a gentle touch. The internal wiring in small garden lights is often very thin and fragile, meaning hasty movements can easily tear a wire away from its solder joint on the circuit board.
Keep the solar panel covered with a dark cloth or work face-down on a soft towel to prevent the panel from generating power during the disassembly process. This also protects the plastic or glass face of the solar panel from scratches while you work on the underside of the fixture.
Opening the Housing and Accessing the Battery
Begin by locating the screws that secure the solar panel assembly or the top cap to the main body of the light. These screws are frequently recessed on the underside of the lid or hidden beneath small rubber weatherproofing plugs designed to keep moisture out. Carefully remove the screws using the appropriate screwdriver, applying steady downward pressure to avoid stripping the small screw heads, which may have become slightly soft or rusted from outdoor exposure.
Once the screws are removed, use a plastic prying tool to gently separate the seams of the housing. Avoid using metal screwdrivers or knives for prying, as they can easily crack the brittle, UV-exposed plastic or scratch the glass covers. As you separate the pieces, be mindful of any rubber weatherproofing gaskets or O-rings. These seals are critical for protecting the electronics from tropical downpours and high humidity; keep them clean and set them aside safely so they do not get lost or torn.
Removing the Old Battery and Checking Connections
With the housing open, you will see the battery compartment, the circuit board, and the wires connecting them to the solar panel and the LED. Before removing the old battery, take a quick photo with your phone to document the exact orientation of the positive and negative terminals. If the battery is held in a standard spring-loaded holder, gently slide it out. If it is connected via a wire harness, grasp the plastic connector plug firmly and pull it apart; never pull directly on the thin wires, as this can easily tear them from the connector.
Once the battery is removed, inspect the metal contacts inside the holder and the surrounding wires. Look for signs of rust, green copper corrosion, or loose solder joints. If you notice a small amount of dry, white powdery residue on the contacts, you can clean it off using a soft, dry brush. However, if the corrosion has eaten completely through the metal terminals, or if the internal wiring has detached from the circuit board due to severe rust, the internal electronics are likely compromised, and the entire fixture will need to be replaced.
Installing the New Battery and Reassembling
Insert the new rechargeable battery into the holder, ensuring that the positive (+) and negative (-) ends align perfectly with the markings inside the compartment and your reference photo. Incorrect battery orientation can cause an immediate electrical short, permanently damaging the control circuit. If your fixture uses a plug-in connector, align the plastic tabs and press the plug together until it clicks securely into place.
Before closing the housing, carefully tuck the internal wires back into their designated channels, ensuring they do not lie across screw holes or get pinched between the plastic edges of the casing. Realign the rubber weatherproofing gasket precisely in its groove to maintain a watertight seal. Reassemble the housing halves, insert the screws, and tighten them gently in an alternating pattern to distribute pressure evenly across the gasket, ensuring a secure, moisture-resistant fit.
Testing and Troubleshooting After Replacement
Once the fixture is fully reassembled, you can perform a quick test to verify that the new battery and connections are working properly. Cover the solar panel completely with your hand, a dark cloth, or place it face-down on a flat surface to simulate nighttime. If the battery has a partial factory charge and the connections are secure, the LED should illuminate immediately. Note that the perceived color temperature and spatial effect of the light are determined by the fixture’s built-in LED and lens design, not by the replacement battery.
If the light turns on during this test, place the fixture in an outdoor location that receives direct, unshaded sunlight for at least 8 to 12 hours. This initial deep charge is essential for calibrating the new battery and ensuring it reaches its maximum capacity. Avoid placing the light under trees, roof eaves, or near taller garden plants that might block the sun during the day.
If the light fails to turn on during your initial test, begin troubleshooting by checking the physical power switch. Ensure it is switched to the “ON” or “AUTO” position, as some switches require a firm push to engage. Next, reopen the battery compartment to verify that the battery is seated tightly against the metal contacts and that the polarity is correct. If the light still does not work after confirming these steps, the issue may lie in a damaged solar panel or a failed circuit board, indicating that the fixture has reached the end of its serviceable life.
Tips to Extend Your Solar Light Battery Lifespan
To maximize the lifespan of your new solar light battery and reduce the frequency of future replacements, establish a simple maintenance routine. Regularly wipe the surface of the solar panel with a clean, damp microfiber cloth to remove dust, pollen, bird droppings, and salt residue. In humid tropical environments, mold or algae can sometimes form along the edges of the panel; keeping the surface clean ensures the photovoltaic cells can convert sunlight into electricity at peak efficiency.
Keep the surrounding garden tidy by trimming back any overhanging branches, tall grass, or climbing vines that might cast shadows over the solar lights. Even partial shading for a few hours a day can significantly reduce the amount of energy the panel can generate, leading to incomplete battery charges that shorten the overall lifespan of the cell.
During prolonged periods of rainy weather, heavy overcast skies, or active typhoon seasons when there is little to no sunlight for several consecutive days, consider turning the lights off using their physical switches. This prevents the battery from continuously draining to a completely empty state, which can cause deep discharge damage and permanently reduce its capacity. If extreme weather or flooding is expected, temporarily store the fixtures indoors in a dry place to protect both the batteries and the internal electronics from severe water ingress.
Frequently Asked Questions (FAQ)
Can I use a standard alkaline battery in my solar garden light?
No, you must never use standard alkaline batteries in a solar garden light. Alkaline batteries are designed for single-use applications and are not rechargeable. When the solar panel is exposed to sunlight, it attempts to send a charging current back into the battery; forcing current into a non-rechargeable alkaline cell can cause it to overheat, leak highly corrosive chemicals, or rupture, which will permanently destroy the light fixture’s electronics. Always use rechargeable batteries that match the exact chemistry and voltage specified by the manufacturer.
How often should I expect to replace the battery in my solar light?
On average, the rechargeable batteries in outdoor solar lights last between one and two years before their capacity degrades significantly. This lifespan can vary depending on the quality of the battery cell, the number of daily charge-discharge cycles, and exposure to extreme outdoor temperatures. High tropical heat can accelerate the chemical degradation inside the battery. Instead of replacing the battery on a strict calendar schedule, monitor the light’s performance and plan a replacement when you notice a substantial drop in nightly runtime.
What should I do if the battery compartment is corroded?
If you discover minor, dry corrosion on the metal contacts, you can often clean it by gently scraping the residue away with a dry, stiff-bristled brush or a small piece of fine-grit sandpaper. Be careful not to inhale any of the loose dust. However, if the corrosion has eaten completely through the metal terminals, or if the internal wiring has detached from the circuit board due to severe rust, the fixture is no longer safe or functional. In such cases, cleaning will not restore operation, and the entire light fixture should be replaced.

Community discussion
Share your experience or ask a question. Comments are reviewed before publication.