
Setting up a blue RGB lighting theme is one of the most effective ways to transform a standard gaming room into an immersive, high-tech sanctuary. The cool, deep tones of blue light evoke a futuristic, sci-fi cockpit aesthetic that helps minimize distractions and draws your focus entirely toward the screen. Whether you are streaming your gameplay, engaging in competitive matches, or enjoying single-player campaigns, a well-executed ambient lighting design elevates the visual experience. However, achieving a clean, professional look requires more than simply sticking light strips to the back of your desk.
To build a truly captivating setup, you must balance visual appeal with practical considerations like room layout, electrical safety, and environmental factors. In tropical climates like the Philippines, high humidity and specific home construction materials, such as concrete walls, present unique installation challenges that require careful planning. By taking a systematic approach to your lighting layout, product selection, and physical installation, you can create a seamless blue-themed gaming environment that is both visually stunning and safe to operate over long gaming sessions.
Planning Your Blue RGB Lighting Layout
Before purchasing any lighting equipment, you must assess your gaming space to determine where the blue ambient light will have the greatest visual impact. The goal of ambient lighting is to provide soft, indirect illumination rather than harsh, direct glare. Key zones for placement include the back of your monitor (often called bias lighting), along the rear or under-edges of your desk, inside ceiling coves, or as modular wall panels. Placing lights behind your monitor is particularly beneficial, as it projects a soft blue glow against the wall, reducing the stark contrast between a bright screen and a dark room, which helps alleviate eye strain.
Products mentioned in this guide
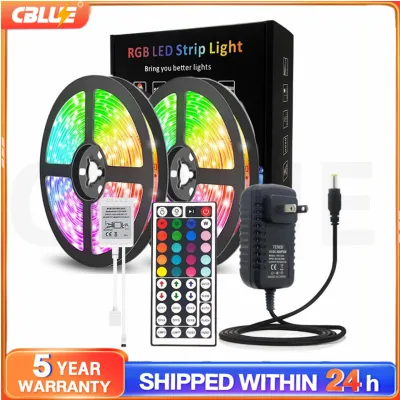
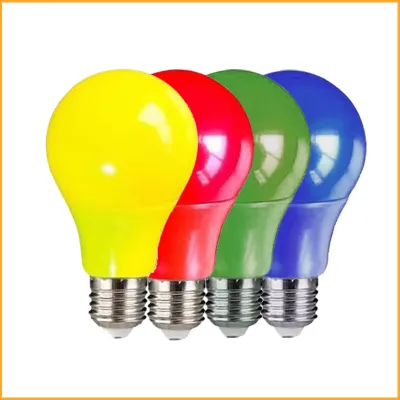
Prices are valid at publication and may change. Please refer to the product page for the latest price.
Accurate measurements are essential to avoid unsightly gaps or awkward overlaps in your lighting run. Use a flexible measuring tape to map out the exact paths where you plan to install LED strips. If you are outlining a desk, measure all three sides of the rear perimeter, keeping in mind that LED strips cannot make sharp 90-degree turns without risking damage to the internal circuitry. For modular wall panels, sketch your desired layout on paper first, measuring the available wall space to ensure the pattern fits symmetrically above your monitor or along an adjacent wall.
Power management and cable routing must be integrated into your initial plan rather than treated as an afterthought. Identify the locations of your nearest wall outlets and determine how many power adapters your setup will require. In many residential layouts or compact condo units, wall outlets may be limited, requiring the use of extension cords or power strips. Plan your cable paths so that all power bricks and wires can be neatly routed along the underside of your desk or behind furniture, keeping them completely hidden from view and clear of foot traffic to prevent tripping hazards.
Choosing the Right Blue RGB Strips and Panels
Selecting the right lighting products requires a careful look at technical specifications to ensure safety and compatibility with your home’s electrical system. In the Philippines, the standard residential electrical supply is 220V AC at 60Hz. Because most RGB LED strips and smart panels operate on low-voltage DC power (typically 5V, 12V, or 24V), they rely on an external power adapter to step down the voltage. Always verify that the input rating on the product’s power adapter explicitly supports 220V and carries recognized electrical safety certifications to prevent overheating or electrical faults.

The control interface is another critical factor that dictates how easily you can customize your blue aesthetic. Basic RGB strips often use simple inline controllers or infrared remotes, which limit your ability to fine-tune specific shades of blue. For a highly customizable setup, look for smart controllers that connect via Wi-Fi or Bluetooth to dedicated mobile apps or PC gaming software. This allows you to select precise hex codes for different shades of blue, such as deep royal blue, vibrant cyan, or soft ice blue, and coordinate them with your PC’s internal RGB components and peripherals.
Environmental conditions in your gaming room should also influence your product choice. The high humidity characteristic of tropical regions can cause standard double-sided adhesive backings to degrade and peel off over time. If your gaming room is cooled by an air conditioner that is turned off during the day, the resulting temperature fluctuations can accelerate adhesive failure. Additionally, if you have indoor plants, a room humidifier, or a liquid-cooled PC setup nearby, consider choosing LED strips with an IP65 rating, which features a protective silicone coating that shields the LEDs from ambient moisture and accidental splashes.
Step-by-Step Installation Guide
A successful installation begins with thorough surface preparation, as even the strongest adhesives will fail if applied to a dusty or oily surface. Unplug all your gaming gear and clear your desk or wall space. Wipe down the mounting surfaces using a microfiber cloth dampened with isopropyl alcohol to remove dust, fingerprints, and oils. Allow the surface to dry completely before attempting to mount any lights, as residual moisture will prevent the adhesive from forming a permanent bond.
When mounting LED strips, peel back the adhesive cover in small sections, pressing the strip firmly onto the prepared surface as you go. To ensure a secure, long-lasting installation—especially on the underside of desks or along vertical surfaces where gravity works against the adhesive—supplement the built-in tape with plastic mounting clips or aluminum channels. Aluminum channels are highly recommended for premium setups; they protect the strip from physical damage, act as a heat sink to dissipate warmth, and feature frosted diffuser covers that blend individual LED hot spots into a smooth, continuous bar of blue light.
Once the lights are physically mounted, focus on routing the cables neatly to maintain a clean aesthetic. Use adhesive cable clips or braided cable sleeves to bundle the power cords and controller wires together, securing them firmly to the underside of your desk frame. Ensure that no cables hang loose where they could be caught by the wheels of your gaming chair or exposed to the hot exhaust vents of your PC case. If your installation requires running cables through walls, hardwiring into fixed electrical circuits, or modifying structural fixtures, always isolate the power at your main circuit breaker and consult a qualified electrician to ensure compliance with local electrical codes.
Configuring and Syncing Your Blue Lighting Setup
With the physical installation complete, you can now power on your system and begin the software configuration. Plug in the power adapter and open the manufacturer’s companion app on your smartphone or PC. If you are using smart lights, ensure your router’s 2.4GHz Wi-Fi band is active, as many smart controllers require this frequency for initial pairing. Follow the on-screen prompts to connect your lights to your local network, grouping multiple strips or panels together so they can be controlled as a single cohesive zone.
When adjusting your color settings, experiment with different blue hues to find the balance that best suits your eyes and your gaming style. While deep, saturated blues look incredibly striking in photos, they can sometimes cause visual fatigue during long, late-night gaming sessions. Consider mixing in a small amount of green to create a soothing teal or cyan, which is often gentler on the eyes. Adjust the overall brightness level so that the ambient light complements your monitor’s output rather than competing with it; keeping the ambient brightness around 30% to 50% usually provides a rich glow without causing distracting screen glare.
If your hardware and software support dynamic integration, configure your lights to sync with your gameplay or system audio. Many smart lighting ecosystems offer desktop applications that analyze the colors on your monitor in real time, projecting matching blue tones onto the wall behind your desk to visually expand the boundaries of your game. For casual gaming or music listening, you can enable sound-reactive modes that pulse the blue light in time with the bass, adding an extra layer of sensory immersion to your setup.
Safety Checks and Routine Maintenance
To keep your blue RGB lighting setup running safely and looking its best, you should perform regular safety checks and basic maintenance. Periodically inspect all physical connections, paying close attention to the joints where LED strips connect to controllers or power extensions. Loose connections can cause individual color channels to fail, resulting in flickering or incorrect colors, and can also create localized heat buildup. If you rearrange your desk or move your PC, double-check that no power cables have been pinched or stretched taut.
Monitor the temperature of your power adapters and LED strips during extended gaming sessions. While low-voltage LED lighting is highly efficient, power bricks and high-density LED strips will still generate some heat. Ensure that power adapters are placed in well-ventilated areas, free from dust buildup, and never covered by blankets, pillows, or heavy cable bundles. If a power adapter feels excessively hot to the touch rather than comfortably warm, disconnect it immediately and check the product specifications to ensure you are not overloading the power supply’s rated capacity.
Keeping your lights clean is essential for maintaining their brightness and color clarity. Over time, dust will accumulate on the surface of LED strips and wall panels, dimming their output and trapping heat. Before cleaning, always disconnect the power supply completely to eliminate any risk of electrical shock. Wipe the surfaces gently with a dry or slightly damp microfiber cloth; never spray water, glass cleaner, or harsh chemical solvents directly onto the LEDs or controllers, as moisture can penetrate the protective seals and cause permanent damage to the circuitry.
Frequently Asked Questions (FAQ)
Can I mix blue RGB strips with other colored lights in the same room?
Yes, combining blue with other colors can create a highly dynamic and visually appealing gaming environment. Blue pairs exceptionally well with cool white, purple, or magenta to create a classic cyberpunk or synthwave aesthetic, or with warm amber tones for a high-contrast look. To achieve this without visual clutter, use multi-zone controllers or separate smart groups to manage different color zones independently. For practical comfort, it is highly recommended to balance cool blue ambient lighting with a warm white task light, such as a desk lamp or monitor light bar, to provide focused illumination when you need to read, write, or type.
Do blue LED strips consume a lot of electricity?
No, LED technology is highly energy-efficient, and blue RGB strips consume very little electricity compared to traditional incandescent or fluorescent lighting. To determine the exact power consumption of your specific setup, check the wattage rating printed on the product label or packaging, which is typically listed as total watts or watts per meter (such as 4.8W/m or 9W/m). You can estimate your daily energy usage by multiplying the total wattage by the number of hours you keep the lights on. For example, a standard 5-meter strip consuming 24 watts of power running for 5 hours a day will use only 0.12 kilowatt-hours of electricity, resulting in a negligible impact on your monthly utility bill, even when calculated against local electricity rates in the Philippines.

Community discussion
Share your experience or ask a question. Comments are reviewed before publication.