
Bringing the warm, inviting glow of outdoor solar lighting inside your condominium is entirely possible, even with strict building regulations and limited space. By utilizing a split solar tube light system, you can capture abundant tropical sunlight on your balcony and channel that energy indoors to power a soft, ambient light tube. This setup allows you to enjoy eco-friendly, cost-effective lighting in your living room or bedroom without relying on electrical outlets or violating condo association rules. Achieving this requires careful planning, from assessing your balcony’s sun exposure to routing cables safely through window seals.
Assessing Your Balcony for Solar Charging and Light Placement
Before purchasing any lighting equipment, evaluate the physical layout and environmental conditions of your balcony. Start by tracking the direct sunlight hours on your balcony railing or outer edge. In the Philippines, tropical weather provides intense sunlight, but high-rise buildings and deep balcony overhangs can cast significant shadows. Observe your balcony at different times of the day to identify the spot that receives the most consistent, unobstructed sunlight. Most solar panels require several hours of direct exposure to charge the internal battery fully, so locating this optimal charging zone is critical.
Next, review your condominium corporation’s house rules. Many properties enforce strict guidelines regarding exterior modifications, hanging objects, and drilling into common areas or structural walls. Drilling into the building’s exterior facade is almost universally prohibited because it can compromise waterproofing and structural integrity. Look for rules concerning what can be attached to balcony railings or visible from the street. Understanding these limitations beforehand helps you choose temporary, non-destructive mounting methods that keep you in good standing with property management.
Products mentioned in this guide
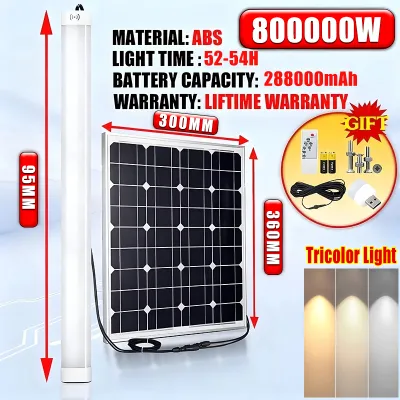
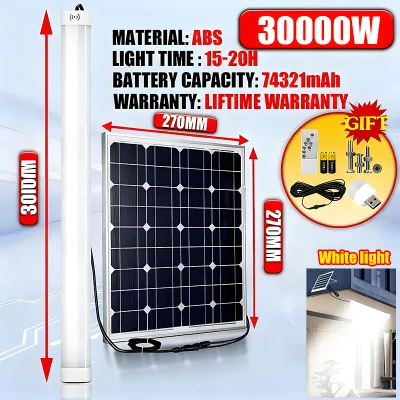
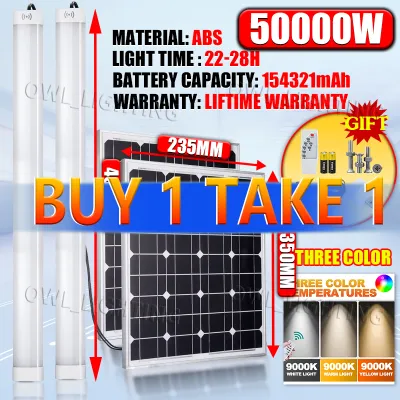
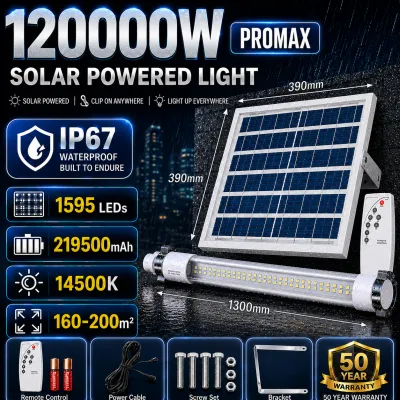
![[BUY 1 TAKE 1] Solar Light Tube Emergency Lamp with Panel Rechargeable Lamp Night Light Camping Ligh](https://img.lazcdn.com/g/p/d49b019dfc50bbb76c9f8b86b4c1ae9f.jpg_400x400q80.jpg_.webp)
Prices are valid at publication and may change. Please refer to the product page for the latest price.
Finally, measure the physical distance from your proposed outdoor solar panel location to the indoor area where you want to install the light tube. Map out the exact path the cable will take, including any turns around door frames or window tracks. Always add a bit of slack to your measurements to prevent the cable from being pulled taut, which can strain the connections and lead to premature wear. Knowing this distance ensures you select a light system with a connecting cable that is long enough to bridge the gap.
Choosing a Split Solar Tube Light System
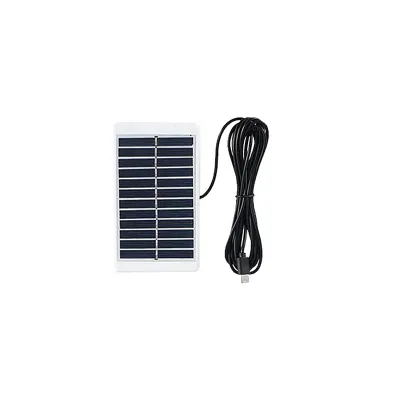
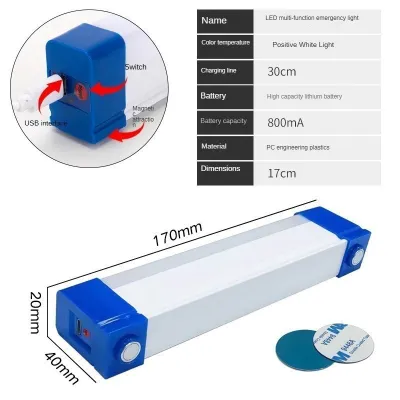
To successfully bring solar-powered light indoors, select a system specifically designed with a split configuration. Unlike standard all-in-one solar path lights, a split solar tube light system separates the solar panel from the actual light emitter. This design allows the solar panel to remain outdoors in direct sunlight while the light tube is positioned entirely indoors. When browsing options, prioritize models that feature a generous, durable connecting cable that links the two components. A longer cable gives you more flexibility in where you place the indoor light tube relative to the balcony door.

Because the solar panel will be exposed to the elements year-round, verify its weather-resistance labels and outdoor suitability specifications. Look for products that explicitly state their weatherproofing capabilities on the packaging or in the manufacturer’s manual. In tropical climates, the panel must withstand intense heat, high humidity, and heavy seasonal downpours. Check the product specifications for a high Ingress Protection (IP) rating, which indicates how well the housing protects against dust and water penetration. Avoid making assumptions based on product titles alone; always confirm the manufacturer’s official environmental ratings.
Additionally, pay close attention to the thickness and flexibility of the connecting cable. Since this wire must travel from the outdoors to the indoors, it will likely need to pass through window or sliding door seals. A cable that is too thick or rigid can prevent your doors from closing fully, compromising your condo’s security and air conditioning efficiency. Look for flat, low-profile, or ribbon-style cables designed specifically to pass through tight gaps without sustaining structural or electrical damage.
No-Drill Mounting Strategies for the Solar Panel
Mounting your solar panel securely without drilling requires creative, non-destructive hardware solutions. One of the most reliable methods is using adjustable railing clamps or heavy-duty, UV-resistant zip ties. These tools allow you to fasten the solar panel bracket directly to your balcony’s metal or concrete railing. When using zip ties, ensure they are rated for outdoor use, as standard indoor plastic ties will quickly degrade and snap under intense tropical sun exposure. Tension-based mounts, which wedge securely between the balcony floor and ceiling, also provide a stable platform for your panel without leaving permanent marks.
If your balcony has glass panels or smooth, non-porous tiled surfaces, weather-resistant adhesive hooks or suction cups designed for outdoor environments are excellent alternatives. Before application, clean the surface thoroughly with rubbing alcohol to remove dust, grease, and moisture, ensuring a strong bond. Always check the manufacturer’s specified weight limits for the adhesive and compare it to the weight of your solar panel. To prevent accidents, choose adhesives that are formulated to withstand high humidity and temperature fluctuations, which are common in tropical regions.
Once mounted, the solar panel must be angled correctly to maximize sunlight absorption while remaining secure against environmental hazards. Angle the panel upward toward the path of the sun, ensuring no nearby plants, laundry racks, or building pillars cast shadows over it during peak daylight hours. Double-check all attachment points to ensure the panel is firmly secured against strong winds and sudden tropical storms. A loose panel can easily become a safety hazard for units below, so periodic checks on the tightness of your clamps or the adhesion of your hooks are essential.
Routing the Cable Indoors Without Damaging Seals
Bringing the power cable indoors requires a routing strategy that preserves your condominium’s weatherproofing, insulation, and security. The most common entry point is through the bottom or side track of a sliding balcony door or window. To do this safely, position the flat or low-profile portion of the cable flat against the track where the door meets the frame. Avoid placing the cable in areas where it will be constantly stepped on or crushed by heavy foot traffic, as this will eventually break the internal copper wires and cause the system to fail.
To maintain your indoor climate and keep pests out, seal any small gaps created by the cable’s entry. Use adhesive-backed foam weather stripping or flexible draft stoppers along the edge of the door or window frame. This foam compresses around the cable, filling the void and preventing cool air-conditioned air from escaping while keeping humid outdoor air, rain, and insects from entering your living space. This step is particularly important during the rainy season when driving rain can easily find its way through the smallest unsealed openings.
Throughout the routing process, avoid pinching, crimping, or sharply bending the wire. Bending a cable at a sharp ninety-degree angle puts immense stress on the internal conductors, which can lead to electrical resistance, short circuits, or complete safety hazards. Instead, guide the cable in gentle, sweeping curves around corners. If you notice that the door requires significant force to close over the cable, stop immediately and adjust the placement. Forcing a door shut on a wire can slice through the protective outer insulation, exposing live wires and creating a fire hazard.
Positioning the Light Tube for Indoor Ambiance
Once the cable is safely routed indoors, focus on positioning the light tube to create the perfect evening ambiance. To achieve a soft, warm glow rather than a harsh, direct glare, aim for indirect lighting. Mount the light tube along the edges of your ceiling, behind a sofa, or underneath wall-mounted shelves. This allows the light to bounce off walls and surfaces, diffusing the illumination evenly throughout the room. Placing the tube behind a sheer curtain near the balcony door can also create a beautiful transition effect, making your indoor and outdoor spaces feel more connected.
To secure the light tube to your indoor walls or furniture without causing damage, use removable adhesive clips, command strips, or lightweight tension rods. These damage-free hanging solutions are ideal for renters and condo owners who want to avoid drilling into drywall or concrete. Ensure the mounting surface is clean and dry before applying the adhesive, and press firmly for the recommended time to establish a secure hold. If you are mounting the tube under a wooden shelf, small, non-penetrating plastic clips can keep the tube perfectly straight and hidden from direct view.
Finally, take advantage of your system’s built-in control settings to customize the lighting to your mood. Many modern solar tube lights come equipped with manual switches, dimmers, or remote controls that allow you to adjust the brightness levels and lighting modes. For a relaxing evening atmosphere, lower the brightness to a warm, gentle level that complements your other indoor decor. If your system includes an automatic dusk-to-dawn sensor, position the sensor away from indoor light sources so it can accurately detect when the sun has set and turn on automatically.
Routine Maintenance and Safety Inspections
To keep your solar lighting system operating efficiently and safely, establish a simple routine maintenance schedule. Periodically wipe down the outdoor solar panel with a soft, damp microfiber cloth to remove accumulated dust, pollen, soot, and bird droppings. In urban condo environments, airborne pollution can quickly form a thin film over the glass, significantly reducing the panel’s ability to absorb sunlight and charge the battery. Avoid using harsh chemical cleaners or abrasive sponges, which can scratch the solar cells and permanently decrease their efficiency.
In addition to cleaning, regularly inspect all outdoor mounting hardware to ensure everything remains secure. Check adhesive hooks, plastic clamps, and zip ties for signs of wear, brittleness, or degradation caused by constant exposure to UV rays and high humidity. This inspection is especially critical after heavy rainstorms or strong typhoons, which can loosen mounts and shift the angle of your solar panel. Replace any brittle zip ties or peeling adhesives immediately to prevent the panel from falling.
Lastly, examine the entire length of the connecting cable, focusing closely on the section that passes through the window or door gap. Look for any signs of fraying, flattened insulation, or exposed copper wires caused by the repeated opening and closing of the door. If you detect any physical damage to the cable’s protective sheath, turn off the system and consult the manufacturer’s guidelines for repair or replacement options. Keeping a close eye on these components ensures your indoor solar ambiance remains safe, reliable, and beautiful for years to come.
Frequently Asked Questions (FAQ)
Will an all-in-one solar light work if I just put it near the window?
Standard window glass is designed to block or reflect a significant portion of ultraviolet (UV) light and solar radiation, which drastically reduces the charging efficiency of integrated solar panels. If you place an all-in-one solar light on an indoor windowsill, the panel will struggle to gather enough energy to power the light for more than a short period, if at all. To achieve reliable, bright indoor ambiance, you need a split system where the solar panel is mounted completely outdoors in direct sunlight, while the light itself remains inside.
What if my balcony does not get direct sunlight?
If your balcony is heavily shaded by adjacent buildings or faces away from the sun, a solar panel may not receive enough energy to charge effectively. In this situation, check the manufacturer’s specifications to see if the panel supports low-light or ambient-light charging, though performance will still be limited. If solar charging is not viable, consider alternative lighting options such as plug-in LED tube lights or USB-rechargeable ambient lights. These alternatives allow you to achieve the same cozy indoor aesthetic without relying on daily solar exposure.

Community discussion
Share your experience or ask a question. Comments are reviewed before publication.