
Transforming a bedroom into a relaxing sanctuary often comes down to the quality of your lighting. Traditional overhead fixtures can feel harsh and clinical, whereas bendable fairy lights offer a customizable, soft glow that instantly softens the room’s atmosphere. By learning how to properly shape, drape, and position these flexible copper-wire strings, you can highlight your room’s best architectural features while keeping your walls and furniture completely undamaged.
Achieving the perfect cozy ambiance requires a balance of creative styling and practical safety. Whether you want to frame a mirror, drape a canopy over your bed, or wrap a wooden headboard, the flexibility of bendable wire allows you to design custom shapes that hold their form. With the right preparation, mounting tools, and safety checks, you can easily execute a professional-looking lighting design that elevates your evening routine.
Preparing Your Space and Lighting Materials
Before unboxing your lights, take the time to measure the specific areas you plan to decorate. Use a flexible measuring tape to trace the path along your bed frame, ceiling perimeter, or window frames, adding an extra meter to account for natural drapes and curves. Knowing the exact length you need prevents the frustration of running out of wire mid-installation or having to bunch up excess lights at the end of a run.
Products mentioned in this guide
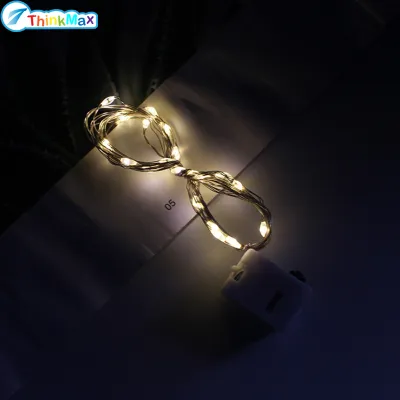
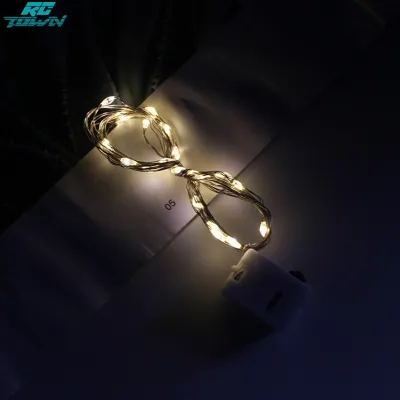
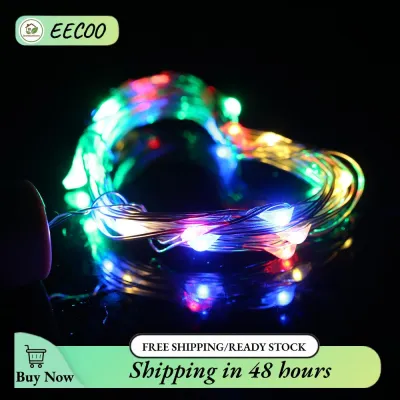
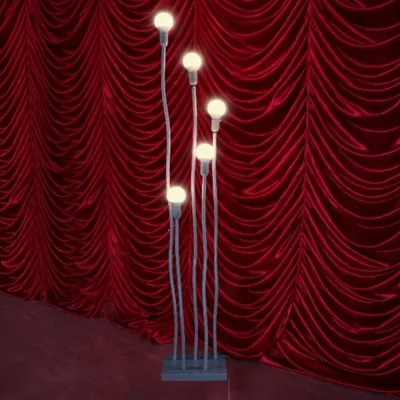

Prices are valid at publication and may change. Please refer to the product page for the latest price.
Next, verify the electrical specifications of your chosen fairy lights to ensure they are safe for your bedroom environment. Check the product label for voltage compatibility, wattage limits, and official electrical safety certifications. Because local outlets in the Philippines run on a 220V system, ensuring your power adapter matches this rating is crucial for preventing short circuits or electrical hazards.
Finally, gather non-damaging mounting tools that suit your bedroom’s surfaces. Avoid permanent fixtures like nails or screws, which can ruin paint and damage the delicate copper wiring of the lights. Instead, opt for transparent adhesive clips, small command hooks, or reusable adhesive putty, which typically costs around ₱100 to ₱200 at local home improvement stores. In tropical climates where high humidity can weaken adhesives, choosing high-quality, moisture-resistant mounting clips ensures your lights stay securely in place over time.
Step-by-Step Techniques for Shaping and Draping
To ensure a smooth installation, always test your bendable fairy lights before hanging them up. Unroll the entire string carefully on a clean floor or bed, plug it in, and turn it on to verify that all the bulbs are functioning properly. This simple step saves you from the tedious task of taking down a fully mounted display just to replace a faulty wire.

When you begin shaping the wire, handle the copper strands with care. While bendable fairy lights are designed to be flexible, making sharp 90-degree folds or repeatedly bending the same spot can fatigue the metal and cause internal wire breakage. Instead, use gentle, sweeping curves to guide the wire around corners or decorative elements, preserving both the aesthetic flow and the electrical integrity of the strand.
As you position the lights, always leave a small amount of slack near the power adapter or battery pack. Pulling the wire taut against the plug puts unnecessary strain on the connection point, which can lead to loose wiring or damage to your wall outlet. A loose, comfortable drape near the power source also makes it much easier to access the switch or unplug the lights when needed.
Creating a Bed Canopy or Ceiling Drape
A ceiling drape or canopy design suspends the lights directly above your sleeping area, casting a soft, starry glow downward. To begin, map out your anchor points on the ceiling or upper walls using removable adhesive hooks. Space the hooks evenly to distribute the weight of the wire and to create consistent, elegant swoops across the ceiling.
When working at height, prioritize safety by using a stable step ladder and ensuring the power source is completely isolated before you begin mounting. Follow the manufacturer’s installation instructions closely, and avoid hanging lights directly over heavy bedding where they could easily be pulled down. Drape the wire in loose, overlapping waves rather than pulling it tight, which creates a more organic, cloud-like visual effect.
Lastly, plan the path of the power cord carefully. The cord should run down the corner of the wall or behind a curtain to reach the nearest outlet safely, without crossing walkways where it could become a tripping hazard. If you must run the cord along the floor, use a flat, rubber cord protector to keep it flat and secure against the ground.
Wrapping Headboards and Bed Frames
Wrapping your headboard is an excellent way to highlight the focal point of your bedroom with localized, warm lighting. For metal or wooden headboards with open slats, weave the flexible wire through the gaps in a consistent zigzag or spiral pattern. This weaving technique utilizes the natural structure of the bed to hold the lights in place without requiring heavy adhesives.
To secure the wire firmly without scratching or denting your furniture’s finish, use small, transparent zip ties or soft twist ties. These fasteners hold the copper wire flush against the frame while remaining virtually invisible from a distance. Avoid tightening the ties too hard, as over-tightening can pinch the wire insulation and damage the internal circuitry.
When positioning the individual bulbs, keep them facing outward or upward rather than pointing directly at your pillows. Direct glare can strain your eyes when you are sitting up in bed to read or relax. Angling the bulbs toward the wall or ceiling creates a beautiful, indirect backlighting effect that is much gentler on the eyes during the late evening hours.
Framing Windows, Mirrors, and Shelves
Outlining architectural features like windows, large mirrors, or floating shelves adds depth and dimension to your bedroom. To frame a mirror or window, run the wire along the inner or outer edges of the frame. The reflective surface of a mirror will double the light output, creating a stunning, layered depth that makes small bedrooms feel significantly larger.
When navigating the corners of frames and shelves, apply corner-friendly bending techniques. Instead of forcing the wire into a tight, sharp fold at a 90-degree angle, form a wide, gentle arc that curves smoothly around the corner. This technique prevents the copper from snapping and ensures a continuous, uninterrupted line of light around your decor.
To maintain a clean, professional look, tuck any excess wire and the battery pack or power adapter discreetly out of sight. You can hide a battery pack behind the mirror frame, tuck it into a decorative basket on a nearby shelf, or place it behind a potted plant. Keeping these bulky components hidden ensures that only the magical glow of the lights remains visible.
Securing the Lights Safely Without Damaging Walls
Choosing the right mounting method is essential for protecting both your bedroom walls and the delicate copper wire of your lights. The best choice often depends on your wall’s texture and the overall weight of the light strand. For smooth, painted concrete or drywall, transparent adhesive clips and command hooks offer a strong, reliable hold that can be removed cleanly without stripping the paint.
If your walls have a textured plaster finish, standard adhesive clips may struggle to stick properly. In these cases, reusable adhesive putty can be molded around the wire and pressed firmly into the wall’s crevices. Before applying any adhesive, always clean the wall surface with a dry microfiber cloth to remove dust and oils, which can significantly weaken the bond—especially in humid tropical environments.
Under no circumstances should you use metal nails, staples, or heavy-duty duct tape to secure your fairy lights. Nails and staples can easily pierce the thin wire insulation, creating a severe shock or fire hazard. Heavy-duty tapes, on the other hand, leave behind a sticky residue that is incredibly difficult to clean and can pull off large chunks of paint when removed.
Adjusting Brightness and Color Temperature
Fine-tuning your lighting allows you to transition your bedroom from a functional daytime space to a peaceful evening retreat. Many modern bendable fairy lights come equipped with a dedicated dimmer switch, a remote control, or smart app settings. Utilizing these controls allows you to lower the brightness levels as you get closer to bedtime, signaling to your body that it is time to wind down.
If your lights feature adjustable color temperatures, shift the output to a warm, amber hue (around 2200K to 2700K) for your evening routine. While cool white light is excellent for focus and daytime tasks, warmer tones are a popular conditional preference for creating a cozy, relaxing atmosphere. Experiment with different brightness levels to find the setting that feels most comfortable for your eyes.
To truly evaluate your new lighting setup, test the lights at night with the main overhead room lights turned off. This allows you to see how the shadows fall and how the light reflects off your walls and furniture. You can then make minor adjustments to the positioning of individual bulbs or drapes to eliminate any harsh hot spots and ensure a perfectly balanced, ambient glow.
Routine Maintenance and Safety Checks
To keep your bedroom lighting setup safe and functional for years to come, establish a simple routine for periodic maintenance. Every few months, take a moment to inspect the entire length of the wire for any signs of fraying, exposed copper, or loose bulbs. Pay close attention to the areas near bending points and anchor hooks, as these spots experience the most physical stress.
Another critical safety practice is ensuring that your power adapter or battery pack is never covered by bedding, pillows, or heavy curtains. Power adapters naturally generate a small amount of heat during operation, and trapping them under fabric can cause heat to build up, posing a potential fire hazard. Keep the adapter in a well-ventilated area where air can circulate freely around it.
Finally, make it a habit to unplug your fairy lights whenever you leave the house for extended periods or when you are cleaning the surrounding areas. Dusting the lights gently with a dry static duster keeps them looking bright and clean, but doing so while the power is on can static-shock the delicate LEDs. Taking these simple precautions ensures your cozy bedroom retreat remains both beautiful and safe.
Frequently Asked Questions (FAQ)
Can I leave bendable fairy lights on all night?
Before leaving your lights on overnight, always check the manufacturer’s label for continuous run-time limits and specific safety warnings. While LED fairy lights generally emit very low heat compared to traditional incandescent bulbs, leaving any electrical device running unattended for long periods carries some risk. To enjoy a worry-free night, consider plugging your lights into a smart plug or using a model with a built-in timer that automatically shuts the lights off after a set number of hours.
How do I hide the battery pack or power adapter?
Concealing bulky power sources is key to achieving a clean, professional-looking installation. For battery-operated models, you can place the battery pack inside a small decorative box, tuck it behind a headboard, or rest it on a high shelf behind a decorative item. If your lights use a plug-in adapter and your outlet is far from the bed, use a high-quality extension cord safely routed along the baseboard, and avoid enclosing the adapter in tight, unventilated spaces where heat can accumulate.

Community discussion
Share your experience or ask a question. Comments are reviewed before publication.