
Selecting the ideal illumination for a compact living space with limited vertical clearance requires a careful balance of physical dimensions, optical output, and aesthetic integration. In a modern condominium, where standard ceiling heights often hover between 2.4 and 2.6 meters, installing an oversized or overly bright fixture can quickly make a room feel cramped, clinical, or visually overwhelming. To resolve this, you must coordinate the physical diameter of the fixture with your room’s dimensions while matching the light’s lumen output to the specific activities performed in that space.
Investing in dedicated lights for ceiling led lights configurations allows you to maximize precious headroom while maintaining a clean, modern aesthetic. By focusing on ultra-low-profile designs and proper light dispersion, you can create an open, airy atmosphere that visually elevates the ceiling. Achieving this balance involves understanding a few straightforward mathematical formulas, verifying critical electrical specifications, and avoiding common placement errors that lead to harsh glare or dark, shadowy corners.
Quick Reference: Sizing and Brightness Rules for Low Ceilings
When planning your condo’s lighting layout, having immediate, reliable rules of thumb can save you hours of trial and error. For low ceilings, the primary objective is to select a fixture that sits as close to the ceiling plane as possible while distributing light evenly across the living space.
Products mentioned in this guide
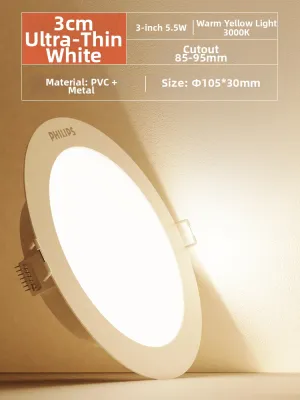
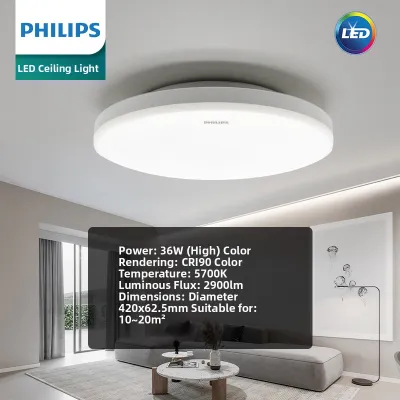
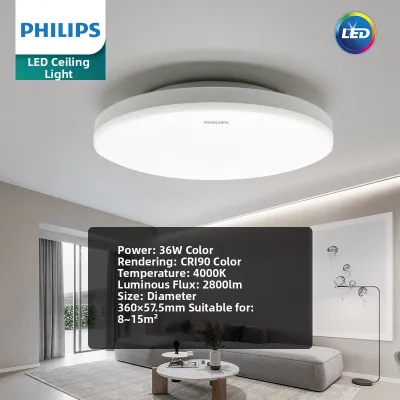

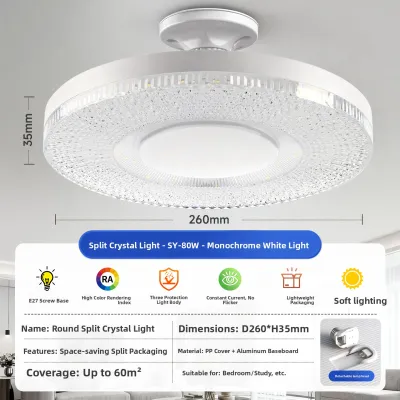
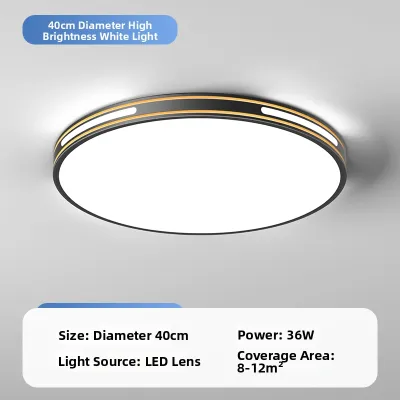
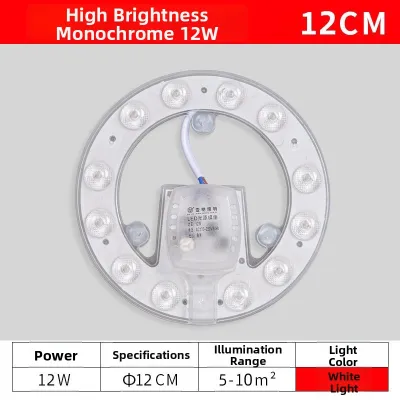
Prices are valid at publication and may change. Please refer to the product page for the latest price.
To quickly determine the ideal fixture diameter, add the length and width of your room in meters, then multiply the sum by 4 to get the target diameter in centimeters. For example, a bedroom measuring 3 meters by 3 meters has a sum of 6, which points to a fixture diameter of approximately 24 to 30 centimeters.
For brightness, aim for 150 to 200 lumens per square meter for relaxing areas like living rooms and bedrooms, and scale up to 300 to 400 lumens per square meter for task-oriented zones like kitchenettes or study nooks. Utilizing slim flush mount LED fixtures is the most effective way to preserve vertical clearance in Philippine condos, ensuring that tall residents and guests have ample headroom without compromising on ambient light quality.
How to Size Flush Mount Fixtures for Low Ceilings
Selecting a light fixture that is proportional to your room prevents the ceiling from feeling low or oppressive. In compact condo units, scale is everything; a fixture that looks perfectly sized in a spacious showroom can easily dominate a small bedroom or dining alcove.

Calculating the Ideal Fixture Diameter
To find the perfect physical proportions, you can rely on a standard sizing formula adapted for metric spaces. Measure the length and width of the room in meters, add those two numbers together, and then multiply the result by a factor of 4. This calculation gives you a highly reliable target diameter in centimeters. For instance, if you are outfitting a compact living room that is 4 meters long and 3 meters wide, the sum is 7. Multiplying 7 by 4 yields 28, meaning a flush mount light with a diameter of 28 to 30 centimeters will look balanced and visually integrated.
If your condo features an open-plan layout—which is highly common in studio and one-bedroom units across Manila—do not size your fixture based on the total footprint of the entire open area. Doing so will result in an oversized light that overwhelms the space. Instead, divide the open layout into distinct functional zones, such as the dining area, the living lounge, and the entryway. Calculate the ideal fixture size for each zone independently, and install separate, smaller flush mounts to define those functional boundaries visually.
For spaces with exceptionally low ceilings, such as those measuring 2.3 meters or below due to dropped structural beams or integrated air conditioning ducts, it is wise to scale down the calculated fixture diameter by about 10 to 15 percent. A slightly smaller fixture reduces the visual weight on the ceiling, preventing a top-heavy sensation and keeping the room’s proportions feeling natural and open.
Managing Height and Visual Clearance
Understanding the structural distinction between a true flush mount and a semi-flush mount fixture is critical when working with limited vertical space. A true flush mount attaches directly to the ceiling surface with no visible gap, typically featuring a total profile thickness of only 2 to 5 centimeters. A semi-flush mount, on the other hand, is suspended from a short canopy or stem, leaving a gap of 5 to 15 centimeters between the fixture body and the ceiling. For ceilings under 2.5 meters, true flush mounts are highly recommended to preserve vertical space and maintain clean sightlines.
Maintaining safe headroom is a primary functional requirement, especially in high-traffic areas like entryways, hallways, and walk-in closets. As a general rule, the bottom of any ceiling fixture must remain at least 2.1 meters (7 feet) above the finished floor to prevent taller individuals from accidentally bumping their heads. If you are installing a ceiling fan in the same room, ensure that any nearby flush mount lights are positioned well outside the sweep of the fan blades to avoid strobing shadows and mechanical interference.
The physical thickness of the LED fixture plays a massive role in how spacious the room feels. Modern ultra-thin LED flush mounts, which often measure less than 2 centimeters in thickness, sit almost flat against the plasterboard or concrete ceiling. Because they do not break the continuous horizontal plane of the ceiling, they draw less attention to the low height, creating a subtle illusion of a taller, more expansive room.
Calculating the Right Brightness (Lumens) for Condo Rooms
Achieving the perfect level of brightness in a low-ceiling condo requires moving away from traditional wattage ratings and focusing entirely on lumens. Because modern LEDs are highly energy-efficient, wattage only tells you how much electricity the fixture consumes, not how much light it actually emits.
Matching Lumens to Room Size and Function
To establish a baseline for your lighting needs, you must calculate the required total lumens based on the floor area of the room and its primary function. This is measured in lux, which represents one lumen per square meter. For areas dedicated to relaxation, such as bedrooms and living rooms, a baseline of 150 to 200 lux is generally sufficient. If you have a bedroom that measures 12 square meters, multiplying the area by 150 lux indicates that you need a total of approximately 1,800 lumens of ambient light.
In contrast, task-heavy zones require significantly higher light concentrations to ensure safety and comfort. Kitchenettes, counter spaces, and home office desks should aim for 300 to 500 lux. A small 6-square-meter kitchenette, for example, requires between 1,800 and 3,000 lumens to safely illuminate food preparation surfaces.
If a single central flush mount cannot provide the required lumens without feeling blindingly bright, do not try to force it. Instead, practice the art of layered lighting. Install a moderate-output flush mount (such as 1,200 lumens) to handle the general ambient light, and supplement the rest of the requirement using targeted secondary fixtures. Under-cabinet LED strips in the kitchen or adjustable desk lamps in your workspace provide excellent localized task lighting without raising the overall glare level of the room.
Adjusting for Low Ceilings and Surface Reflectance
Low ceilings bring light sources physically closer to your eyes and to the surfaces in the room. This reduced distance means the light has less space to disperse and scatter naturally before it hits the floor or furniture, which can create intense, uncomfortable hotspots directly beneath the fixture. To mitigate this proximity effect, it is crucial to select flush mount LEDs equipped with high-quality diffusers. Frosted acrylic, polycarbonate, or opal glass lenses are excellent at scattering the light rays in multiple directions, softening the output and eliminating harsh glare.
Your condo’s interior finishes also play a major role in how bright a room feels. Dark wall colors, matte paint finishes, and heavy wood cabinetry absorb a significant percentage of light, meaning you may need to increase your calculated lumen output by 10 to 20 percent to achieve the desired brightness. Conversely, light-colored walls (such as off-white, cream, or light gray), glossy ceramic floor tiles, and strategically placed mirrors reflect light efficiently. In highly reflective rooms, you can safely select fixtures with lower lumen outputs, saving energy while still enjoying a bright, open space.
Essential Electrical and Optical Specifications to Verify
Before purchasing any flush mount LED fixture, you must verify several technical specifications to ensure it is safe, compatible, and durable within your condo’s specific environment.
Voltage, Wattage, and Electrical Compatibility
First and foremost, you must verify that the fixture’s operating voltage matches the standard electrical grid in the Philippines, which operates at 220V to 240V at 60Hz. Many fixtures purchased online from international sellers are designed for 110V systems; installing these without a transformer will instantly destroy the internal LED driver and present a severe fire hazard. Always look for local safety certifications, such as the Philippine Standard (PS) quality mark or the Import Commodity Clearance (ICC) sticker, which guarantee the product has been tested for local electrical conditions.
Even though modern LED flush mounts draw very little power—typically between 12W and 36W—you must still inspect the existing ceiling junction box and the wiring insulation. Older condo units may have brittle wiring that needs replacement before a new fixture is installed. Additionally, measure the physical diameter of the new fixture’s mounting canopy. The canopy must be large enough to completely cover the existing utility box in your ceiling, hiding any raw concrete, exposed plaster, or old paint rings left behind by the previous light fixture.
Because the Philippines has a highly humid tropical climate, heat management is another critical factor. Although LEDs run cooler than incandescent bulbs, their internal drivers still generate heat that must be dissipated. Look for flush mount fixtures constructed with high-quality aluminum backing or integrated aluminum heat sinks rather than cheap, fully enclosed plastic housings. Proper heat dissipation prevents the LED chips from degrading prematurely, ensuring the light maintains its brightness and color accuracy over its rated lifespan.
Color Temperature and Dimming Capabilities
The color temperature of your LED light, measured in Kelvin (K), dictates the color of the light emitted and heavily influences the mood of a small space.
- Warm White (2700K to 3000K): Emits a soft, golden glow that mimics traditional incandescent bulbs. This temperature is highly recommended for bedrooms and living areas because it promotes relaxation and makes small spaces feel cozy and inviting.
- Cool White (4000K): Delivers a clean, neutral white light that enhances contrast and clarity. It is the ideal choice for kitchens, bathrooms, and dedicated study or work areas where visual precision is required.
- Daylight (6000K to 6500K): Produces a bright, bluish-white light that mimics natural midday sun. While popular in many local households, daylight can feel clinical and harsh in compact rooms with low ceilings. Use it sparingly, or reserve it for utility areas and laundry balconies.
If you plan to adjust your lighting levels to suit different times of day, do not assume all LED flush mounts can be dimmed. Standard LED fixtures are non-dimmable, and connecting them to a wall dimmer will cause rapid flickering, buzzing, or permanent driver failure. You must explicitly look for fixtures labeled as “dimmable” on their packaging. Furthermore, ensure your wall switch is an LED-compatible dimmer (such as a trailing-edge or electronic low-voltage dimmer), as older analog dimmers designed for incandescent bulbs are rarely compatible with modern solid-state lighting.
Common Sizing and Placement Mistakes to Avoid
Avoiding common design and technical pitfalls ensures that your new lighting setup is both comfortable and highly functional.
- Choosing an Oversized Fixture: Placing a 50-centimeter wide flush mount in an 8-square-meter bedroom visually anchors the ceiling downward, making the entire room feel cramped and claustrophobic. Stick to the metric sizing formula to keep the visual scale balanced.
- Relying on Wattage to Judge Brightness: Assuming a 24W LED from one manufacturer will perform the same as a 24W LED from another is a common error. Due to differences in luminous efficacy, one brand's 24W light might produce 2,400 lumens, while a lower-quality alternative might only produce 1,500 lumens. Always compare the actual lumen rating printed on the box.
- Ignoring the Beam Angle: Low ceilings require a wide beam angle (typically 110 to 120 degrees) to spread light horizontally across the room. Choosing a fixture with a narrow beam angle (under 60 degrees) creates harsh, spotlight-like pools of light on the floor, leaving the upper walls and corners in deep shadow and making the room feel smaller than it is.
- Placing Fixtures Directly Above Seating or Beds: Installing a flush mount directly over the head of a bed or the center of a sofa forces you to look directly into the light source when reclining. This causes immediate eye strain and discomfort. Always offset the fixture slightly, or ensure it features a heavy, high-quality frosted diffuser to soften direct glare.
Installation Safety and Professional Boundaries
Working with electrical fixtures requires strict adherence to safety protocols to prevent shocks, short circuits, or damage to your condo’s electrical system.
Before conducting any inspection, removal, or installation of a ceiling fixture, you must turn off the power at the main circuit breaker panel (often located near the entryway or kitchen of your condo). Never rely solely on the wall switch to isolate the power, as some circuits may still carry live current due to improper wiring. Use a reliable, non-contact voltage tester at the ceiling junction box to confirm that the wires are completely dead before touching them.
A simple, like-for-like replacement of an existing flush mount light is generally a manageable task for a confident DIY enthusiast, provided the new fixture uses the same mounting bracket and the existing wiring is in excellent condition. However, you must stop and hire a licensed electrician if you encounter any of the following situations:
- The existing ceiling wires are frayed, brittle, or have degraded insulation.
- There is no existing junction box, or the existing box is loose and cannot support the weight of the new fixture.
- You need to run new electrical conduit to relocate the light source to a different part of the ceiling.
- The installation requires drilling into structural concrete slabs, which may contain post-tensioned cables or structural reinforcement.
Finally, always consult your condominium corporation’s building administration rules before initiating any electrical or structural work. Many high-rise developments in the Philippines have strict guidelines regarding structural drilling, modification of common walls, maximum allowable electrical loads, and even the color temperature of lights visible from the building’s exterior facade. Following these guidelines ensures a safe, compliant installation that enhances your living space for years to come.

Community discussion
Share your experience or ask a question. Comments are reviewed before publication.