
Designing a custom gaming setup with vibrant, synchronized ambient lighting often leads enthusiasts to choose individual LED lighting modules for their flexibility, but figuring out how to safely wire, chain, and power these components without causing voltage drops or short circuits can feel overwhelming. Successfully connecting RGB LED modules requires selecting the correct wiring topology (series or parallel), matching the voltage and amperage ratings of your power supply to the total load, and using secure, insulated physical connectors to link the modules to a compatible controller. By following a systematic approach to power calculation and physical connection, you can build a reliable, flicker-free lighting system that enhances your gaming desk or room. Whether you are highlighting the back of a monitor, illuminating under-desk shelving, or creating a custom wall display, understanding the electrical fundamentals ensures your custom lighting remains safe, durable, and visually striking.
What safety precautions and tools are required before wiring LED lighting modules?
Before starting any physical assembly, you must isolate all power sources and gather specialized tools to ensure clean, secure, and electrically sound connections. Verifying the voltage and wattage limits printed on your product labels is the most critical step to prevent equipment damage or electrical hazards. Working with low-voltage direct current (DC) systems, such as 5V, 12V, or 24V LED modules, is generally safe for DIY enthusiasts, but mishandling the power supply or creating a short circuit can still lead to overheating, melted plastic, or component failure.
To complete this project successfully, you should assemble a dedicated toolkit. Essential tools include high-quality wire strippers capable of handling 18 to 22 AWG (American Wire Gauge) wires, which are standard for low-voltage LED installations. You will also need appropriate connectors—either solderless snap-on connectors or a soldering iron with lead-free solder and heat-shrink tubing for a more permanent bond. A digital multimeter is indispensable for checking electrical continuity, verifying voltage outputs, and ensuring there are no short circuits between the positive and negative terminals before you plug the system into a wall outlet.
Products mentioned in this guide
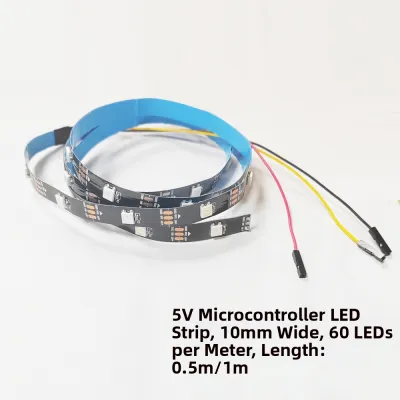
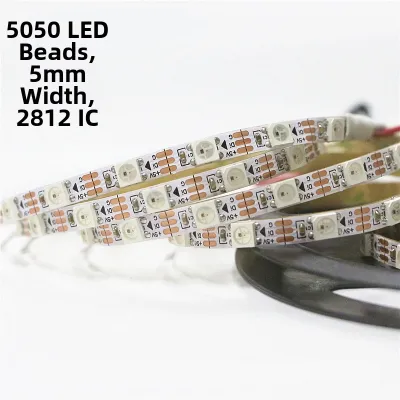
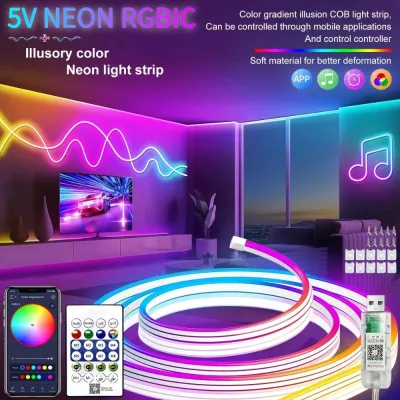
199 Lazada user ratings
Very pleased with this purchase of LD light strip. The functions work well with the many different patterns designs I'm quite sure it will m…Read full reviewShow less
Very pleased with this purchase of LD light strip. The functions work well with the many different patterns designs I'm quite sure it will make a wonderful addition as an attraction to my wall And bring calmness and amusement too many.
Waterproof for outdoor use, Great for game room decor, Great for game room decor, Easy to control with remote, Dimmable brightness control, …Read full reviewShow less
Waterproof for outdoor use, Great for game room decor, Great for game room decor, Easy to control with remote, Dimmable brightness control, High quality LED light strip, Fast shipping and good packaging,
very nice. kahit nakaon yung light, very vivid pa rin color nya. also maraming options kung pano mo sya gustong magblink. 🔨Durability:10 💡Br…Read full reviewShow less
very nice. kahit nakaon yung light, very vivid pa rin color nya. also maraming options kung pano mo sya gustong magblink. 🔨Durability:10 💡Brightness:11 🛠️Ease of Installation:10
legit Ganda Ng neon strip light na to,medyo magtagal lang shipping sulit nman salamat seller.High quality LED light strip,
Great for game room decor, Smart Bluetooth control, Perfect for home decoration, fast delivery.madali kausap SI seller.
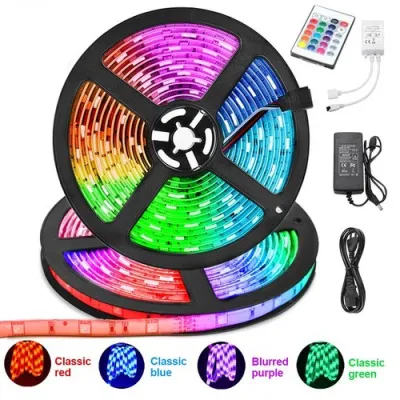
4,756 Lazada user ratings
Easy to install and use, Beautiful color-changing effects, Great value for money, Bright and vibrant colors!, Waterproof feature is a bonus!…Read full reviewShow less
Easy to install and use, Beautiful color-changing effects, Great value for money, Bright and vibrant colors!, Waterproof feature is a bonus!, Perfect for creating a cozy ambiance, Versatile and flexible strip lights, Remote control works perfectly,
Quality: Very good! The lights work and all colors are in good quality. Appearance: Very bright and aesthetically pleasing once installed. P…Read full reviewShow less
Quality: Very good! The lights work and all colors are in good quality. Appearance: Very bright and aesthetically pleasing once installed. Performance: Works pretty well. Worth to buy.
photo not related... Thank u seller maganda pagka package walanq damaqe at nasa maayos na paq ka packed thank u🥰
Picture no related pero bilis ng shipping Ganda ng damit Ayun maganda amganda maganda maganda
10,959 Lazada user ratings
Extremely disappointed — not all the lights in my order are working. This purchase is definitely not worth it. Seller, please check every it…Read full reviewShow less
Extremely disappointed — not all the lights in my order are working. This purchase is definitely not worth it. Seller, please check every item carefully before shipping. Receiving defective products is frustrating and unacceptable. I hope you take this seriously so future buyers don’t have the same negative experience. NOTE- 5 meters lang sya. Dinugtong tong lang namin since 20m yung order ko. Akala ko 20m deretso hindi pala.
LEGIT P1.00 q lang tlaga xa nakuha dahil 1st time q gumamit ng Lazada. Nung una ayaw umilaw bka kako reject ung item kaya piso lang. But it'…Read full reviewShow less
LEGIT P1.00 q lang tlaga xa nakuha dahil 1st time q gumamit ng Lazada. Nung una ayaw umilaw bka kako reject ung item kaya piso lang. But it's good, indi lang pala natama ung install q. Maaga ang pasko namin 😁 Thank u Lazada & seller
the multi color effect is stunning. really brighter than the solar lights. good quality for the price. inwill order more.
The LED lights are energy-efficient and eco-friendly., The RGB multicolor lighting effect is stunning.,
it's very good I got it for 1 peso only and its satisfying bili na kayo for room aesthetic
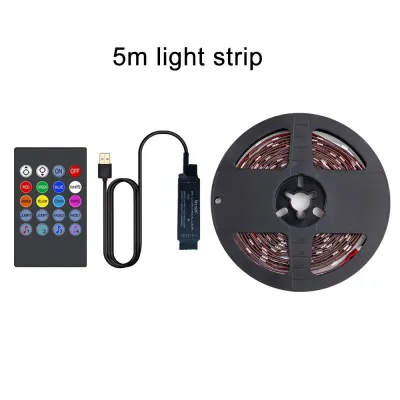
178 Lazada user ratings
The product works well, and I highly rate the seller. It would be even better if the set included batteries for the remote control, so users…Read full reviewShow less
The product works well, and I highly rate the seller. It would be even better if the set included batteries for the remote control, so users could fully experience all the features right out of the box.
Sản phẩm dùng rất vui, mình cực kỳ thích luôn. Rất cảm ơn người bán, mình đề xuất mọi người nên dùng, một sản phẩm rất tốt, cảm ơn nhiều nha…Read full reviewShow less
Sản phẩm dùng rất vui, mình cực kỳ thích luôn. Rất cảm ơn người bán, mình đề xuất mọi người nên dùng, một sản phẩm rất tốt, cảm ơn nhiều nha.
Order received. Fast shipping and delivery. Legit seller
Veria affordable and very stylish.Very nice.
very good nice light
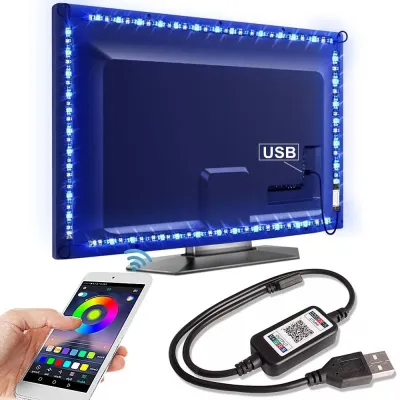
8 Lazada user ratings
🔨Durability: mukha naman matibay 🛠️Ease of Installation: As simple as abc 💡Brightness: Sakto lang ung brightness nya Ok naman ung liwanag nya…Read full reviewShow less
🔨Durability: mukha naman matibay 🛠️Ease of Installation: As simple as abc 💡Brightness: Sakto lang ung brightness nya Ok naman ung liwanag nya. Ang napansin ko lang baligtad ung color green at red sa app nya. Not a big deal. Ok to para sakin. Kasi ung remote version madaling malobat. Atleast ito pwede kahit anong phone.
The product itself is quite nice and reliable to use.
Fast delivery, product as expected.
The product is exactly as expected.
Prices are valid at publication and may change. Please refer to the product page for the latest price.
Safety must remain your top priority throughout the installation process. Always unplug the power supply from the wall outlet before stripping, cutting, or joining any wires. Never attempt to wire or modify components while the system is energized. Additionally, check the electrical certification marks on your power supply and controller to ensure they meet standard safety guidelines.
It is crucial to recognize the limits of a DIY low-voltage project. If your custom gaming setup requires fixed wiring behind drywall, routing cables through structural walls, installing new mains-voltage wall outlets, or mounting heavy suspended lighting fixtures overhead, you must isolate the mains power at your home’s circuit breaker. For any modifications to the building’s permanent electrical system, stop immediately and consult a qualified professional or licensed electrician to ensure compliance with local electrical codes.
How do you decide between series and parallel wiring for your RGB setup?
Choosing between series and parallel wiring depends on the total length of your LED run and the voltage requirements of your modules, as improper routing can lead to severe voltage drop and uneven brightness. For most custom gaming setups with multiple high-draw RGB modules, parallel wiring is the preferred method to ensure every module receives consistent voltage directly from the power source. Understanding how electrical current behaves across these two configurations will help you design a layout that maintains vibrant, uniform color across your entire desk or room.

In a series configuration, often referred to as daisy-chaining, the output of one LED module connects directly to the input of the next. While this method simplifies cable management by using a single continuous run, it introduces the problem of voltage drop. Because the thin copper traces inside LED strips and modules offer electrical resistance, the voltage gradually decreases as it travels further down the line. As a result, modules at the end of a long series run may appear noticeably dimmer, flicker, or display incorrect colors—such as shifting toward a dull red because red LEDs require less voltage to illuminate than blue or green ones.
To prevent this issue, parallel wiring connects each module, or small groups of modules, directly back to the main power supply lines. This ensures that every component receives the full rated voltage (such as 12V or 5V) simultaneously. You can achieve this by running a heavier gauge “bus” wire (such as 16 AWG) from the controller and tapping individual module wires into this main line. Parallel wiring is highly recommended if your custom setup spans more than five meters or uses high-density LED modules that draw significant current.
Before finalizing your wiring diagram, always check the manufacturer’s specifications for the maximum run length, maximum wattage limits, and recommended wiring layouts. Calculate the total wattage of your setup by adding the wattage of each individual module. To ensure system stability and longevity, apply the 80% safety rule: your total load should not exceed 80% of your power supply’s maximum rated capacity. If your total load is 30 watts, your power supply should be rated for at least 37.5 watts to prevent overheating and premature failure.
How do you physically connect LED lighting modules and controllers step-by-step?
Physically connecting your LED modules and controllers requires matching the pin configurations precisely and securing the joints using either solderless quick connectors or permanent soldered joints. Always verify the polarity and data direction markers on both the controller and the modules before applying power to the system. Taking your time during this phase prevents short circuits and ensures that your custom lighting responds accurately to your controller’s commands.
Step 1: Verify Pin Configurations and Polarity
Before making any cuts or connections, examine the copper pads on your LED modules. Standard analog RGB modules typically use a 4-pin configuration labeled “+12V” (or “+5V”), “R” (Red), “G” (Green), and “B” (Blue). Addressable RGB (ARGB) modules, which allow for individual pixel control and dynamic chasing effects, usually use a 3-pin configuration labeled “+5V”, “DAT” (Data), and “GND” (Ground). You must ensure that the wires from your controller connect to the exact corresponding pads on the modules. Swapping a data wire with a power wire can instantly destroy the integrated circuits inside addressable LEDs.
Step 2: Choose and Apply Your Connection Method
Depending on your tools and experience, choose between solderless quick-snap connectors or soldering:
- Solderless Connectors: These plastic clips slide over the copper contact pads of the module and press metal teeth down to establish a connection. They are ideal for quick, solder-free installations, especially around tight corners. Ensure the module is cut cleanly along the designated cut lines and that the plastic cover is clamped down firmly to maintain consistent contact.
- Soldering: For a highly reliable, low-resistance connection that will not loosen over time due to desk vibrations or temperature changes, soldering is the superior method. Strip a tiny portion of the wire insulation, tin both the wire tip and the copper pad with a small amount of solder, and join them quickly with a clean soldering iron tip. Slide a piece of heat-shrink tubing over the joint and shrink it using a heat gun to insulate the exposed metal.
Step 3: Connect the Modules to the Controller
Route the wires from the first module in your chain to the output terminals of your RGB controller. If your controller uses screw terminals, insert the stripped wire ends completely into the terminals and tighten the screws, ensuring no stray copper strands touch adjacent terminals. If the controller uses a plug-in harness, align the polarity markers (often indicated by a small arrow on the connector housing pointing to the positive wire) before plugging it in.
Step 4: Connect the Controller to the Power Supply
Finally, connect the input terminals of the controller to your DC power supply. Double-check that the output voltage of the power supply matches the rated voltage of both the controller and the LED modules. For instance, never connect a 12V power supply to a 5V ARGB system, as this will permanently burn out the LEDs. Ensure the positive (+) and negative (-) wires from the power supply are connected to the corresponding positive and negative input terminals on the controller. Once all physical connections are insulated and verified, you can safely plug the power supply into the wall outlet to test your custom setup.
What common wiring mistakes cause RGB LED modules to fail or flicker?
RGB LED modules typically fail, flicker, or display incorrect colors due to loose physical connections, insufficient power supply amperage, or reversed polarity along the wiring path. Systematically checking each connection point with a multimeter and verifying your power calculations will resolve most common installation issues. Diagnosing these problems early prevents permanent damage to your controller and ensures your gaming setup remains safe to operate.
One of the most frequent issues in custom DIY setups is voltage drop, which manifests as a gradual loss of brightness or a color shift toward the end of the LED chain. If your modules start bright white near the controller but fade to a dim orange or red at the far end, your power supply is struggling to push sufficient voltage through the thin wiring. You can resolve this by injecting power at the end of the run or splitting the run into a parallel wiring layout. Similarly, if the entire setup flickers or shuts down when set to full brightness (white), your power supply is likely overloaded. When all three color channels (Red, Green, and Blue) are fully active, the system draws maximum current; if the power supply’s amperage rating is too low, its internal protection circuits will trip, causing the lights to cycle on and off.
Loose physical connections are another common culprit behind flickering or dead modules. Solderless connectors can lose tension over time, especially if the cables are pulled or subjected to movement under a gaming desk. If a single color channel fails to light up—for example, your purple light turns completely red—check the blue channel connection, as a loose wire or poor solder joint on the “B” pad will prevent that color from illuminating. Use your multimeter to test for continuity along each wire path to locate the exact break.
Reversed polarity is a critical mistake that can destroy your hardware. Connecting the positive power wire to a ground or data terminal can cause immediate, irreversible damage to the microchips inside addressable LED modules. If you observe any smoking, extreme heat radiating from the wires or controller, or a persistent burning smell, immediately disconnect the power supply from the wall outlet. Do not attempt to power the system back on until you have thoroughly re-evaluated the entire circuit layout, verified all polarity alignments, and replaced any damaged components. If the system continues to malfunction despite correct wiring, seek professional technical support or consult the manufacturer’s detailed troubleshooting documentation.

Community discussion
Share your experience or ask a question. Comments are reviewed before publication.