
Japanese-style LED panel lights offer an elegant, unobtrusive lighting solution that aligns perfectly with the clean lines and natural textures of modern minimalist Filipino homes. These fixtures prioritize soft, glare-free illumination, simple geometric forms, and low-profile designs that maximize the feeling of vertical space. By blending the functional efficiency of modern LEDs with the serene design philosophy of traditional Japanese interiors, these lights help create a calm, balanced atmosphere in any room.
Selecting the right panel light for your home requires balancing visual minimalism with strict technical compatibility. Because the Philippine market features a wide variety of imported fixtures, understanding how to evaluate structural designs, electrical specifications, and installation requirements is essential. This guide provides a practical framework to help you identify high-quality Japanese-style LED panels that are safe, durable, and aesthetically suited to your living space.
Core Criteria for Japanese-Style Minimalist Lighting
To achieve an authentic Japanese minimalist aesthetic, you must first evaluate the physical design and materials of the panel light. Traditional Japanese design relies on simplicity, natural elements, and the soft diffusion of light, which modern LED fixtures replicate through specific structural choices.
Products mentioned in this guide
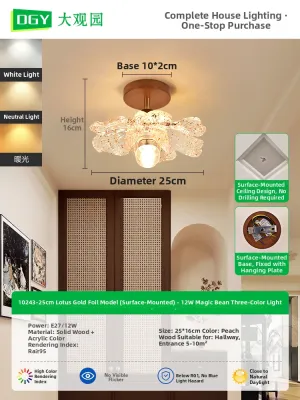
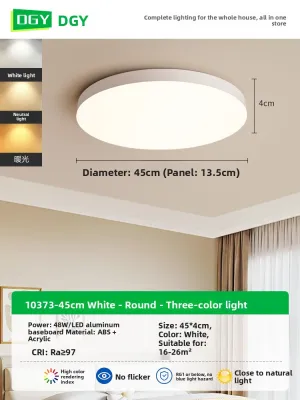
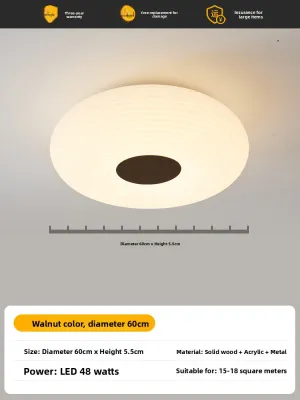
Prices are valid at publication and may change. Please refer to the product page for the latest price.
Form Factor and Trim Designs
When evaluating form factors, look for ultra-slim profiles that sit as flush to the ceiling as possible. Thick, bulky fixtures disrupt the clean overhead plane and draw unnecessary visual attention. Frameless LED panels are highly effective for a seamless look, as they cast light from edge to edge without a visible border, making the fixture appear to merge directly with a white ceiling.
If you prefer a warmer, more organic feel, look for panels featuring subtle natural trims. Light wood borders, such as simulated hinoki, ash, or light oak, add a touch of nature that complements wooden furniture and indoor plants. Ensure the trim is thin and neatly finished; overly ornate or heavy wooden frames can overwhelm a minimalist room and collect dust more easily.
Diffuser Material Comparison
The diffuser is the front panel that scatters the light emitted by the internal LED chips. For a true Japanese minimalist effect, the light must be soft, even, and entirely free of harsh hotspots or visible glare. The choice of diffuser material directly impacts this light quality.
- Acrylic (PMMA) Diffusers: Acrylic is the most common material used in high-quality LED panels. It is lightweight, highly shatter-resistant, and provides excellent light transmission while effectively scattering the light to eliminate harsh glare. However, low-grade acrylic can degrade and turn yellow over time when exposed to heat and UV light, so look for UV-stabilized acrylic specifications.
- Glass Diffusers: Frosted glass diffusers offer premium clarity, scratch resistance, and will never yellow or degrade over time. They provide a beautiful, high-end matte finish that diffuses light exceptionally well. The primary trade-offs are weight and fragility; glass panels are significantly heavier, requiring more robust ceiling anchors and careful handling during installation.
Spatial Integration and Ceiling Types
Your choice between recessed and surface-mounted panel lights depends heavily on your ceiling structure. Recessed panels sit completely flat within the ceiling cavity, creating an entirely flush surface that is ideal for low-ceilinged rooms. This integration mimics the clean, uninterrupted planes of traditional Japanese architecture.
Surface-mounted panels are the practical choice if you have solid concrete ceilings, which are common in many Filipino residential builds. To maintain a minimalist look with a surface mount, prioritize fixtures with an ultra-thin depth—ideally under 25 millimeters. A slim, square, or circular surface-mounted panel with a matte white finish can closely replicate the clean, integrated look of a recessed light without requiring extensive ceiling excavation.
Essential Electrical and Structural Specifications
While aesthetics define the look of your space, electrical and structural specifications dictate the safety, compatibility, and longevity of your lighting system. Never purchase a fixture based on style alone without verifying these critical technical limits.

Voltage and Frequency Compatibility
The standard residential electrical system in the Philippines operates at 220V to 230V at a frequency of 60Hz. Because many Japanese-style lighting fixtures are imported from countries with different electrical standards—such as Japan, which uses 100V at 50Hz or 60Hz—you must carefully check the product label.
Operating a 100V or 110V fixture directly on a 220V system will immediately destroy the LED driver and poses a severe fire hazard. Always verify that the integrated LED driver is explicitly rated for a wide voltage input of 220V to 240V at 60Hz. If you import a fixture rated only for 100V, you must install a compatible step-down transformer, though choosing a native 220V-compliant fixture is always the safer and more efficient option.
Matching Wattage and Lumen Output
To maintain a calm, minimalist atmosphere, you must avoid both over-lighting and under-lighting your rooms. Wattage indicates how much electricity the fixture consumes, while lumens measure the actual amount of light emitted. Modern, efficient LEDs deliver more lumens per watt, allowing you to achieve bright spaces with lower energy consumption.
To determine the right light output, calculate your room’s square footage and consider its primary function. For a relaxing living room or bedroom, aim for approximately 100 to 150 lumens per square meter. For task-oriented areas like kitchens or home offices, target 300 to 400 lumens per square meter. Select a panel light with a lumen output that matches these calculations to ensure comfortable, functional illumination.
IP Ratings for Humid Environments
The tropical climate of the Philippines brings high humidity levels, which can degrade sensitive electronic components inside LED fixtures. Ingress Protection (IP) ratings indicate how well a fixture’s housing seals against solids and liquids. Understanding these ratings is crucial for selecting durable lights.
- IP20: Suitable for dry, indoor living areas such as bedrooms, living rooms, and hallways. These fixtures offer basic protection against dust but no protection against moisture.
- IP44: Recommended for kitchens, laundry areas, and covered balconies. These panels are protected against solid objects larger than 1 millimeter and splashes of water from any direction, making them resilient against high humidity and insects.
- IP65: Essential for wet areas, such as directly above showers. These fixtures are completely dust-tight and protected against water jets, ensuring absolute safety in high-moisture zones.
Verifying Physical Dimensions
Before purchasing any panel light, obtain the exact physical dimensions from the manufacturer’s specification sheet. For recessed installations, pay close attention to the “cutout size” rather than the outer frame dimensions. A cutout that is even a few millimeters too large or too small will prevent the fixture from mounting securely.
For surface-mounted installations, verify the dimensions of the mounting bracket and the overall weight of the fixture. Ensure that your ceiling structure can support the weight and that the mounting holes align safely with your ceiling joists or concrete anchors. Measuring your space and checking these specifications beforehand prevents costly installation delays and structural damage.
Light Quality: Color Temperature and CRI Standards
The quality of light emitted by your panel fixtures directly influences how you perceive your home’s interior design. Minimalist spaces rely on natural textures, wood grains, and neutral paint colors, all of which require high-quality light to look their best.
Selecting Color Temperatures
Color temperature is measured in Kelvin (K) and describes the warmth or coolness of the light. To maintain a cohesive, peaceful minimalist atmosphere, choose your color temperatures based on room usage:
- Warm White (2700K to 3000K): This temperature emits a soft, golden glow reminiscent of candlelight or late afternoon sun. It is highly recommended for bedrooms and living rooms, as it promotes relaxation and highlights the warmth of wooden furniture and trim.
- Neutral White (4000K): This range provides a clean, balanced light that closely mimics natural midday sunlight. It is ideal for kitchens, bathrooms, and study areas, offering excellent clarity for tasks without the clinical coldness of higher temperatures.
- Cool White / Daylight (6000K to 6500K): This temperature emits a bright, bluish-white light. While highly functional for commercial spaces, it can feel harsh, sterile, and cold in a minimalist home, often washing out natural wood tones and creating an uninviting atmosphere.
Understanding the Color Rendering Index (CRI)
The Color Rendering Index (CRI) measures how accurately a light source reveals the true colors of objects compared to natural sunlight. CRI is rated on a scale up to 100. For a minimalist home featuring natural materials like bamboo, linen, rattan, and light wood, high color rendering is essential.
Always look for panel lights with a CRI rating of Ra 80 or higher, with Ra 90+ being the ideal choice for living areas. A low CRI rating (below 80) will make your carefully selected wood finishes look dull, gray, or unnaturally greenish. High-CRI lighting ensures that your home’s textures and colors remain vibrant, warm, and true to life.
Verifying Flicker-Free Performance
Many low-quality LED drivers produce a rapid, invisible flickering of light. While you may not consciously see this flicker, prolonged exposure can cause eye strain, fatigue, and headaches. This completely undermines the calm, health-focused environment of a minimalist home.
When shopping, check the product specifications for terms like “flicker-free,” “no flicker,” or “ripple-free driver.” High-quality fixtures utilize advanced electronic drivers that deliver a constant, smooth electrical current to the LEDs, ensuring stable, comfortable illumination that protects your well-being.
Installation Boundaries and Ceiling Compatibility
Proper installation is critical to ensuring both the aesthetic appeal and the safety of your lighting system. Different ceiling structures require specific mounting techniques, and understanding these boundaries prevents structural failures and electrical hazards.
Clearance and Heat Dissipation
Although LEDs are highly efficient, they still generate heat, which is concentrated at the back of the panel where the driver and LED chips are located. In the Philippines, ceiling voids and attic spaces can become exceptionally hot during the summer months. If this heat cannot escape, the LED chips will degrade rapidly, leading to dimming, color shifting, or premature driver failure.
For recessed installations, ensure there is a minimum clearance of 50mm to 100mm of free air space above and around the fixture. Never cover the back of a recessed panel light with thermal insulation unless the fixture is explicitly rated for insulation contact (IC-rated). Proper airflow around the chassis is vital to keeping the operating temperature within safe limits.
Ceiling Materials and Mounting Feasibility
Identify your ceiling material before selecting your mounting hardware, as different materials require distinct support systems:
- Gypsum and Fiber Cement Boards: Common in modern drop ceilings, these materials are lightweight but fragile. Recessed panels are held in place using spring-loaded clips that press against the top of the board. Ensure the board is thick enough to support the spring tension without cracking, and avoid placing fixtures directly beneath ceiling joists.
- Solid Concrete Slabs: Concrete ceilings cannot accommodate recessed fixtures without major structural modification. For these ceilings, surface-mounted panels are the standard choice. You must use a masonry drill to install expansion shields or concrete anchors to secure the mounting bracket firmly to the slab.
Safety and Professional Boundaries
Working with residential electrical systems carries inherent risks of severe electrical shock, short circuits, and electrical fires. Before beginning any installation, maintenance, or replacement of a light fixture, always turn off the power at the main circuit breaker and verify that the circuit is dead using a reliable voltage tester.
If your installation requires running new electrical wiring, cutting through structural ceiling joists, adding new wall switches, or if the manufacturer’s instructions conflict with your home’s existing wiring, do not attempt to complete the work yourself. Stop immediately and hire a licensed, qualified electrician to ensure the installation complies with the Philippine Electrical Code and local building regulations.
Building Your Shortlist: What to Prioritize When Shopping
When you are ready to purchase your Japanese-style LED panel lights, creating a structured comparison framework will help you filter through the vast selection available on e-commerce platforms and in local retail stores.
Control Features: Smart vs. Simple Switch Operation
Consider whether you need advanced control features or if simple, reliable operation is better suited to your lifestyle. Both options have distinct trade-offs:
- Smart and Dimmable Panels: These fixtures allow you to adjust brightness and color temperature via a smartphone app, remote control, or smart home assistant. This is highly versatile, allowing you to transition from bright neutral white for daytime tasks to warm, dim light for evening relaxation. However, they require a stable Wi-Fi connection, compatible dimming switches, and are generally more expensive.
- Tri-Color Toggle Panels: These lights change color temperature (e.g., from warm white to neutral white to daylight) simply by toggling your standard wall switch off and on within a few seconds. They offer excellent versatility without the complexity of smart apps or specialized dimming hardware, making them highly reliable and user-friendly.
- Single-Color Panels: The simplest option, these lights emit one fixed color temperature. They are highly reliable, cost-effective, and ideal for spaces where the lighting needs never change, such as hallways or utility rooms.
Evaluating Retailers and Warranties
When purchasing from online marketplaces or local distributors, look beyond the product photos. Carefully evaluate the seller’s credibility and after-sales support policies to protect your investment:
- Warranty Terms: Look for products that offer a minimum of a one-year warranty, though two to three years is preferred for premium LED fixtures. Ensure the warranty covers driver failure, as this is the most common point of failure in LED systems.
- Return Policies: Verify the platform's return policy regarding items damaged during transit. Fragile items like glass-diffused panels require robust packaging, so check customer reviews to see if previous buyers reported secure shipping practices.
- Certifications: Look for safety certification marks on the product packaging or driver label, such as the Philippine Standard (PS) mark or the Import Commodity Clearance (ICC) sticker, which verify that the product has passed local safety and quality standards.
Final Pre-Purchase Checklist
Before finalizing your purchase and proceeding to checkout, verify that your chosen panel light meets every item on this checklist:
- Voltage: Is the driver rated for 220V–240V at 60Hz?
- Dimensions: Do the outer dimensions and cutout sizes match your ceiling measurements?
- IP Rating: Is the rating appropriate for the room's moisture levels (e.g., IP44 for kitchens)?
- Light Quality: Is the CRI rated at Ra 80 or higher, and is the driver certified flicker-free?
- Aesthetic: Does the trim material and profile thickness align with your minimalist design goals?
Frequently Asked Questions (FAQ)
How do I clean acrylic diffusers without causing yellowing or scratches?
To maintain the clean, minimalist appearance of your panel lights, regular cleaning is necessary. Always turn off the power at the main circuit breaker and allow the fixture to cool completely before cleaning to avoid electrical hazards and thermal shock to the materials.
Begin by using a clean, dry, ultra-soft microfiber cloth to gently wipe away loose dust and cobwebs from the surface of the diffuser. Never use rough paper towels, polyester cloths, or abrasive scrubbing pads, as these can create microscopic scratches on the acrylic surface, which will permanently scatter the light unevenly and make the panel look dull.
For stubborn smudges, fingerprints, or insect spots, slightly dampen your microfiber cloth with water mixed with a single drop of mild, pH-neutral dish soap. Gently wipe the affected areas without applying heavy pressure. Avoid using harsh chemical cleaners, glass sprays, alcohol, acetone, or benzene, as these solvents chemically react with acrylic, causing it to haze, crack, or turn yellow over time. Dry the surface thoroughly with a second dry microfiber cloth before restoring power.
Can I install a recessed LED panel in a bathroom?
Yes, you can install a recessed LED panel in a bathroom, but you must select a fixture with the appropriate specifications to handle the high humidity and steam typical of tropical bathrooms.
First, identify the installation zone. If the panel light is to be installed directly inside a shower enclosure or directly above a bathtub (Zone 1), you must use a fixture with a minimum rating of IP65, which is completely sealed against water jets. For general bathroom ceilings outside the immediate shower area (Zone 2), an IP44 rating is typically sufficient to protect the internal electronics from steam and condensation.
Additionally, ensure that the ceiling void has adequate ventilation to prevent moisture from trapping around the back of the fixture. High humidity combined with trapped heat will rapidly degrade the LED driver. Always check the manufacturer’s product manual to confirm that the fixture is explicitly certified for damp locations, and ensure that all electrical connections are sealed inside a waterproof junction box by a qualified professional.

Community discussion
Share your experience or ask a question. Comments are reviewed before publication.