
Finding the right lighting for a low-ceiling condo bathroom in the Philippines requires balancing spatial limitations with the harsh realities of a tropical, high-humidity environment. Standard hanging fixtures or bulky semi-flush mounts can make a compact bathroom feel cramped and pose physical hazards in spaces where vertical clearance is limited. Opting for a low-profile, moisture-resistant flush mount ceiling light ensures that your bathroom remains bright, safe, and visually open. By focusing on key technical specifications, material durability, and proper installation practices, you can select a fixture that withstands daily steam while maximizing your limited vertical space.
Assessing Your Low-Ceiling Bathroom Lighting Needs
Condominium units in the Philippines often feature dropped ceilings in bathrooms to accommodate overhead plumbing lines, drainage traps, and ventilation ducts from the units above. This structural design frequently results in a finished ceiling height well below the standard 2.4 meters. In such compact vertical spaces, every centimeter of clearance is valuable. Installing a fixture that protrudes too far down not only reduces the visual volume of the room but also creates a physical hazard, increasing the risk of accidentally hitting the light while changing clothes, reaching for towels, or cleaning.
Beyond physical clearance, the environmental conditions of a condo bathroom demand careful consideration. The tropical climate of the Philippines naturally brings high ambient humidity, which is dramatically accelerated inside a small, enclosed bathroom during and after hot showers. Without adequate ventilation, steam rises and clings to the ceiling, creating a persistent layer of condensation. This moisture can quickly penetrate unsealed light fixtures, leading to the rapid corrosion of internal metal components, premature degradation of wiring insulation, and electrical short circuits. Selecting a fixture specifically designed to resist these conditions is essential for long-term safety and performance.
Products mentioned in this guide
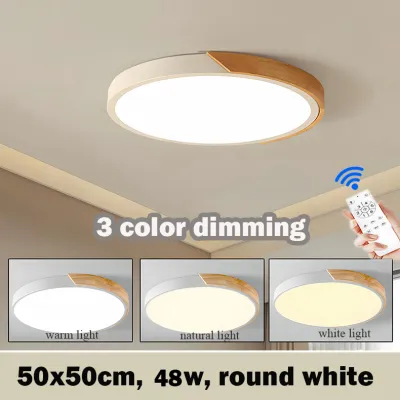
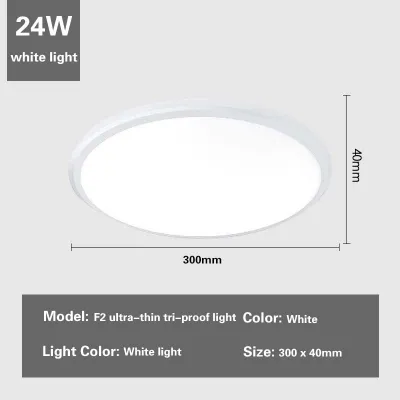
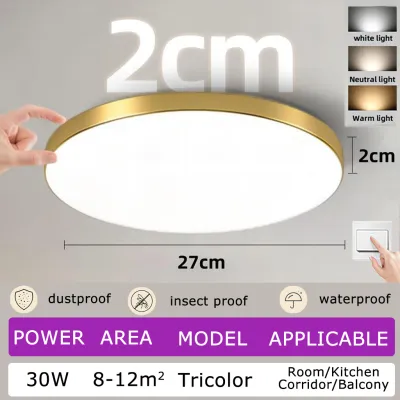
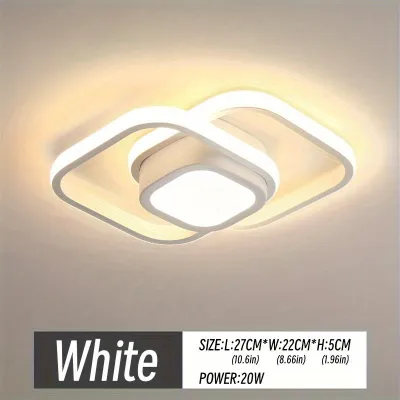
Prices are valid at publication and may change. Please refer to the product page for the latest price.
Achieving the right balance of illumination in a low-ceiling bathroom is also a unique design challenge. Because the light source is closer to the floor, the beam angle has less distance to spread naturally, which can result in harsh, localized pools of light and deep shadows. This is particularly problematic during grooming tasks, such as shaving or applying makeup, where even, shadow-free lighting is necessary. To address this, your primary flush mount light must deliver wide, diffused ambient illumination across the entire space, which can then be supplemented by targeted vanity lighting around the mirror if space permits.
Essential Specifications for Flush Mount Bathroom Lights
When comparing flush mount options, the Ingress Protection (IP) rating is the most critical technical specification to verify. The IP rating consists of two digits: the first indicates protection against solid particles, and the second measures resistance to water. For bathroom ceiling lights, the water resistance digit is paramount. If you plan to install the fixture directly above a shower enclosure or bathtub, it is exposed to direct splashes and heavy steam, requiring a wet-location rating of at least IP65. For fixtures installed on the general ceiling area outside the immediate shower zone, a damp-location rating of IP44 is typically sufficient to handle condensation and airborne moisture.

Physical dimensions must be carefully matched to your ceiling height and room layout. For low ceilings, prioritize ultra-thin profiles, ideally with a depth of 5 centimeters or less. These slim designs sit almost flush against the ceiling plane, minimizing visual weight and creating an illusion of a higher ceiling. The overall diameter of the fixture should also scale with the bathroom’s footprint; a diameter of 20 to 30 centimeters is generally appropriate for standard condo bathrooms, ensuring the light looks balanced and does not visually overwhelm the small space.
Light quality is determined by a combination of lumen output, color temperature, and the Color Rendering Index (CRI). Lumens measure the actual brightness of the light rather than the power consumed. For a small condo bathroom, a total output of 800 to 1,500 lumens is usually sufficient to serve as the primary light source. Color temperature, measured in Kelvin (K), is a matter of personal preference but directly impacts functionality. Cool white (4000K) or daylight (6500K) is highly practical for task-oriented grooming, while warm white (3000K) offers a softer, more relaxing atmosphere. To ensure skin tones and cosmetics appear accurate, look for a fixture with a high CRI of 90 or above.
Another key decision is choosing between integrated LED panels and fixtures with replaceable bulbs. Integrated LED flush mounts offer the slimmest possible profiles because they do not require bulky sockets or bulb housings. They are highly energy-efficient and designed to last for tens of thousands of hours, though the entire fixture must generally be replaced if the internal driver or LED board fails. Conversely, fixtures with replaceable bulbs, such as those utilizing standard E27 or GU10 bases, are typically thicker but allow you to easily swap out a dead bulb or adjust your color temperature over time without replacing the entire housing.
Safety and Installation Boundaries for Condo Bathrooms
Before purchasing any ceiling fixture, you must verify its electrical compatibility with local standards. In the Philippines, the standard residential electrical supply is 220V at 60Hz. Ensure that the product packaging explicitly states compatibility with this voltage to prevent immediate product failure or electrical hazards. Additionally, look for official safety certification marks, such as the Philippine Standard (PS) quality mark or the Import Commodity Clearance (ICC) sticker, which confirm that the fixture has undergone rigorous safety testing and complies with national standards.
Before mounting your new light, inspect the existing ceiling junction box to ensure it is structurally sound and compatible with the new fixture’s mounting hardware. In many condo developments, junction boxes are cast directly into concrete slabs or secured to lightweight metal furrings behind gypsum board ceilings. Verify that the box can easily support the weight of the new fixture, although modern plastic or slim aluminum LED flush mounts are generally lightweight. If the mounting holes on the new fixture’s bracket do not align with the existing junction box, you may need to use a compatible adapter plate or drill new mounting holes into the ceiling structure, taking care not to damage any hidden conduits.
While some basic fixture replacements can be performed as a DIY project, certain scenarios strictly require the services of a licensed electrician. If your installation involves running new fixed wiring, relocating the junction box to a different part of the ceiling, or installing a fixture within direct wet zones, professional expertise is necessary to ensure compliance with the Philippine Electrical Code. Always isolate the power at the main circuit breaker before attempting any electrical work, and carefully follow the manufacturer’s step-by-step installation instructions to maintain the integrity of the fixture’s moisture seals.
Furthermore, you must consult your condominium’s property management office regarding their specific renovation and maintenance guidelines. Most condo corporations require unit owners to submit a work permit application before undertaking any electrical alterations or structural modifications. You may be required to provide the credentials of your contractor, submit a simple wiring layout, and adhere to designated working hours to minimize noise and disruption to neighboring units. Failing to secure these approvals beforehand can result in fines or delays in your installation project.
Building Your Shortlist: Comparing Features and Prices
To make an informed purchasing decision, it is helpful to compile a shortlist of potential fixtures and compare their specifications side-by-side. You can source these options from local home improvement centers or reputable online marketplaces. Below is a comparison matrix outlining common generic flush mount categories suitable for low-ceiling condo bathrooms:
| Fixture Type | IP Rating | Profile Depth | Average Price Range |
|---|---|---|---|
| Ultra-Thin Integrated LED Panel | IP54 | 2 cm – 3 cm | ₱500 – ₱1,500 |
| Moisture-Resistant Dome (E27 Socket) | IP44 | 8 cm – 12 cm | ₱400 – ₱1,200 |
| Waterproof Recessed-Style Flush Mount | IP65 | 1.5 cm – 2.5 cm | ₱800 – ₱2,000 |
When evaluating these options, pay close attention to material durability. In a humid bathroom environment, prioritize fixtures constructed from high-grade polycarbonate, acrylic, or rust-resistant treated aluminum. Avoid cheap ferrous metals that lack protective coatings, as they will quickly rust, leading to unsightly stains on your ceiling and potential structural failure of the fixture housing. Additionally, choose shatterproof plastic or acrylic diffusers over heavy glass covers; they are safer to handle during installation and cleaning, especially when working at heights in a confined space.
Warranty terms and the local availability of replacement parts are also crucial factors when finalizing your choice. For integrated LED fixtures, look for products that offer at least a one-year to two-year local warranty. Because integrated drivers are the most common point of failure in LED systems, verify whether the manufacturer or local distributor sells replacement drivers separately, or if they offer a straightforward replacement policy. This prevents you from having to purchase a completely new fixture if a minor electrical component fails prematurely.
Finally, consider the practicality of smart features or dimming capabilities in your bathroom setup. Dimmable flush mounts allow you to adjust the light levels, creating a soft, low-light environment for late-night bathroom visits or a bright, clear space for morning routines. However, you must ensure that the dimmable fixture is fully compatible with your existing wall switch. Many LED fixtures require specific electronic low-voltage (ELV) dimmers to prevent flickering or buzzing. If your bathroom ventilation fan is wired to the same switch as your light, consult an electrician to ensure that adding a dimmer switch will not interfere with the fan’s motor operation.
Frequently Asked Questions (FAQ)
Can I install a standard flush mount light in a bathroom without an IP rating? (FAQ)
Installing a standard, non-IP-rated flush mount light in a bathroom is not recommended and can pose serious safety risks. Standard indoor fixtures lack the specialized rubber gaskets and sealed compartments required to keep moisture out. Over time, steam and condensation will penetrate the housing, leading to the corrosion of electrical contacts, rapid degradation of the wiring, and an increased risk of short circuits or electrical shocks. To ensure safety and longevity, you should strictly follow manufacturer guidelines and install only damp-rated (IP44) or wet-rated (IP65) fixtures in moisture-prone bathroom zones.
How do I calculate the right lumen output for a small condo bathroom? (FAQ)
To estimate the required brightness, you can use a basic calculation based on your bathroom’s floor area. As a general guideline, bathrooms require approximately 70 to 80 lux (lumens per square meter) for general ambient lighting, and up to 300 lux for task areas like the vanity. For a typical small condo bathroom measuring 4 square meters, you would multiply the area by the ambient requirement (4 sqm x 75 lux = 300 lumens). However, because low ceilings limit light dispersion, and many condo bathrooms lack natural windows or feature dark wall tiles, you should increase this target to 800 to 1,200 lumens to ensure the space feels bright and functional.
Are integrated LED flush mounts better than those with replaceable bulbs? (FAQ)
Both designs have distinct trade-offs, and the best choice depends on your priorities. Integrated LED flush mounts are superior for low ceilings because their lack of a bulb socket allows for an ultra-thin, modern profile that sits nearly flat against the ceiling. They also offer excellent energy efficiency and a long operational lifespan. However, if the internal driver fails, the entire fixture must usually be replaced. Replaceable bulb fixtures are thicker and more visually prominent, but they offer greater long-term convenience, allowing you to easily replace a single bulb or change the color temperature without touching the main electrical installation.

Community discussion
Share your experience or ask a question. Comments are reviewed before publication.