
Achieving a sophisticated, upscale look in a modern condominium often comes down to your choice of lighting. In the Philippines, where standard condo ceiling heights typically range from 2.4 to 2.7 meters, hanging a traditional, low-draping chandelier in your sala is rarely practical. A suspended fixture can easily become a physical hazard for taller guests or make a compact living space feel cramped and visually cluttered. Fortunately, you do not have to sacrifice the grandeur of a classic chandelier. Low-profile flush mount and semi-flush mount ceiling lights designed with crystal accents, layered glass, and elegant metallic finishes can deliver the same dazzling light refraction and high-end aesthetic while preserving precious vertical clearance.
By focusing on fixtures that hug the ceiling, you can introduce a brilliant focal point that draws the eye upward, making your living area feel larger and more inviting. Choosing the perfect chandelier for sala spaces requires balancing decorative elegance with the physical realities of condo living, such as concrete ceilings and tropical humidity. With the right design, proper sizing, and safe installation practices, you can transform your everyday living room into a luminous, resort-style sanctuary.
What Defines a "Chandelier Look" in Flush Mount Lighting
To replicate the luxury of a traditional chandelier within a flush mount footprint, you must look closely at the materials and how they interact with light. The hallmark of any chandelier is its ability to refract, bend, and scatter light across a room, creating a dynamic play of brightness and shadow. In high-quality flush mounts, this effect is achieved through the integration of precision-cut crystals, faceted glass, and polished metallic backplates. When light shines through these elements, it bounces off the reflective surfaces, casting intricate patterns across your ceiling and walls, which instantly elevates the ambiance of your sala.
Products mentioned in this guide
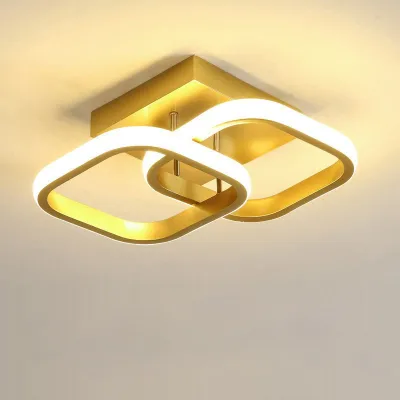
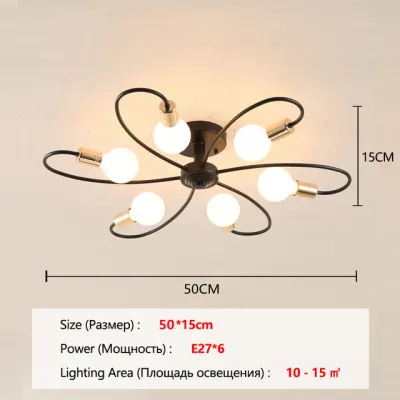
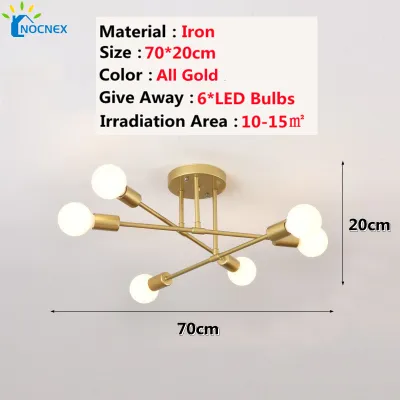
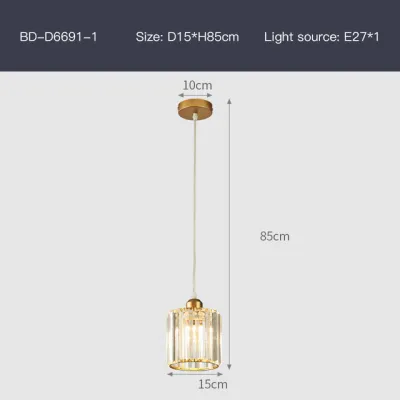
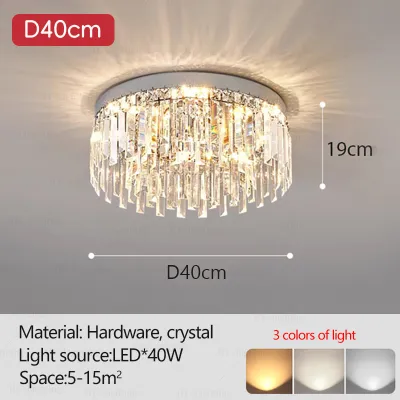
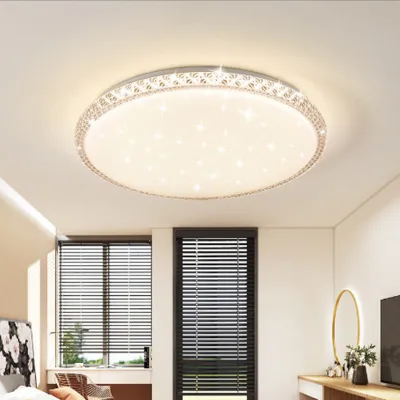
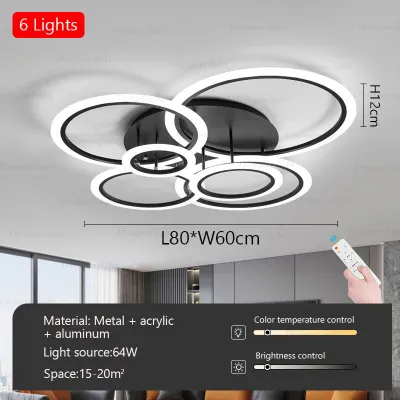
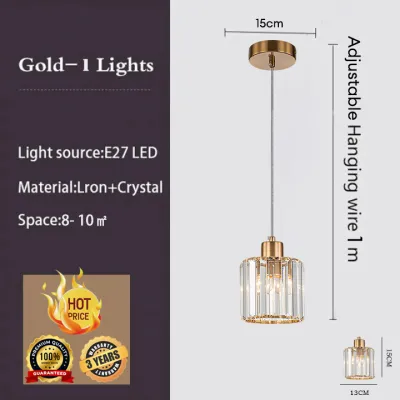
Prices are valid at publication and may change. Please refer to the product page for the latest price.
Understanding the distinction between true flush mounts and semi-flush mounts is essential for determining your room’s physical limits. A true flush mount sits entirely flat against the ceiling slab, leaving no gap between the fixture’s body and the ceiling surface. This style is ideal for exceptionally low ceilings, typically those at or below 2.4 meters, because it maximizes headroom. A semi-flush mount, on the other hand, features a small stem or collar that suspends the main body of the light a few inches below the ceiling. This slight gap allows light to cast upward as well as downward, creating a floating effect that visually lifts the ceiling, though it requires slightly more vertical clearance.
To maintain safe and comfortable movement in your living room, the bottom of your light fixture should hang no lower than 2.1 meters (7 feet) from the floor. If your condo has a standard 2.4-meter ceiling, your maximum allowable fixture height is 30 centimeters (12 inches), which naturally points toward a true flush mount. If you are fortunate enough to have a 2.7-meter ceiling, you can comfortably accommodate a semi-flush mount with a profile height of up to 60 centimeters (24 inches). Measuring your exact ceiling height before shopping prevents the disappointment of purchasing a fixture that disrupts the flow of your living space.
Visual weight and proportion also dictate how successful your lighting design will be. A fixture with a dense, solid silhouette can feel heavy and dominant, which might overwhelm a compact, open-plan condo sala. Conversely, a fixture that is too small will look lost and fail to deliver the desired decorative impact. To achieve a balanced look, select a design that offers a sense of grandeur through its width and material quality rather than its downward hang. A wider, shallower fixture provides the visual presence of a chandelier without encroaching on your living space.
Finally, remember that a decorative flush mount works best when integrated into a layered lighting scheme. While the main fixture serves as the ambient anchor of your sala, it should not be expected to do all the heavy lifting alone. In modern Philippine condos, combining your central flush mount with recessed downlights (pin lights) along the perimeter and a warm floor lamp next to your sofa creates a balanced, glare-free environment. This layered approach ensures you have functional light for reading, soft light for watching television, and brilliant light for entertaining guests.
Top Flush Mount Chandelier Styles for Low Ceilings
Crystal and Beaded Drum Flush Mounts
Crystal and beaded drum flush mounts are the quintessential choice for homeowners seeking classic, high-society glamour. These fixtures feature a circular metal frame—often finished in polished chrome, gold, or brass—wrapped in cascading strands of crystals, glass beads, or faceted acrylic drops. The drum shape keeps the silhouette compact and tidy, while the dense arrangement of crystals ensures that the light from the internal bulbs is scattered in every direction, creating a sparkling, multi-dimensional glow.

In a traditional, transitional, or glam-style sala, a crystal drum fixture serves as an undeniable visual anchor. The light refraction from precision-cut K9 crystals can make even a modest living room feel like a luxury hotel suite. Because the crystals diffuse the light so intensely, they help eliminate harsh, direct glare, replacing it with a soft, glittering illumination that flatters both the room’s decor and its occupants.
However, the tropical humidity and dust common in the Philippines mean that crystal fixtures require a commitment to regular maintenance. Dust and airborne moisture can form a dull film over the crystals, reducing their brilliance over time. If your condo is located near busy city roads or if you frequently keep your windows open to enjoy the breeze, you will need to perform gentle, periodic cleaning to preserve the fixture’s signature sparkle.
This style is best suited for salas with neutral color palettes, clean-lined furniture, and minimal wall clutter. Because the crystal drum is highly decorative and possesses significant visual weight, keeping the surrounding decor understated allows the fixture to stand out as a sophisticated focal point without making the room feel chaotic.
Multi-Tier Glass and Metal Flush Mounts
For those who appreciate classic elegance but prefer a more structured, transitional aesthetic, multi-tier glass and metal flush mounts offer an exceptional alternative. These fixtures utilize overlapping glass panels, frosted glass petals, or textured “ice” glass sheets arranged in concentric tiers around a central metal frame. The combination of structured metalwork with semi-opaque or textured glass delivers a refined, architectural look that feels both substantial and sophisticated.
Unlike crystal fixtures that scatter light in sharp, glittering patterns, multi-tier glass fixtures provide a highly diffused, even ambient glow. The frosted or textured glass acts as a natural shield, hiding the hot spots of the light bulbs inside and distributing light smoothly across the ceiling and living area. This makes them incredibly comfortable for daily use, especially in cozy salas where family members spend hours relaxing, reading, or watching television.
From a practical standpoint, glass and metal fixtures are significantly easier to maintain than their crystal counterparts. Flat or gently curved glass panels do not trap dust as easily as hundreds of tiny crystal beads, and they can be quickly wiped clean with a damp microfiber cloth. This lower maintenance profile makes them highly attractive for busy professionals who want a high-end look without spending hours on upkeep.
This style integrates seamlessly into modern classic, contemporary, or tropical-modern condo interiors. The structured lines of the metallic frames—particularly in antique brass, brushed nickel, or matte black—complement modern furniture silhouettes, while the layered glass tiers add the depth and luxury associated with traditional hanging chandeliers.
Modern Geometric and Cage Flush Mounts
If your condo features an industrial, mid-century modern, or minimalist design, traditional crystal or tiered glass might feel out of place. Modern geometric and cage flush mounts offer an airy, architectural interpretation of the chandelier look. These fixtures rely on open metal frameworks, intersecting lines, or low-profile Sputnik designs that sit close to the ceiling, utilizing negative space to create visual interest rather than heavy, solid materials.
Instead of hiding the light source, cage and geometric fixtures embrace the bulbs as an active design element. They are frequently paired with decorative, vintage-style LED filament bulbs (such as Edison bulbs) that emit a warm, amber glow. The interplay between the structural metal lines and the exposed filaments creates a captivating shadow-and-light effect on the ceiling, serving as a modern piece of art even when the light is turned off.
The primary advantage of an open-cage design in a low-ceiling condo is its weightless, airy feel. Because you can see right through the fixture, it does not block your line of sight or make the ceiling feel like it is pressing down on the room. This visual transparency is incredibly beneficial in smaller studio or one-bedroom condo units, where preserving an open, spacious feel is a top priority.
These fixtures are best suited for salas that feature raw textures like concrete, brick, warm wood, or matte metal finishes. They provide a striking, contemporary edge that feels highly curated and urban, proving that you do not need traditional crystals to achieve a dramatic, head-turning lighting display.
How to Size and Light Your Condo Sala Correctly
Selecting the right style is only half the battle; ensuring the fixture is correctly proportioned and provides the right amount of light is crucial for a comfortable living environment. To find the ideal fixture diameter for your sala, interior designers use a simple, reliable formula based on the room’s dimensions. While Philippine real estate is typically measured in square meters, converting your room’s dimensions to feet makes this classic calculation straightforward:
- Step 1: Measure the length and width of your sala in feet. For example, a typical condo living area might measure 10 feet by 12 feet (approximately 3 meters by 3.6 meters).
- Step 2: Add the two numbers together. In this case, 10 + 12 = 22.
- Step 3: Convert that sum directly into inches. The resulting number is the ideal diameter for your light fixture. Therefore, a 22-inch (approx. 56 cm) wide flush mount would be perfectly scaled for this space.
If your condo features an open-plan layout where the living room, dining area, and kitchen flow into one another, do not use the dimensions of the entire open space. Doing so will result in a massive fixture that overwhelms your seating area. Instead, calculate the dimensions of the specific “sala zone” as defined by your furniture arrangement, such as the area covered by your sofa, coffee table, and entertainment console.
Once you have determined the physical size, you must calculate the required brightness, measured in lumens. A living room generally requires 10 to 20 lumens per square foot of space. For a 120-square-foot sala (10×12 feet), you will need a total of 1,200 to 2,400 lumens of light. Ensure your chosen flush mount can accommodate enough light bulbs to reach this target. For instance, a fixture with three E27 bulb sockets fitted with 8-watt LED bulbs (producing roughly 800 lumens each) will easily provide 2,400 lumens of bright, functional ambient light.
Color temperature plays a massive role in setting the mood and spatial feel of your home. For a cozy, inviting, and relaxing chandelier effect, look for bulbs in the Warm White (2700K to 3000K) range. This temperature mimics the soft, golden glow of traditional incandescent bulbs, perfect for unwinding after a long day in the city. If you prefer a cleaner, more energetic, and modern atmosphere, choose Neutral White (4000K). Avoid Cool White (6000K to 6500K) bulbs in your main living area, as this high-temperature blue-white light can make your cozy sala feel sterile, flat, and clinical.
To truly capture the luxury of a high-end chandelier, ensure your flush mount and its bulbs are fully compatible with dimmer switches. Dimming capability allows you to transition your sala from a bright, functional space for reading or cleaning to a soft, low-lit environment for movie nights or intimate gatherings. When purchasing your fixture, verify whether it uses integrated LEDs or replaceable bulbs. If it features integrated LEDs, check the manufacturer’s specifications to ensure the built-in driver supports dimming, and pair it with a compatible LED-rated dimmer switch to prevent annoying flickering or buzzing.
Installation Realities and Safety Checks for Condo Ceilings
Installing a decorative light fixture in a condominium presents unique structural challenges that differ significantly from standard house construction. In the Philippines, most high-rise condo developments utilize solid, cast-in-place concrete slabs for ceilings. Drilling into solid concrete requires specialized tools, such as a hammer drill and masonry bits, along with heavy-duty metal expansion anchors (sleeve anchors) to support the weight of the fixture. You cannot rely on standard plastic wall plugs, which can warp and fail over time under a constant downward load.
Alternatively, your condo might feature a suspended plasterboard or gypsum drop ceiling, often installed to conceal air conditioning ducts, electrical conduits, or plumbing lines. Gypsum board is fragile and cannot support the weight of a heavy decorative light fixture. If you attempt to mount a heavy crystal or glass flush mount directly to a drop ceiling, the board will sag, crack, or collapse entirely. In these setups, the installer must run threaded steel rods or structural brackets through the drop ceiling, anchoring them securely to the main concrete slab above, ensuring the weight of the light is borne entirely by the building’s concrete structure.
Before purchasing any fixture, you must also verify the weight capacity of your existing electrical junction box. Standard plastic utility boxes installed during basic construction are typically rated to support fixtures weighing up to 15 pounds (approximately 6.8 kilograms). If your chosen crystal or multi-tier glass flush mount exceeds this weight, the existing box must be reinforced or replaced with a heavy-duty, fan-rated steel junction box that is anchored directly into the concrete slab. Ignoring this step poses a severe safety risk, as the fixture could pull the box out of the ceiling over time.
Electrical safety must always be your top priority during any lighting upgrade. Before inspecting your existing wiring or attempting to install a new fixture, you must isolate the power by turning off the main circuit breaker at your condo’s distribution panel. Never rely solely on the wall switch to cut the power. Use a non-contact voltage tester to verify that the wires in the ceiling are completely dead before touching them. Additionally, ensure that your chosen fixture is rated for the standard Philippine electrical supply of 220V to 240V at 60Hz. Look for official safety certifications, such as the Philippine Standard (PS) mark or the Import Commodity Clearance (ICC) sticker, to guarantee the fixture meets local electrical safety standards.
Because of the complexities of concrete drilling, structural weight limits, and high-voltage wiring, always hire a licensed electrician or a certified professional installer to handle the installation. A professional will have the correct tools to drill into concrete without damaging embedded electrical conduits, can accurately assess the load-bearing capacity of your ceiling, and will ensure all electrical connections are safe, secure, and compliant with the Philippine Electrical Code. Attempting to bypass these structural and electrical limits for aesthetic preferences can result in costly damage to your property or severe safety hazards.
Frequently Asked Questions (FAQ)
Can I install a heavy crystal flush mount on a standard condo concrete ceiling?
Yes, you can safely install a heavy crystal flush mount on a solid concrete condo ceiling, but you must not rely on the standard plastic junction box to support the weight. Standard utility boxes are only designed for lightweight fixtures. To mount a heavy fixture safely, your installer must bypass the plastic box and drill directly into the concrete slab using a hammer drill.
They must use heavy-duty steel expansion bolts, also known as sleeve anchors or drop-in anchors, to secure the fixture’s mounting bracket directly to the structural concrete. This ensures that the building’s concrete slab bears the entire weight of the fixture. Because of the risk of drilling into hidden electrical conduits or water pipes embedded in the concrete, it is highly recommended to hire a licensed electrician who has experience working with high-rise condo structures.
How do I clean a crystal flush mount chandelier without taking it down?
To clean your crystal flush mount safely and effectively without dismantling it, start by turning off the wall switch and switching off the corresponding circuit breaker at your main panel. Allow the light bulbs to cool down completely to prevent thermal shock or burns. Place a thick, soft towel or a protective drop cloth on the floor or sofa directly beneath the fixture to catch any dripping cleaning solution or accidental falling crystals.
Prepare a mild cleaning mixture of three parts distilled water and one part isopropyl alcohol in a spray bottle, or use a specialized, residue-free crystal cleaning spray. Instead of spraying the liquid directly onto the fixture—which can seep into the electrical sockets and cause short circuits, rust, or wiring damage—spray a small amount onto a clean, lint-free microfiber cloth or a pair of white cotton gloves. Gently wipe each crystal strand from top to bottom. Once finished, allow the fixture to dry completely for at least two to three hours before restoring power to the circuit.

Community discussion
Share your experience or ask a question. Comments are reviewed before publication.