
Finding the right size for a recessed panel ceiling light requires balancing the physical dimensions of your ceiling structure with the optical requirements of your living space. To achieve comfortable, even illumination without creating harsh glare or dark corners, you must calculate your room’s total area, evaluate the ceiling height, and verify the physical clearance behind your ceiling boards. Whether you are renovating a compact bedroom or installing modern fixtures in a spacious open-plan living area, selecting the correct panel size and light output ensures your home remains functional and visually appealing.
Calculate Your Room's Lighting Requirements
To determine how many recessed panel lights you need and what size they should be, start by measuring the physical dimensions of your room. Use a tape measure to find the length and width of the space in meters. Multiplying these two numbers gives you the total floor area in square meters, which serves as the foundation for all subsequent lighting calculations. For example, a room that is 4 meters long and 3 meters wide has an area of 12 square meters.
Next, identify the primary purpose of the room, as different activities require different levels of light intensity. Lighting designers measure this intensity in lux, which represents lumens per square meter. Task-oriented spaces, such as kitchens, home offices, and study areas, demand higher light levels—often ranging from 300 to 500 lux—to ensure safety and reduce eye strain during detailed work. Conversely, ambient areas like bedrooms, living rooms, and hallways require a softer touch, typically needing only 100 to 200 lux to create a relaxing atmosphere.
Products mentioned in this guide
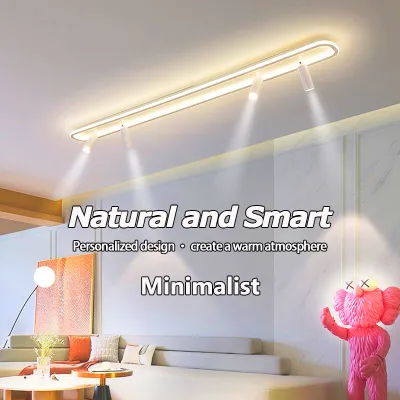
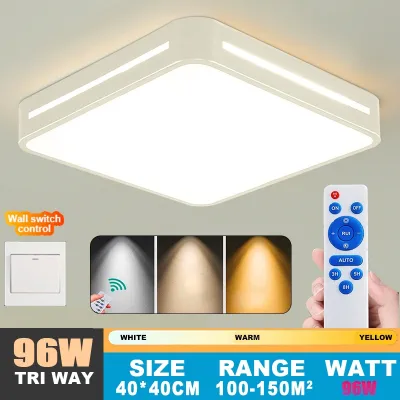
Prices are valid at publication and may change. Please refer to the product page for the latest price.
Ceiling height plays a critical role in how light behaves as it travels from the fixture to the floor. Standard residential ceilings in the Philippines are typically around 2.4 to 2.7 meters high. If your ceiling exceeds 3 meters, the light must travel a greater distance, which naturally disperses the beam and reduces the perceived brightness at floor level. To compensate for high ceilings, you will need fixtures with higher lumen outputs or a denser layout of smaller panels to maintain the desired illumination levels throughout the room.
Once you have your room’s square footage and the target lux level, you can calculate the total lumens required by multiplying the area by the target lux. For a 12-square-meter bedroom requiring 150 lux, you would need a total of 1,800 lumens. You can then divide this total among multiple recessed panel lights. For instance, installing four smaller panels that produce 450 lumens each will distribute the light much more evenly than relying on a single, high-output fixture in the center of the room.
Match Physical Dimensions to Ceiling Space
When shopping for a recessed panel ceiling light, you must distinguish between the visible face size of the fixture and its required cutout dimensions. The visible face includes the outer trim that sits flush against the ceiling, while the cutout dimension is the actual hole you must cut into the ceiling board. Always refer to the manufacturer’s specification sheet for the exact cutout diameter or length and width before making any incisions in your ceiling.

Before finalizing your purchase, inspect the structural layout above your ceiling board. Most modern residential ceilings in the Philippines utilize gypsum board or fiber cement board mounted on a framework of metal double furrings or wooden joists. If you select a large panel light, such as a 600mm by 600mm square fixture, you must ensure that its installation path does not conflict with these structural supports. Cutting through a load-bearing wooden joist or a critical metal channel can compromise the structural integrity of your ceiling.
Vertical clearance in the plenum space—the gap between the ceiling board and the concrete slab or roof structure—is another vital factor. Recessed panel lights, particularly ultra-thin LED models, require very little depth, often needing only 2 to 3 centimeters of vertical clearance. However, you must also account for the external LED driver, which is the small rectangular box that regulates power to the light. This driver must sit safely in the ceiling space near the fixture, requiring adequate room and ventilation to prevent overheating.
In tropical climates characterized by high ambient temperatures and humidity, heat dissipation is crucial for the longevity of electronic components. Even though LED panels generate significantly less heat than older incandescent bulbs, their drivers and internal circuitry are sensitive to thermal buildup. Ensure there is at least a few centimeters of free space around the fixture and its driver, and avoid covering them directly with loose insulation unless the fixture is explicitly rated for insulation contact.
Determine Wattage, Lumens, and Control Compatibility
Modern LED technology has decoupled power consumption from light output, meaning you should never rely solely on wattage to judge how bright a ceiling light will be. Instead, focus on lumens, which measure the actual amount of visible light emitted by the fixture. To evaluate efficiency, check the manufacturer’s efficacy rating, expressed as lumens per watt (lm/W). A highly efficient panel might produce 100 lumens per watt, meaning a 12-watt fixture delivers 1,200 lumens, whereas a less efficient model might require 18 watts to achieve the same brightness.
Once you know the lumen output of your chosen panel size, you can plan the layout to ensure even light distribution. For general ambient lighting, space your recessed panels evenly across the ceiling. A good rule of thumb is to space the fixtures at a distance equal to half the ceiling height, or to keep them roughly 1 to 1.5 meters apart. This spacing prevents the formation of “hot spots” of intense light directly under the fixtures and dark shadows in the spaces between them.
If you plan to install dimmable recessed panels to adjust the room’s mood, you must verify compatibility between the LED driver and your wall dimmer switch. Standard rotary dimmers designed for older incandescent bulbs often cause LED lights to flicker, buzz, or fail prematurely. Look for panels labeled as dimmable and pair them with compatible trailing-edge or electronic low-voltage dimmers. Whether you are spending ₱300 or ₱1,500 per fixture, verifying these specifications beforehand saves you from the frustration of unstable lighting performance.
Finally, calculate the total electrical load of your new lighting layout to ensure it remains within safe limits. While individual LED panels consume very little power—typically between 6 and 24 watts—combining multiple fixtures on a single circuit adds up. Ensure that the total wattage of all connected lights, fans, and appliances does not exceed 80 percent of the rated capacity of your room’s breaker circuit, which is a standard safety practice in residential electrical design.
Installation Environment and Safety Boundaries
Working with electrical fixtures requires strict adherence to safety protocols to prevent shocks, short circuits, and fire hazards. Before inspecting existing wiring, preparing a cutout, or mounting a new ceiling light, always turn off the main power supply at your home’s central breaker panel. Use a reliable non-contact voltage tester to verify that the wires in the ceiling are completely dead before touching them. Never rely solely on a wall switch to isolate the electrical current.
The specific environment of the room dictates the physical ratings required for your recessed panels. In areas exposed to high moisture, such as bathrooms, laundry rooms, or covered outdoor balconies and dirty kitchens, standard indoor panels can quickly fail due to corrosion or moisture ingress. For these damp or wet locations, you must select fixtures with an appropriate Ingress Protection (IP) rating, such as IP44 or higher, which indicates resistance to water splashes and high humidity.
For installations that involve cutting new holes in your ceiling, running new electrical wires through the joists, or modifying your home’s distribution board, the complexity increases significantly. Working at heights on ladders and handling live electrical connections carry inherent risks. If you are unfamiliar with local electrical codes, or if your home’s wiring does not include a dedicated grounding wire, stop immediately and consult a licensed electrician to complete the installation safely.
Common Sizing and Placement Mistakes
One of the most frequent errors homeowners make is purchasing recessed panel lights based entirely on wattage, assuming a higher watt rating automatically guarantees a brighter room. Because LED efficiency varies widely across different brands and models, two different 12-watt panels can produce vastly different light levels. Always compare the rated lumen output on the product packaging rather than the wattage to ensure you get the brightness your space requires.
Another common pitfall is failing to measure the vertical clearance behind the ceiling board before buying the fixtures. Homeowners often purchase deep recessed housings only to discover during installation that a metal furring, a PVC drainpipe, or an air conditioning duct blocks the space directly behind the desired cutout location. Opting for ultra-thin, spring-loaded LED panel lights can help bypass this issue, as they require minimal depth and can often be positioned directly beneath shallow ceiling structures.
Lastly, poor placement of recessed panels can ruin the comfort of a well-designed room. Placing fixtures too close to walls can project harsh, semi-circular pools of light down the paintwork, highlighting minor wall imperfections and creating distracting glare. Similarly, positioning a high-output panel directly over a sofa, bed, or computer screen can cause uncomfortable direct glare for anyone sitting or lying down. Aim to position your panels slightly away from direct seating areas and distribute them evenly to create a balanced, diffuse glow.
Frequently Asked Questions (FAQ)
Can I replace an existing fluorescent troffer with an LED panel of the same physical size?
Yes, you can replace older fluorescent troffers with modern LED panels, but you must verify the mounting system and electrical wiring. Standard drop-ceiling grids often use 2×2 feet or 2×4 feet fixtures, which match standard metric LED panel sizes like 600mm by 600mm or 300mm by 1200mm. Before installation, turn off the power at the breaker and determine if the new LED panel requires a direct-wire connection that bypasses the old fluorescent ballast, as keeping an incompatible ballast in the circuit can damage the new LED fixture.
How does ceiling height affect the beam angle I should choose?
Ceiling height directly influences how light spreads as it travels downward. For standard ceilings of 2.4 to 2.7 meters, a wide beam angle of 110 to 120 degrees is ideal because it disperses light broadly, creating an even, shadow-free ambient glow across the room. If your ceiling is higher than 3 meters, a wide beam angle may cause the light to dissipate too much before reaching the floor, resulting in a dim environment. In high-ceiling spaces, choosing panels with a narrower beam angle helps project a more concentrated column of light downward to maintain functional brightness at ground level.

Community discussion
Share your experience or ask a question. Comments are reviewed before publication.