
Installing a recessed corner wall light is an excellent way to add safety, depth, and modern sophistication to hallways, staircases, and outdoor pathways. Unlike standard surface-mounted fixtures, a recessed corner wall light sits flush within the wall, casting a soft, glare-free downward glow that highlights walkways without obstructing foot traffic. Achieving this seamless integration requires careful planning and preparation before you make a purchase or cut into your walls. Proper preparation ensures that your chosen fixture is physically compatible with your wall structure, electrically safe for your home’s power supply, and compliant with local building standards.
To ensure a successful installation, you must coordinate several structural, electrical, and spatial factors. You need to determine whether your wall is hollow or solid masonry, verify that your electrical system matches the fixture’s power requirements, and gather the correct tools for your specific wall material. Addressing these details beforehand prevents costly structural mistakes, avoids electrical hazards, and guarantees a clean, professional finish that enhances your home’s architectural design.
Assess Your Wall Structure and Corner Dimensions
The physical composition of your wall dictates the entire installation process, including the type of housing container you need and the tools required to create the cutout. In many residential layouts, walls are constructed from plasterboard, drywall, or fiber cement boards over wood or metal studs. These hollow structures are relatively easy to cut and typically allow you to secure the light fixture using spring clips or simple mounting brackets.
Products mentioned in this guide
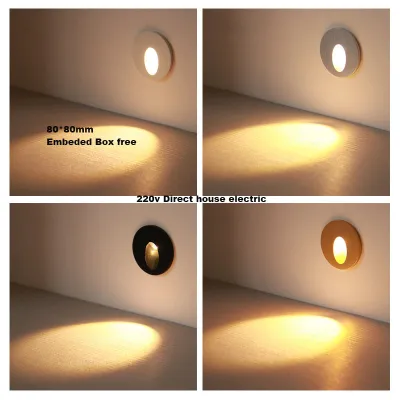
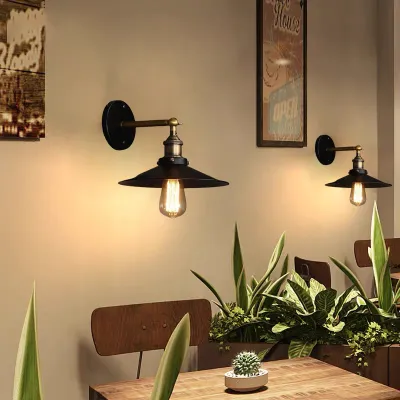
Prices are valid at publication and may change. Please refer to the product page for the latest price.
Conversely, solid masonry and concrete walls—which are exceptionally common in tropical climates like the Philippines for their durability and thermal mass—require a more intensive preparation method. If you are retrofitting a corner wall light into a solid concrete or concrete hollow block (CHB) wall, you cannot rely on simple spring clips. Instead, you must install a specialized embedding box, often called a back box or outer casing, directly into the wall. This housing must be plastered into place before the electrical fixture can be mounted, requiring deep chiseling and structural planning.
Before purchasing any fixtures, you must also verify the physical geometry of your chosen corner. While most wall corners are designed to be exactly 90 degrees, structural settling, plaster buildup, or minor construction imperfections can cause slight deviations. Use a corner square to check the angle. A corner that is even slightly out of alignment can prevent a rigid, recessed fixture from sitting flush, resulting in unsightly gaps or uneven light distribution.
Finally, you must cross-reference the manufacturer’s specified cutout dimensions with your wall’s internal clearance. Measure the depth of the wall cavity or the thickness of the concrete wall to ensure it can accommodate the depth of the light’s housing. You must also check for hidden structural obstructions. Use a high-quality stud finder to locate wooden or metal studs, and consult your home’s architectural blueprints to ensure you will not cut into plumbing pipes, structural rebar, or existing electrical conduits running through the corner.
Verify Electrical Wiring and Power Supply
A recessed corner wall light requires a dedicated and reliable power connection to operate safely. Before finalizing your purchase, locate the nearest power source, such as an existing junction box, a nearby wall outlet, or a light switch loop. If there is no pre-existing wiring in the immediate vicinity, you will need to plan a route to run new electrical cables behind the wall, which requires open space in hollow walls or chiseled channels in solid concrete.

Electrical compatibility is critical for safety and product longevity. In the Philippines, the standard household utility voltage is 220V AC at a frequency of 60Hz. You must verify that the recessed corner wall light you select is rated specifically for this voltage and frequency. Using a fixture designed solely for 110V or 50Hz systems can cause the LED driver to overheat, flicker, or fail prematurely. Always look for recognized safety certifications, such as the Philippine Standard (PS) mark or the Import Commodity Clearance (ICC) sticker, to ensure the product has been tested for local electrical conditions.
While modern LED corner lights draw minimal wattage, you must still verify that your existing lighting circuit has sufficient capacity to handle the additional load. Check the wire gauge of your current lighting loop; typically, a standard lighting circuit uses a 2.0 mm² (14 AWG) wire protected by a 15-ampere circuit breaker. Adding a few low-wattage LED fixtures is rarely an issue, but ensuring the circuit is not already overloaded prevents nuisance breaker trips and maintains system stability.
Working with electrical systems carries inherent risks of shock, fire, and severe injury. If your installation requires running new electrical cables, installing a new wall switch, tapping into your home’s main distribution panel, or modifying existing circuits, do not attempt to do this yourself. All fixed wiring and electrical modifications must be performed by a licensed Registered Master Electrician or a qualified professional to ensure compliance with the Philippine Electrical Code and local municipal safety regulations.
Gather Essential Tools and Installation Materials
Having the correct tools on hand before you begin prevents mid-project delays and ensures clean, precise cuts that preserve the aesthetic of your walls. The specific materials you need will depend heavily on whether you are working with a hollow drywall system or a solid concrete structure.
For measuring, marking, and aligning your fixture, you should gather the following items:
- Tape measure and pencil: For marking the exact height and horizontal placement of the light.
- Spirit level: To ensure the cutout template is perfectly level and aligned with the floor.
- Corner square: To verify the precise angle of the corner wall joint.
- Manufacturer's cutout template: Usually included in the product packaging to guide your cuts.
For cutting the wall opening, select the tools designed for your wall material:
- Drywall saw or utility knife: Ideal for clean cuts in hollow plasterboard or fiber cement walls.
- Angle grinder with a diamond blade: Essential for scoring clean lines in concrete or brick walls.
- Masonry drill bits and a rotary hammer drill: Necessary for drilling pilot holes and breaking away concrete within the marked template.
- Hand chisel and hammer: Used to carefully chip away remaining concrete and create a neat cavity for the embedding box.
For electrical safety and connection tasks, you will need:
- Non-contact voltage tester: To verify that the power is completely off before touching any wires.
- Insulated wire strippers and cutters: For preparing the electrical leads.
- Wire connectors or terminal blocks: Rated for high-humidity environments to prevent moisture-induced short circuits.
- Electrical conduit (PVC orange utility pipes): To protect the wiring inside solid concrete walls.
Determine DIY Limits and When to Hire a Professional
Understanding the boundaries of your own technical skills is vital for a safe and successful installation. While some aspects of preparing for a corner wall light are highly suited for a hands-on DIY approach, others carry high risks and must be handled by certified professionals.
If you are comfortable with basic home improvement tasks, you can safely handle several preparation steps. Marking the wall using the manufacturer’s template, verifying the corner angle, and physically cutting the opening in drywall are manageable DIY tasks, provided you work slowly and wear appropriate safety gear. You can also physically mount the outer housing or embedding box into the cavity, as long as you do not touch or connect any active electrical components.
However, certain tasks are strictly professional territory. Running new electrical cables through wall cavities, routing conduits inside chiseled concrete channels, connecting the fixture to the mains power supply, and installing new wall switches must be left to a licensed electrician. Improperly routed wires inside concrete can easily degrade over time due to moisture, leading to dangerous ground faults or electrical fires.
Before attempting any part of the installation yourself, carefully read the manufacturer’s warranty terms. Many high-quality lighting brands explicitly state that the product warranty is voided if the fixture is not installed by a licensed professional. Additionally, improper structural modifications—such as cutting through load-bearing studs or structural concrete columns—can compromise your home’s integrity and violate local building codes.
Perform Pre-Installation Safety and Product Checks
Once your tools are gathered and your wall cavity is prepared, you must conduct a final series of safety and product checks immediately before beginning the physical installation. Taking these precautionary steps prevents accidents and ensures you do not waste time installing a damaged or incompatible product.
First, isolate the power supply. Go to your home’s main electrical panel and switch off the circuit breaker that controls the area where you will be working. Do not rely solely on the wall switch, as it may only cut the hot wire, leaving neutral or ground wires active. After switching off the breaker, use a non-contact voltage tester directly on the wires at the installation site to verify that there is absolutely no electrical current present.
Next, unbox your recessed corner wall light and inspect all components thoroughly. Check the physical housing, lens, and wiring leads for any signs of shipping damage, cracks, or loose connections. Compare the physical dimensions of the light fixture directly against the paper cutout template provided in the box; occasionally, printing scaling errors can cause templates to be slightly larger or smaller than the actual product. Finally, lay out all the included hardware—such as mounting clips, rawlplugs (tox screws), brackets, and the instruction manual—to confirm that no essential parts are missing.
Frequently Asked Questions (FAQ)
Can I install a recessed corner light on a solid concrete wall?
Yes, you can install a recessed corner wall light on a solid concrete wall, but the process is significantly more demanding than a drywall installation. It requires using an angle grinder and a rotary hammer drill to chisel out a precise cavity in the concrete to house the fixture’s embedding box. Because concrete dust is hazardous, you must wear a dust mask and safety goggles. To protect the electrical wiring from moisture and abrasion inside the concrete, the cables must be run through protective PVC conduits. Due to the structural risks of cutting into concrete, hiring a professional is highly recommended.
Do recessed LED corner lights require a separate driver or transformer?
Whether your recessed corner wall light requires a separate driver depends entirely on the specific model you purchase. Many modern LED corner lights feature integrated drivers, allowing them to connect directly to your home’s 220V mains supply. However, low-voltage models (typically 12V or 24V) require an external driver or transformer to step down the voltage. If your light requires an external driver, you must plan for adequate, accessible space to house it—such as inside a nearby ceiling cavity, an adjacent closet, or a dedicated wall access panel—so it remains ventilated and serviceable in the future.

Community discussion
Share your experience or ask a question. Comments are reviewed before publication.